
Quick Start Guide

ECI-D64Z2 Network Dome Camera Quick Start Guide
QSG VE ECI-D64Z2 041118NA 15
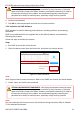
4. Click Activate to start activation.
You can check whether the activation is complete in the popup window. If activation failed,
make sure that the password meets the requirements, and try again.
Modify the IP Address
3.3
Purpose:
To view and configure the camera via LAN (Local Area Network), you need to connect the
network camera in the same subnet as your PC.
Use the SADP software or client software to search and change the IP address of the device.
IP Address modification via SADP software will be used as an example.
In order to modify the IP address via client software, refer to the user manual of the client
software.
Steps:
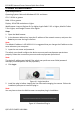
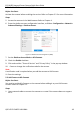
1. Run SADP.
2. Select an active device.
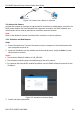
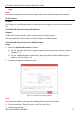
3. Change the device IP address to the same subnet as your computer by either modifying
the IP address manually, or by checking the Enable DHCP checkbox.
Modify the IP Address
Figure 3-5
Note:
Hik-Connect can be enabled during activation. Refer to Chapter 5.1 for detailed information.
4. Input the admin password and click Modify to complete IP address modification.
SADP supports batch IP address modification. Refer to the SADP user manual for details.