
User Manual
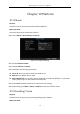

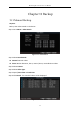
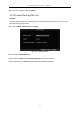
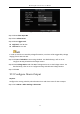
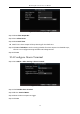
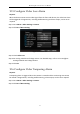
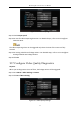
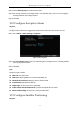
Table Of Contents
- Chapter 1 Panel Introduction
- Chapter 2 Installation and Connections
- Chapter 3 Start Up Device
- Chapter 4 Network
- Chapter 5 IP Camera
- Chapter 6 Camera Management
- Chapter 7 Live View
- Chapter 8 Storage
- Chapter 9 Playback
- Chapter 10 Platform
- Chapter 11 Backup
- Chapter 12 Events and Alarms
- 12.1 Configure Motion Detection Alarm
- 12.2 Configure Alarm Input
- 12.3 Configure Alarm Output
- 12.4 Configure Alarm Terminal
- 12.5 Configure Video Loss Alarm
- 12.6 Configure Video Tampering Alarm
- 12.7 Configure Video Quality Diagnostics
- 12.8 Configure Exception Alarm
- 12.9 Configure Satellite Positioning
- 12.10 Configure G-Sensor Alarm
- 12.11 Configure Arming Schedule and Linkage Actions
- 12.12 Configure Detection Area
- Chapter 13 User Account Management
- Chapter 14 General System Configuration
- Chapter 15 Maintenance
- Chapter 16 Shut Down Device
- Chapter 17 Appendix

Mobile Digital Video Recorder User Manual
58
Figure 12-6 Video-Tampering
Step 3 Check Tamper-proof.
Step 4 Set area for video tampering detection. For detailed steps, refer to 12.12 Configure
Detection Area.
The video tampering alarm can be triggered only when the view of the camera is fully
covered.
Step 5 Set arming schedule and linkage actions. For detailed steps, refer to 12.11 Configure
Arming Schedule and Linkage Actions.
Step 6 Click OK.
12.7 Configure Video Quality Diagnostics
Purpose:
When your analog camera is out of focus, the linkage actions will be triggered.
Step 1 Go to Menu > Other Settings > Camera.
Step 2 Click Set of More Setting.
Figure 12-7 Video Quality Settings