
User Manual
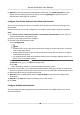
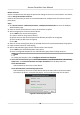
Table Of Contents
- Legal Information
- Available Model
- Regulatory Information
- Safety Instruction
- Chapter 1 Preventive and Cautionary Tips
- Chapter 2 Product Description
- Chapter 3 Main Board Description
- Chapter 4 Terminal Description
- Chapter 5 Terminal Wiring
- Chapter 6 Settings
- Chapter 7 Activation
- Chapter 8 Client Software Configuration
- 8.1 Operation on Client Software
- 8.1.1 Add Device
- 8.1.2 Select Application Scenario
- 8.1.3 Configure Other Parameters
- 8.1.4 Manage Organization
- 8.1.5 Manage Person Information
- 8.1.6 Configure Schedule and Template
- 8.1.7 Manage Permission
- 8.1.8 Configure Advanced Functions
- Configure Access Control Parameters
- Configure Individual Authentication
- Configure Card Reader Authentication Mode and Schedule
- Configure Multiple Authentication
- Configure Opening Door with First Card
- Configure Anti-Passback
- Configure Cross-Controller Anti-passing Back
- Configure Multi-door Interlocking
- Configure Authentication Password
- Configure Custom Wiegand Rule
- 8.1.9 Search Access Control Event
- 8.1.10 Configure Access Control Alarm Linkage
- 8.1.11 Manage Access Control Point Status
- 8.1.12 Control Door during Live View
- 8.1.13 Display Access Control Point on E-map
- 8.2 Remote Configuration (Web)
- 8.3 Time and Attendance
- 8.1 Operation on Client Software
- Appendix A. Tips for Scanning Fingerprint
- Appendix B. DIP Switch Description
- Appendix C. Custom Wiegand Rule Descriptions

3. Click the added template in the
le list to show its property on the right.
4. Add a week schedule to apply to the template.
1) Click Week Schedule tab on the right.
2) In the Week Schedule eld, select a congured week schedule.
3)
Oponal: Click Add Week Schedule to add a new week schedule.
Note
For details about adding a week schedule, refer to Add Week Schedule .
5. Add a holiday group schedule to apply to the template.
Note
Up to four holiday groups can be added to one template.
1) Click Holiday Group tab.
2) Select a holiday group in the list.
3)
Oponal: Click Add Holiday Group to add a new holiday group schedule.
Note
For details about adding a holiday group, refer to Add Holiday Schdule .
4) Click Add to add the selected holiday group schedule to the right list.
5)
Oponal: Select a selected holiday group on the right list and click Delete to remove the
selected one.
6. Click Save to save the sengs and nish adding the template.
8.1.7 Manage Permission
Aer adding the person and conguring the person's credenals, you can create the access
permissions to
dene the access level of which person(s) can get access to which door(s).
Assign Permission to Person
You can assign permission to persons so that person can enter or exist the access control points
(doors) according to the assigned permission.
Perform this task if you need to assign access permissions to persons.
Steps
• You can add up to 4 permissions to one access control point of one device.
• You can add up to 128 permissions in total.
• When the permission
sengs are changed, you need to apply the permissions to the devices
again to take eect. The permission changes include changes of schedule and template,
permission
sengs, person's permission sengs, and related person details (including card
number, ngerprint, linkage between card number and ngerprint, linkage between card
number and
ngerprint, card password, card eecve period, etc).
Access Controller User Manual
70