
User Manual

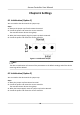
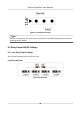
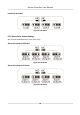
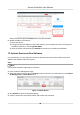
Table Of Contents
- Legal Information
- Available Model
- Regulatory Information
- Safety Instruction
- Chapter 1 Preventive and Cautionary Tips
- Chapter 2 Product Description
- Chapter 3 Main Board Description
- Chapter 4 Terminal Description
- Chapter 5 Terminal Wiring
- Chapter 6 Settings
- Chapter 7 Activation
- Chapter 8 Client Software Configuration
- 8.1 Operation on Client Software
- 8.1.1 Add Device
- 8.1.2 Select Application Scenario
- 8.1.3 Configure Other Parameters
- 8.1.4 Manage Organization
- 8.1.5 Manage Person Information
- 8.1.6 Configure Schedule and Template
- 8.1.7 Manage Permission
- 8.1.8 Configure Advanced Functions
- Configure Access Control Parameters
- Configure Individual Authentication
- Configure Card Reader Authentication Mode and Schedule
- Configure Multiple Authentication
- Configure Opening Door with First Card
- Configure Anti-Passback
- Configure Cross-Controller Anti-passing Back
- Configure Multi-door Interlocking
- Configure Authentication Password
- Configure Custom Wiegand Rule
- 8.1.9 Search Access Control Event
- 8.1.10 Configure Access Control Alarm Linkage
- 8.1.11 Manage Access Control Point Status
- 8.1.12 Control Door during Live View
- 8.1.13 Display Access Control Point on E-map
- 8.2 Remote Configuration (Web)
- 8.3 Time and Attendance
- 8.1 Operation on Client Software
- Appendix A. Tips for Scanning Fingerprint
- Appendix B. DIP Switch Description
- Appendix C. Custom Wiegand Rule Descriptions

Status of the device becomes Acve aer successful acvaon.
5. Modify IP address of the device.
1) Select the device.
2) Change the device IP address to the same subnet as your computer by either modifying the
IP address manually or checking Enable DHCP.
3) Input the admin password and click Modify to
acvate your IP address modicaon.
7.2
Acvate Device via Client Soware
For some devices, you are required to create the password to acvate them before they can be
added to the
soware and work properly.
Steps
Note
This funcon should be supported by the device.
1. Enter the Device Management page.
2. Check the device status (shown on Security column) and select an inacve device on the Device
for Management or Online Device area.
Figure 7-1 Online Device
3. Click Acvate to open the Acvaon dialog.
4. Create a password in the password
eld, and conrm the password.
Access Controller User Manual
39