
User Manual


Table Of Contents
- Legal Information
- Regulatory Information
- Preface
- Chapter 1 Product Introduction
- Chapter 2 Device Activation and Login
- Chapter 3 Client Configuration and Operation
- 3.1 Wizard
- 3.2 Signal Input Type Configuration
- 3.3 Display Adjustment
- 3.4 Volume Adjustment
- 3.5 Configure a Scene
- 3.6 Add Device Alias
- 3.7 Configure Message
- 3.8 Configure OSD
- 3.9 Configure Network
- 3.10 Configure No-Signal Screensaver
- 3.11 Configure On/off Image
- 3.12 Configure Multicast Control
- 3.13 Configure Video Window Opening
- 3.14 Configure Screen Splicing
- Chapter 4 Device Maintenance
- Chapter 5 System Maintenance
- Chapter 6 Local Configuration and Operation
- Chapter 7 FAQ
- 7.1 Full Screen is Unlit
- 7.2 Image is Incomplete or in Wrong Position
- 7.3 Full-screen Image Flashes or Vibrates
- 7.4 Spots/Strips Exist in Full-screen Image
- 7.5 Certain Unit Image Flashes or Has Spots
- 7.6 Certain Unit Screen is Unlit
- 7.7 Certain Module or Row of Modules are Unlit in Unit
- 7.8 Screen Display Error When Smart Settings
- 7.9 Searching Online Device Fail
7. Click Preview or press Enter to check the
eects.
8. Click Apply.
Operaon Descripon
Clear Reset all parameters if needed.
Load Original Data Load original correcon data.
Note
The funcon may vary with models. The parameters will not be
displayed when the funcon not supported.
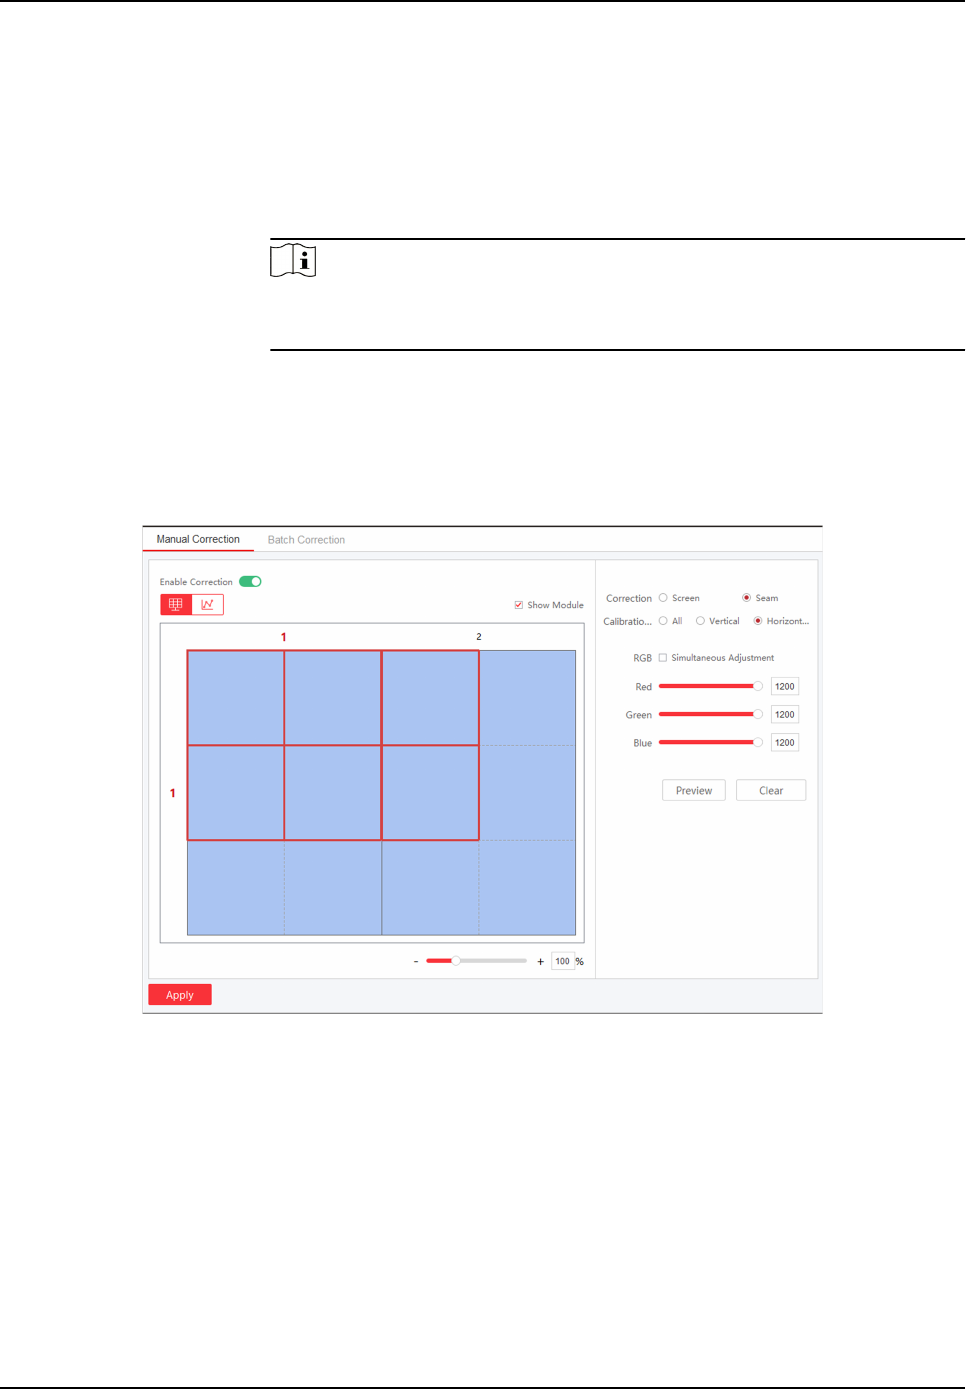
Correct Seam Manually
Steps
1. Click Screen Adjustment → Advanced Operaon → Correcon → Manual Correcon .
Figure 3-6 Correct Seam Manually
2. Select Enable Correcon.
3. Select Seam in Correcon.
4. Select Calibraon Range.
All
Correct all seams.
Vercal Line
Correct all vercal seams.
Full-Color LED Display Controller User Manual
13