
Manual


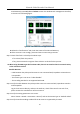
Table Of Contents
- Chapter 1 Introduction
- Chapter 2 Getting Started
- 2.1 Device Startup and Activation
- 2.2 Using Wizard for Basic Configuration
- 2.3 Adding and Connecting the IP Cameras
- Chapter 3 Live View
- Chapter 4 PTZ Controls
- Chapter 5 Recording Settings
- 5.1 Configuring Parameters
- 5.2 Configuring Recording Schedule
- 5.3 Configuring Motion Detection Recording
- 5.4 Configuring Alarm Triggered Recording
- 5.5 Configuring VCA Event Recording
- 5.6 Manual Recording
- 5.7 Configuring Holiday Recording
- 5.8 Configuring Redundant Recording
- 5.9 Configuring HDD Group for Recording
- 5.10 Files Protection
- Chapter 6 Playback
- Chapter 7 Backup
- Chapter 8 Alarm Settings
- Chapter 9 VCA Alarm
- Chapter 10 VCA Search
- Chapter 11 Network Settings
- 11.1 Configuring General Settings
- 11.2 Configuring Advanced Settings
- 11.2.1 Configuring Hik-Connect
- 11.2.2 Please refer to the help file on the official website (www.hik-connect.com) and the Hik-Connect Mobile Client User Manual for adding the device to Hik-Connect and more operation instructions.Configuring DDNS
- 11.2.3 Configuring PPPoE
- 11.2.4 Configuring NTP Server
- 11.2.5 Configuring SNMP
- 11.2.6 Configuring More Settings
- 11.2.7 Configuring HTTPS Port
- 11.2.8 Configuring Email
- 11.2.9 Configuring NAT
- 11.2.10 Configuring Virtual Host
- 11.3 Checking Network Traffic
- 11.4 Configuring Network Detection
- Chapter 12 HDD Management
- Chapter 13 Camera Settings
- Chapter 14 NVR Management and Maintenance
- Chapter 15 Others
- Chapter 16 Appendix

Network Video Recorder User Manual
213
1) Select “Menu>HDD>General”.
2) If the status of the HDD is “Uninitialized”, please check the checkbox of corresponding
HDD and click the “Init” button.
Step 11 Verify the HDD is detected or is in good condition.
3) Select “Menu>HDD>General”.
4) If the HDD is not detected or the status is “Abnormal”, please replace the dedicated HDD
according to the requirement.
Step 12 Check if the fault is solved by the step 1 to step 3.
If it is solved, finish the process.
If not, please contact the engineer from Hikvision to do the further process.
The status of the added IP camera displays as “Disconnected” when it is connected through
Private Protocol. Select “Menu>Camera>Camera>IP Camera” to get the camera status.
Possible Reasons:
− Network failure, and the NVR and IP camera lost connections.
− The configured parameters are incorrect when adding the IP camera.
− Insufficient bandwidth.
Step 1 Verify the network is connected.
1) Connect the NVR and PC with the RS-232 cable.
2) Open the Super Terminal software, and execute the ping command. Input “ping IP” (e.g.
ping 172.6.22.131).
Simultaneously press Ctrl and C to exit the ping command.
If there exists return information and the time value is little, the network is normal.
Step 2 Verify the configuration parameters are correct.
1) Select “Menu>Camera>Camera>IP Camera”.
2) Verify the following parameters are the same with those of the connected IP devices,
including IP address, protocol, management port, user name and password.
Step 3 Verify the whether the bandwidth is enough.
1) Select “Menu >Maintenance > Net Detect > Network Stat.”.
2) Check the usage of the access bandwidth, and see if the total bandwidth has reached its
limit.
Step 4 Check if the fault is solved by the step 1 to step 3.
If it is solved, finish the process.