
Operation Manual

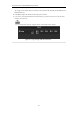


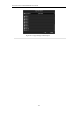


Table Of Contents
- Product Key Features
- Chapter 1 Introduction
- Chapter 2 Getting Started
- Chapter 3 Live View
- Chapter 4 PTZ Controls
- Chapter 5 Record Settings
- Chapter 6 Playback
- Chapter 7 Backup
- Chapter 8 Alarm Settings
- Chapter 9 Network Settings
- 9.1 Configuring General Settings
- 9.2 Configuring Advanced Settings
- 9.2.1 Configuring Extranet Access
- 9.2.2 Configuring PPPoE Settings
- 4.5.1 9.2.3 Configuring NTP Server
- 9.2.4 Configuring SNMP
- 9.2.5 Configuring NAT
- 9.2.6 Configuring Remote Alarm Host
- 9.2.7 Configuring Multicast
- 9.2.8 Configuring RTSP
- 9.2.9 Configuring Server and HTTP Ports
- 9.2.10 Configuring HTTPS Settings
- 9.2.11 Configuring Email
- 9.3 Checking Network Traffic
- 9.4 Network Detection
- Chapter 10 HDD Management
- Chapter 11 Camera Settings
- Chapter 12 Device Management and Maintenance
- Chapter 13 Others
- Chapter 14 Appendix

User Manual of DS-7200/7300/8100-SH Series DVR
139
2) Select the direction to A<->B, A->B or A<-B.
Figure 8. 19 Set Direction of Line Crossing Detection
3) Set the sensitivity of the line crossing detection to 1-100.
4) Click and set two points in the preview window to draw a virtual line.
A
B
Figure 8. 20 Draw Virtual Line in the Image
You can use the to clear the existing virtual line and re-draw it.
5) Click Apply to save the settings.
Task2: Configure the Intrusion Detection.
1) Select the intrusion region from the drop-down list. Up to 4 regions are selectable.
2) Select the sensitivity of the intrusion detection to 1-100.
3) Set the percentage to 1-100. Percentage defines the ratio of the in-region part of the object which
can trigger the alarm. For example, when you set the percentage as 50%, half of the object entering
the region will trigger the alarm.
Figure 8. 21 Set Intrusion Detection