
User Manual

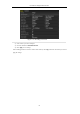


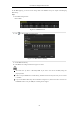

Table Of Contents
- Product Key Features
- Chapter 1 Introduction
- Chapter 2 Getting Started
- Chapter 3 Live View
- Chapter 4 PTZ Controls
- Chapter 5 Recording Settings
- 5.1 Configuring Recording Parameters
- 5.2 Configuring Record Schedule
- 5.3 Configuring Motion Detection Record
- 5.4 Configuring Alarm Triggered Record
- 5.5 Configuring VCA Record
- 5.6 Configuring Manual Record
- 5.7 Configuring Holiday Record
- 5.8 Configuring Redundant Recording
- 5.9 Configuring HDD Group for Recording
- 5.10 Files Protection
- Chapter 6 Playback
- Chapter 7 Backup
- Chapter 8 Alarm Settings
- Chapter 9 Network Settings
- Chapter 10 HDD Management
- Chapter 11 Camera Settings
- Chapter 12 DVR Management and Maintenance
- Chapter 13 Others
- Appendix

User Manual of Digital Video Recorder
96
To edit HDD property, you need to set the storage mode of the HDD to Group. See Chapter 10.4 Managing
HDD Group.
Steps:
1. Enter HDD setting interface.
Menu> HDD
Figure 5. 31 HDD General
2. Click to edit the HDD you want to protect.
Figure 5. 32 HDD General- Editing
3. Set the HDD to Read-only.
4. Click OK to save settings and back to the upper level menu.
You cannot save any files in a Read-only HDD. If you want to save files in the HDD, change the
property to R/W.
If there is only one HDD and is set to Read-only, the DVR cannot record any files. Only live view mode
is available.
If you set the HDD to Read-only when the DVR is saving files in it, then the file will be saved in next
R/W HDD. If there is only one HDD, the recording will be stopped.