
Quick Start Guide


Set up camera time manually for the rst time access if the
local time is not synchronized with that of the network. Visit
the camera via Web browse/client software and go to time
settings interface.
Installation
Make sure the device is rmly secured to any wall or ceiling
mountings.
Be sure that there is enough space to install the camera
and accessories.
Make sure that the device in the package is in good
condition and all the assembly parts are included.
Make sure that the wall is strong enough to withstand at
least 4 times the weight of the camera and the mount.
The standard power supply is 12 VDC, please make sure
your power supply matches with your camera.
Make sure that the power has been disconnected before
you wire, install, or disassemble the device.
Make sure that no reective surface is too close to the
camera lens. The IR light from the camera may reect back
into the lens causing reection.
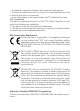
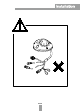
For device with this sticker, this device is
intended for installation in a restricted access
location, access can only be gained by service
persons or by users who have been instructed about the
reasons for the restrictions applied to the location and
about any precautions that shall be taken.
Symbols and Marks
Notice