Quick Start Guide
Manuals
Brands
Hikvision Manuals
Security Cameras
DeepinView Outdoor Thermal & Optical Network Bullet Camera
31
32
33
34
35
36
37
38
39
40
Table Of Contents
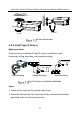
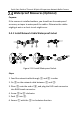
1 Appearance Description
1.1 Type I Camera Appearance
1.2 Type II Camera Appearance
1.3 Type III Camera Appearance
1.4 Type IV Camera Appearance
1.5 Cable Description
1.6 Interfaces of Junction Box
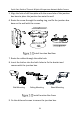
2 Installation
2.1 Install Memory Card
2.1.1 Insall Type I Camera Memory Card
2.1.2 Install Type II and Type IV Camera Memory Card
2.1.3 Install Type III Camera Memory Card
2.2 Wide Range Coverage
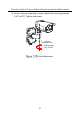
2.3 Install Camera
2.3.1 Install Type I Camera
2.3.2 Install Type II and Type IV Camera
2.3.3 Install Type III Camera
2.4 Waterproof Measures (Optional)
2.4.1 Install Network Cable Waterproof Jacket
2.4.2 Waterproof Other Cables
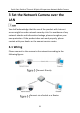
3 Set the Network Camera over the LAN
3.1 Wiring
3.2 Activate the Camera
3.2.1 Activate via Web Browser
3.2.2 Activate via SADP Software
3.3 Modify the IP Address
4 Access via Web Browser
Appendix
Common Material Emissivity Reference
Quick Start Guide of Thermal & Optical Bi
-
spectrum Network Bu
llet Camera
28
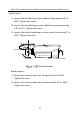
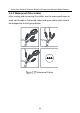
2.4.2
Waterproof Othe
r Cables
After r
outing a
nd connecting the cables, use the
wat
erproof tapes to
wrap up the cables. Connected cables a
nd spare cables bot
h should
be wrapped up as the figures be
low
.
Wat
erproof Cables
1
...
...
36
37
38
39
40
...
...
50