Quick Start Guide
Manuals
Brands
Hikvision Manuals
Network
640 x 512 Thermal Network Outdoor Bullet Camera, 25mm Lens
11
12
13
14
15
16
17
18
19
20
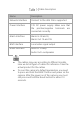
Table Of Contents
1 Appearance Description
1.1 Camera Appearance
1.2 Cable Description
2 Installation
2.1 Wide Range Coverage for Different Specifications
2.2 Installing Camera
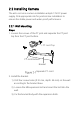
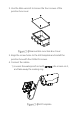
2.2.1 Wall Mounting
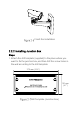
2.2.2 Installing Junction Box
2.3 Installation of Network Cable Water-proof Jacket
3 Setting the Network Camera over the LAN
3.1 Wiring
3.2 Activating the Camera
3.2.1 Activation via Web Browser
3.2.2 Activation via SADP Software
3.3 Modifying the IP Address
4 Accessing via Web Browser
Appendix
Frequently Asked Questions (FAQ)
Device Running Error
Device Upgrading
Others
Common Material Emissivity Reference
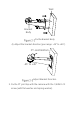
Bracket
Body
Wall
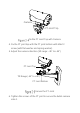
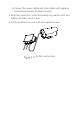
Fix the Bracket Body
4).
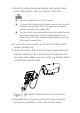
Adjust the bracket directio
n (pan ran
ge: -45°
to +45°
).
-45°
to +45°
PT Joint Bottom
Adjust Bracket Direction
3.
Fix the PT joint t
op with the ca
mera with the 1/4UN
C×
12
screw (with flat washer an
d spring was
her).
1
...
...
13
14
15
16
17
...
...
36