
User Manual

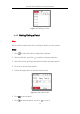
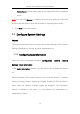
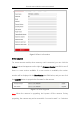
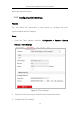
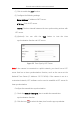
Table Of Contents
- Chapter 1 Overview
- Chapter 2 Network Connection
- Chapter 3 Access to the Network Camera
- Chapter 4 Live View
- Chapter 5 Network Camera Configuration
- Chapter 6 Network Settings
- Chapter 7 Video/Audio Settings
- Chapter 8 Image Settings
- Chapter 9 Event Settings
- Chapter 10 Storage Settings
- Chapter 11 Open Platform setting
- Chapter 12 Playback
- Chapter 13 Picture
- Appendix

Thermal Network Bullet Camera User Manual
37
(1) Click to enable the NTP function.
(2) Configure the following settings:
Server Address: IP address of NTP server.
NTP Port: Port of NTP server.
Interval: The time interval between the two synchronizing actions with
NTP server.
(3) (Optional) You can click the Test button to test the time
synchronization function via NTP server.
Figure 5-5 Time Sync by NTP Server
Note: If the camera is connected to a public network, you should use a NTP
server that has a time synchronization function, such as the server at the
National Time Center (IP Address: 210.72.145.44). If the camera is set in a
customized network, NTP software can be used to establish a NTP server for
time synchronization.
Configure the manual time synchronization.
(1) Check the Manual Time Sync. item to enable the manual time
synchronization function.
(2) Click the icon to select the date, time from the pop-up calendar.