
User Manual
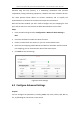
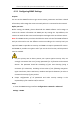
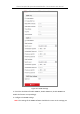
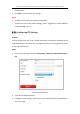
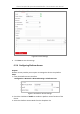

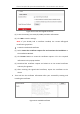
Table Of Contents
- Chapter 1 System Requirement
- Chapter 2 Network Connection
- Chapter 3 Access to the Network Camera
- Chapter 4 Live View
- Chapter 5 Network Camera Configuration
- Chapter 6 Network Settings
- Chapter 7 Video/Audio Settings
- Chapter 8 Image Settings
- Chapter 9 Event Settings
- Chapter 10 Storage Settings
- Chapter 11 Playback
- Chapter 12 Picture
- Appendix

Thermal & Optical Bi-spectrum Network Bullet / Turret Camera User Manual
58
4. Set the Server IP.
5. Click to save the settings
6.2.5 Configuring HTTPS Settings
Purpose:
HTTPS provides authentication of the web site and its associated web server, which
protects against Man-in-the-middle attacks. Perform the following steps to set the
port number of https.
E.g., If you set the port number as 443 and the IP address is 192.168.1.64, you may
access the device by inputting https://192.168.1.64:443 via the web browser.
Steps:
1. Enter the HTTPS settings interface. Configuration > Network > Advanced
Settings > HTTPS.
2. Check the checkbox of Enable to enable the function.
Figure 6-11 HTTPS Configuration Interface
3. Create the self-signed certificate or authorized certificate.
Create the self-signed certificate
(1) Select Create Self-signed Certificate as the Installation Method.
(2) Click Create button to enter the creation interface.