
User Manual


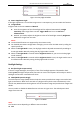
Table Of Contents
- About This Document
- Chapter 1 Activating and Accessing to the Camera
- Chapter 2 Setting Local Parameters and Network
- Chapter 3 Live View
- Chapter 4 PTZ Control
- 4.1 Operating PTZ Control
- 4.2 PTZ Configuration
- 4.2.1 Configuring Basic PTZ Parameters
- 4.2.2 Configuring PTZ Limits
- 4.2.3 Configuring Initial Position
- 4.2.4 Configuring Park Action
- 4.2.5 Configuring Privacy Mask
- 4.2.6 Configuring Scheduled Tasks
- 4.2.7 Clearing PTZ Configurations
- 4.2.8 Configuring PTZ Control Priority
- 4.2.9 Configuring Panorama Tracking
- 4.2.10 Configuring Eagle Vision Focus
- Chapter 5 Storage and Playback
- Chapter 6 Alarm and Events
- 6.1 Basic Event Configuration
- 6.2 Smart Event Configuration
- 6.3 VCA Configuration
- Chapter 7 Maintenance
- Appendix
- Appendix 1 SADP Software Introduction
- Appendix 2 Statics, Interference Lightning and Surge Protection
- Appendix 3 Waterproof
- Appendix 4 Bubble Maintenance
- Appendix 5 RS-485 Bus Connection
- Appendix 6 24VAC Wire Gauge & Transmission Distance
- Appendix 7 12VDC Wire Gauge & Transmission Distance
- Appendix 8 Table of Wire Gauge Standards
- Appendix 9 Alarm In/Out Connections
- Appendix 10 Camera Function Description

User Manual of PanoVu Series Network Camera
32
Limit Gain
This feature is used to adjust gain of the image. The value ranges from 0 to 100.
Slow Shutter
This function can be used in underexposure condition. It lengthens the shutter time to ensure full
exposure. Select slow shutter level from the dropdown list
Figure 3-9 Slow Shutter
Focus Settings
Focus Mode
The Focus Mode can be set to Auto, Manual, Semi-auto.
Auto:
The camera focuses automatically at any time according to objects in the scene.
Semi-auto:
The camera focuses automatically only once after panning, tilting and zooming.
Manual:
In Manual mode, you need to use on the control panel to focus manually.
Min. Focus Distance
This function is used to limit the minimum focus distance.
Note:
Focus settings applies only to Camera 1.
Day/Night Switch
Day/Night Switch
The Day/Night Switch mode can be set to Auto, Day, Night, and Scheduled-Switch.
Auto:
In Auto mode, the day mode and night mode can switch automatically according to the light
condition of environment. The switching sensitivity can be set to Low, Normal, High.
Figure 3-10 Auto Mode Sensitivity
Day:
In Day mode, the camera displays color image. It is used for normal lighting conditions.
Night:
In Night mode, the image is black and white. Night mode can increase the sensitivity in low
light conditions.
Scheduled-Switch
In Scheduled-Switch mode, you can set the time schedule for day mode as shown in Figure
3-11. The rest time out of the schedule is for night mode.