
User's Manual
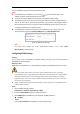
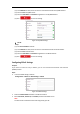
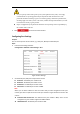

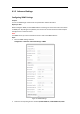

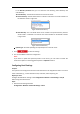
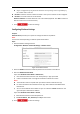

Table Of Contents
- Chapter 1 Overview
- Chapter 2 Network Connection
- Chapter 3 Accessing to the Network Speed Dome
- Chapter 4 Basic Operations
- Chapter 5 System Configuration
- 5.1 Storage Settings
- 5.2 Basic Event Configuration
- 5.3 Smart Event Configuration
- 5.4 PTZ Configuration
- 5.4.1 Configuring Basic PTZ Parameters
- 5.4.2 Configuring PTZ Limits
- 5.4.3 Configuring Initial Position
- 5.4.4 Configuring Park Action
- 5.4.5 Configuring Privacy Mask
- 5.4.6 Configuring Scheduled Tasks
- 5.4.7 Clearing PTZ Configurations
- 5.4.8 Configuring Smart Tracking
- 5.4.9 Prioritize PTZ
- 5.4.10 Position Settings
- 5.4.11 Rapid Focus
- 5.5 Face Capture Configuration
- 5.6 Smart Display
- Chapter 6 Camera Configuration
- Appendix
Proper configuration of all passwords and other security settings is the responsibility of
the installer and/or end-user.
Receiver: Select the receiver to which the email is sent. Up to 2 receivers can be configured.
Receiver: The name of the user to be notified.
Receiver’s Address: The email address of user to be notified. (Optional: click Test to make sure
that the email server can send email out.)
3. Click to save the settings.
Configuring Platform Settings
Purpose:
Platform Access provides you an option to manage the devices via platform.
Note:
This function varies depending on different speed dome models.
Steps:
1. Enter the Platform settings interface:
Configuration> Network > Advanced Settings > Platform Access
Figure 6-12 Platform Access
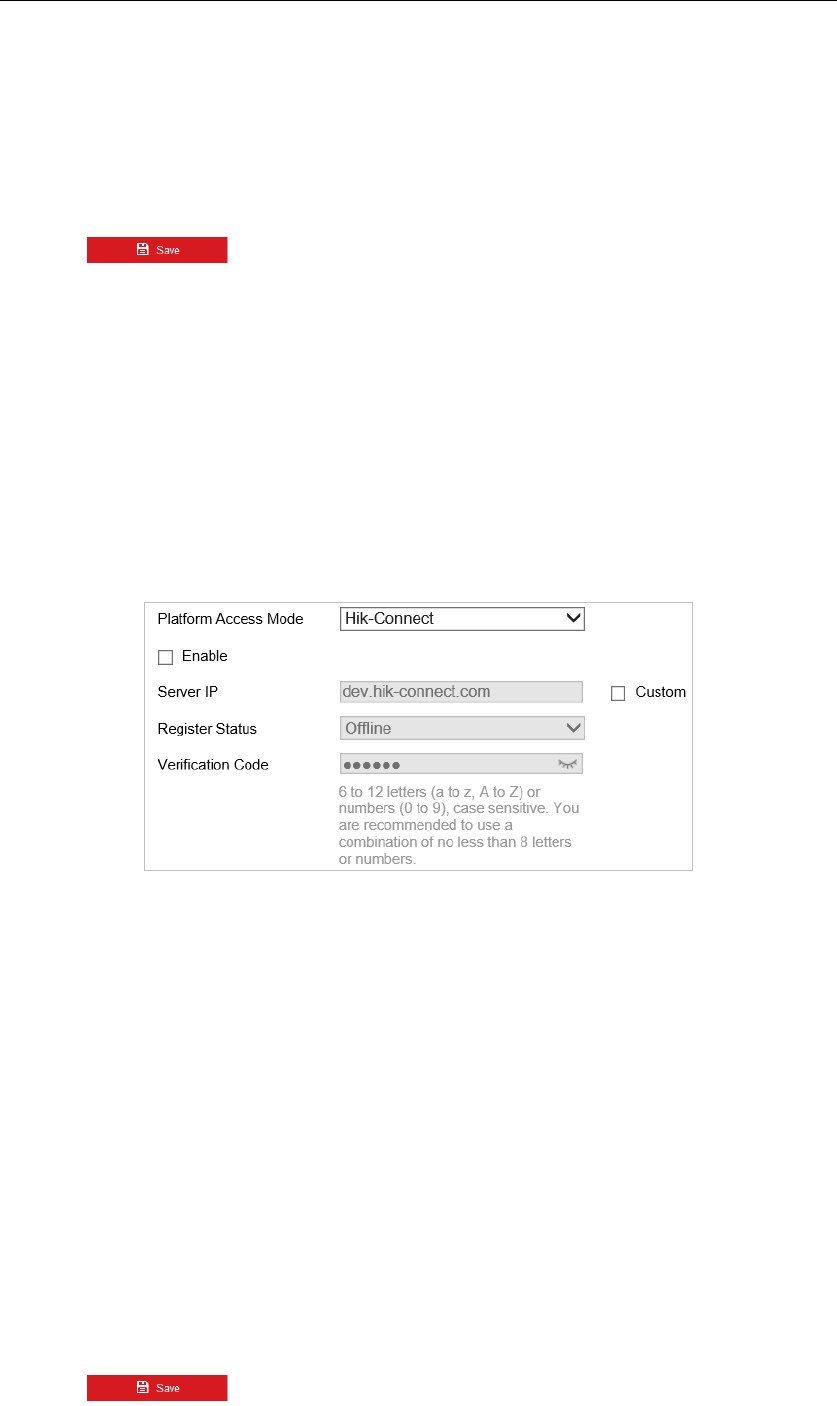
2. Check the Enable checkbox to enable the platform access function of the device.
3. Select the Platform Access Mode.
If you select Platform Access Mode as Hik-Connect,
1) Click and read "Terms of Service" and "Privacy Policy" in pop-up window.
2) Create a verification code or change the verification code for the camera.
Notes:
The verification code is required when you add the camera to Hik-Connect app.
For more information about the Hik-Connect app, refer to Hik-Connect Mobile Client
User Manual.
3) You can use the default server address. Or you can check the Custom checkbox on the
right and input a desired server address.
If you select Platform Access Mode as Ehome,
1) Select Protocol Version from the dropdown list.
2) Set Server Address, Port, Device ID, and Key for the camera.
4) Click to save the settings.