
User's Manual
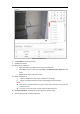
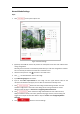

Table Of Contents
- Chapter 1 Overview
- Chapter 2 Network Connection
- Chapter 3 Accessing to the Network Speed Dome
- Chapter 4 Basic Operations
- Chapter 5 System Configuration
- 5.1 Storage Settings
- 5.2 Basic Event Configuration
- 5.3 Smart Event Configuration
- 5.4 PTZ Configuration
- 5.4.1 Configuring Basic PTZ Parameters
- 5.4.2 Configuring PTZ Limits
- 5.4.3 Configuring Initial Position
- 5.4.4 Configuring Park Action
- 5.4.5 Configuring Privacy Mask
- 5.4.6 Configuring Scheduled Tasks
- 5.4.7 Clearing PTZ Configurations
- 5.4.8 Configuring Smart Tracking
- 5.4.9 Prioritize PTZ
- 5.4.10 Position Settings
- 5.4.11 Rapid Focus
- 5.5 Face Capture Configuration
- 5.6 Smart Display
- Chapter 6 Camera Configuration
- Appendix
Normal Mode Settings
Steps:
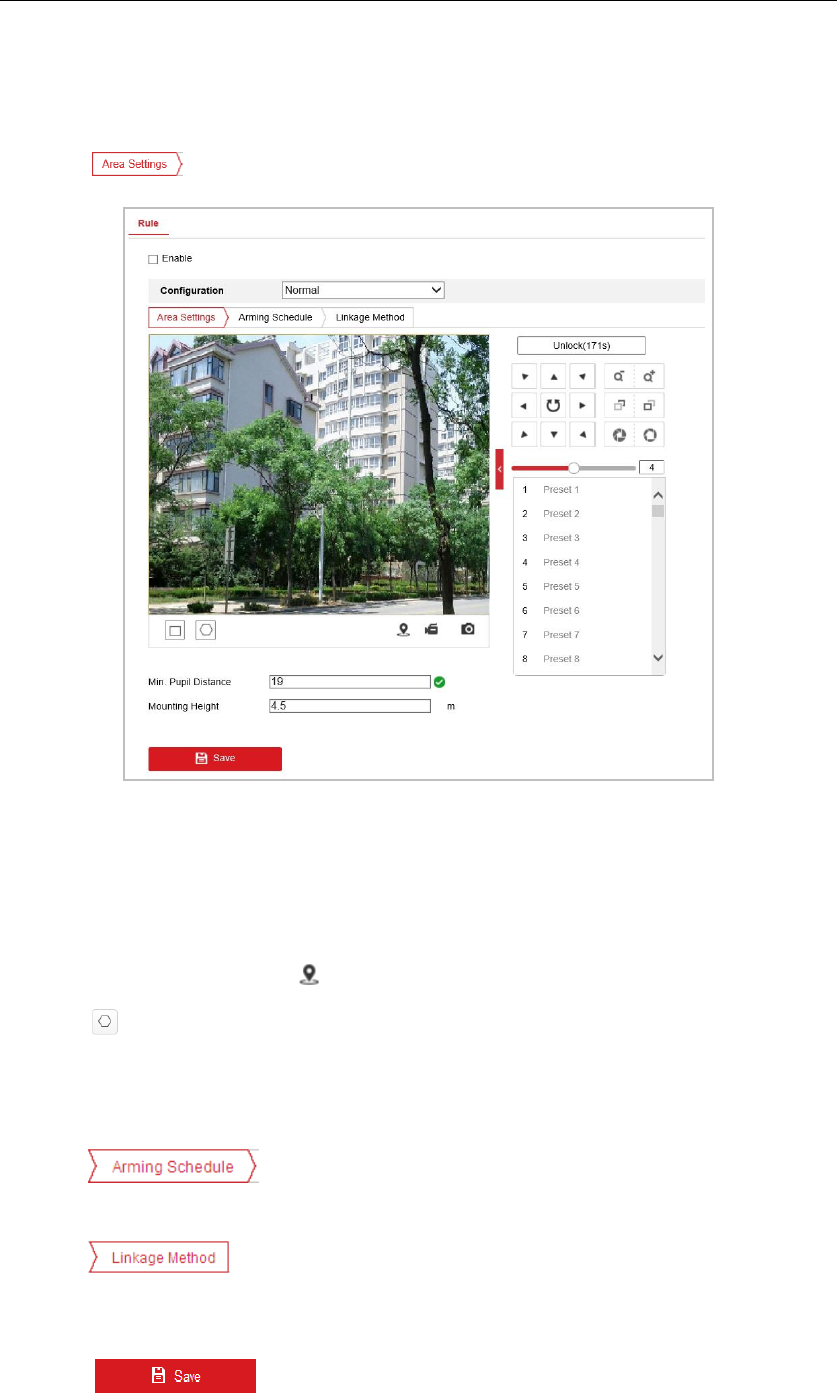
1. Click to set up face capture rule.
Figure 5-44 Area Settings
2. (Optional) Click Lock to lock PTZ to prevent the interruption from other PTZ related action
during configuration.
Normally, the PTZ control is automatically locked when you enter the configuration interface.
You can manually resume the lock when the countdown is over.
3. Use PTZ control panel or click to locate a scene with a face.
4. Click and draw detection area on live image.
5. Input Mounting Height of the camera.
6. Input or draw Min. Pupil Distance on live image. The min. pupil distance refers to the
minimum area between two pupils, and it is basic for the device to identify a face.
7. Click tab to enter the arming schedule setting interface. The time
schedule configuration is the same as the settings of the arming schedule for motion
detection. Refer to Step 5 in Section 5.2.1 Configuring Motion Detection.
8. Click tab to select the linkage method taken for the video loss alarm,
Notify surveillance center, send email, upload to FTP, trigger channel, smart tracking and
trigger alarm output are selectable. Refer to Step 6 in Section 5.2.1 Configuring Motion
Detection.
9. Click button to save the settings.