
Quick Start Guide
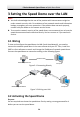
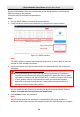
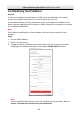

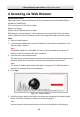
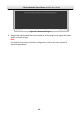
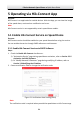
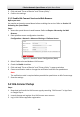
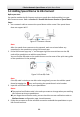
Table Of Contents
- 1 Overview
- 2 Installation
- 2.1 Installing DE4xxx Series Speed Dome
- 2.2 Installing DE4xxxI Series (IR) Speed Dome
- 2.3 Installing DE5xxx Series Speed Dome
- 2.4 Installing DE5xxxI Series (IR) Speed Dome
- 2.5 Installing DE6xxxI Series (IR) Speed Dome
- 2.6 Installing DE7xxxI Series (IR) Speed Dome
- 2.7 Protective Measures for Outdoor Installation
- 3 Setting the Speed Dome over the LAN
- 4 Accessing via Web Browser
- 5 Operating via Hik-Connect App

E Series Network Speed Dome·Quick Start Guide
33
5.3 Adding Speed Dome to Hik-Connect
Before you start:
You need to enable the Hik-Connect service on speed dome before adding it to your
Hik-Connect account. Refer to Section 5.1 Enable Hik-Connect Service on Speed Dome.
Steps:
1. Use a network cable to connect the speed dome with a router if the speed dome
does not support Wi-Fi.
Figure 5-3 Connect a Router
Note:
After the speed dome connects to the network, wait one minute before any
operation on the speed dome using Hik-Connect app.
2. In the Hik-Connect app, tap “+” on the upper-right corner and then scan the QR
code of the speed dome to add the speed dome.
You can find the QR code on the speed dome or on the cover of the quick start guide
of the speed dome in the package.
Figure 5-4 Scan QR Code
Note:
If the QR code is missing or too blur to be recognized, you can also add the speed
dome by tapping the icon and inputting the speed dome's serial number.
3. Input the verification code of your speed dome.
Notes:
The required verification code is the code you create or change when you enabling
Hik-Connect service on speed dome.
If you forget the verification code, you can check the current verification code on
Platform Access configuration page via web browser.
4. Follow the prompts to set the network connection and add the speed dome to your
Hik-Connect account.