
Quick Start Guide
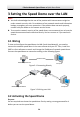
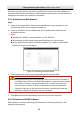
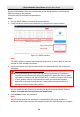
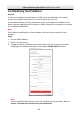

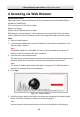
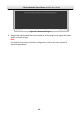
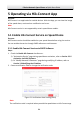
Table Of Contents
- 1 Overview
- 2 Installation
- 2.1 Installing DE4xxx Series Speed Dome
- 2.2 Installing DE4xxxI Series (IR) Speed Dome
- 2.3 Installing DE5xxx Series Speed Dome
- 2.4 Installing DE5xxxI Series (IR) Speed Dome
- 2.5 Installing DE6xxxI Series (IR) Speed Dome
- 2.6 Installing DE7xxxI Series (IR) Speed Dome
- 2.7 Protective Measures for Outdoor Installation
- 3 Setting the Speed Dome over the LAN
- 4 Accessing via Web Browser
- 5 Operating via Hik-Connect App

E Series Network Speed Dome·Quick Start Guide
32
3. Click and read "Terms of Service" and "Privacy Policy".
4. Confirm the settings.
5.1.2 Enable Hik-Connect Service via Web Browser
Before you start:
You need to activate the speed dome before enabling the service. Refer to Section 3.2
Activating the Speed Dome.
Steps:
1. Access the speed dome via web browser. Refer to Chapter 4 Accessing via Web
Browser.
2. Enter platform access configuration interface:
Configuration > Network > Advanced Settings > Platform Access
Figure 5-2 Platform Access Configuration (Web)
3. Select Platform Access Mode as Hik-Connect.
4. Check the Enable checkbox.
5. Click and read "Terms of Service" and "Privacy Policy" in pop-up window.
6. Create a verification code or change the verification code for the speed dome.
Note:
The verification code is required when you add the speed dome to Hik-Connect app.
7. Save the settings.
5.2 Hik-Connect Setup
Steps:
1. Download and install the Hik-Connect app by searching “Hik-Connect” in App Store
or Google Play
TM
.
2. Launch the app and register for a Hik-Connect user account.
3. Log in Hik-Connect app after registration.