
Quick Start Guide
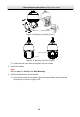
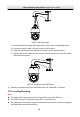
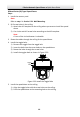
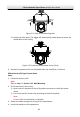
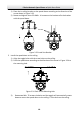
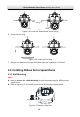
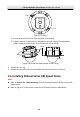
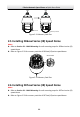
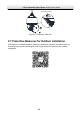
Table Of Contents
- 1 Overview
- 2 Installation
- 2.1 Installing DE4xxx Series Speed Dome
- 2.2 Installing DE4xxxI Series (IR) Speed Dome
- 2.3 Installing DE5xxx Series Speed Dome
- 2.4 Installing DE5xxxI Series (IR) Speed Dome
- 2.5 Installing DE6xxxI Series (IR) Speed Dome
- 2.6 Installing DE7xxxI Series (IR) Speed Dome
- 2.7 Protective Measures for Outdoor Installation
- 3 Setting the Speed Dome over the LAN
- 4 Accessing via Web Browser
- 5 Operating via Hik-Connect App

E Series Network Speed Dome·Quick Start Guide
19
Locks
Locks
Ceiling
Figure 2-25 Install the Speed Dome to the Ceiling
6. Install the trim ring.
Figure 2-26 Install the Trim Ring
7. Remove the protective film on the bubble after the installation is finished.
2.3 Installing DE5xxx Series Speed Dome
2.3.1 Wall Mounting
Notes:
Refer to Section 2.1.1 Wall Mounting for wall mounting steps for DE5xxx series
speed dome.
Refer to Figure 2-27 for memory card slot of DE5xxx series speed dome.
Memory Card Slot
Figure 2-27 Memory Card Slot