
Quick Start Guide
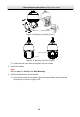
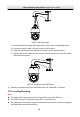
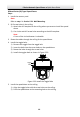
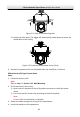
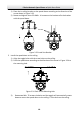
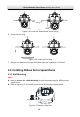
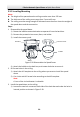
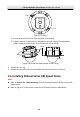
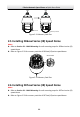
Table Of Contents
- 1 Overview
- 2 Installation
- 2.1 Installing DE4xxx Series Speed Dome
- 2.2 Installing DE4xxxI Series (IR) Speed Dome
- 2.3 Installing DE5xxx Series Speed Dome
- 2.4 Installing DE5xxxI Series (IR) Speed Dome
- 2.5 Installing DE6xxxI Series (IR) Speed Dome
- 2.6 Installing DE7xxxI Series (IR) Speed Dome
- 2.7 Protective Measures for Outdoor Installation
- 3 Setting the Speed Dome over the LAN
- 4 Accessing via Web Browser
- 5 Operating via Hik-Connect App

E Series Network Speed Dome·Quick Start Guide
17
Figure 2-21 Push to the Mounting Hole
3) Rotate the bolts again. The toggle will automatically rotate down to secure the
speed dome to the ceiling.
Figure 2-22 Install the Speed Dome to the Ceiling
6. Remove the protective film on the bubble after the installation is finished.
DE4xxxI Series (IR) Type II Speed Dome
Steps:
1. Install the memory card.
Note:
Refer to step 1 in Section 2.2.1 Wall Mounting.
2. Drill screw holes in the ceiling.
1) Attach the drill template to the ceiling where you want to install the speed
dome.
2) Cut a hole and drill screw holes according to the drill template.
Note:
±2 mm of the circle diameter is tolerable.
3. Route the cables through the ceiling for the speed dome.
4. Install the bracket on the speed dome.