
Quick Start Guide
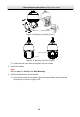
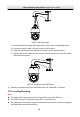
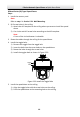
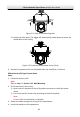
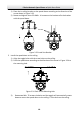
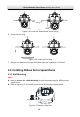
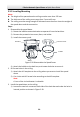
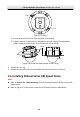
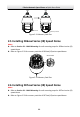
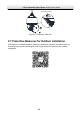
Table Of Contents
- 1 Overview
- 2 Installation
- 2.1 Installing DE4xxx Series Speed Dome
- 2.2 Installing DE4xxxI Series (IR) Speed Dome
- 2.3 Installing DE5xxx Series Speed Dome
- 2.4 Installing DE5xxxI Series (IR) Speed Dome
- 2.5 Installing DE6xxxI Series (IR) Speed Dome
- 2.6 Installing DE7xxxI Series (IR) Speed Dome
- 2.7 Protective Measures for Outdoor Installation
- 3 Setting the Speed Dome over the LAN
- 4 Accessing via Web Browser
- 5 Operating via Hik-Connect App

E Series Network Speed Dome·Quick Start Guide
15
Figure 2-18 Safety Rope
2) Route the cables through the bracket and connect the corresponding cables.
3) Loosen the two SC-AM6 × 14 lock screws on the bracket.
4) Align the speed dome with bracket and rotate it to the bracket tightly.
5) Tighten the two SC-AM6 × 14 lock screws with the wrench to secure the speed
dome and the bracket.
Figure 2-19 Secure the Speed Dome
4. Remove the protective film on the bubble after the installation is finished.
2.2.2 In-ceiling Mounting
Note:
The height of the space above the ceiling must be more than 250 mm.
The thickness of the ceiling must range from 5 mm to 40 mm.
The ceiling must be strong enough to withstand more than four times the weight of
the speed dome and the accessories.