
User Manual


UM DS-2CE5xH0T-Axxxxx 042318NA 6
• Make sure the wall is strong enough to withstand
three times the weight of the camera and the
mount.
• If the wall is cement, insert expansion bolts before
you install the camera. If the wall is wooden, use
self-tapping screws to secure the camera.
• If the product does not function properly, contact
your dealer or the nearest service center. Do NOT
disassemble the camera for repair or maintenance
yourself.
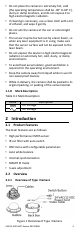
3.1 Type I and Type II Camera Ceiling
Mounting
Before you start:
Both wall mounting and ceiling mounting are suitable
for the dome camera. Ceiling mounting will be taken
as an example in this section. You can take the ceiling
mounting steps as a reference for wall mounting.
Steps:
1. Paste the drill template to the celling.
2. Drill screw holes and the cable hole (optional) on
the ceiling according to the supplied drill
template.
Note:
Drill the cable hole if using the ceiling outlet to route
the cable.
Figure 4 The Drill Template
3. Loosen the screws on the bubble of the dome
camera to remove the bubble and the black liner.
4. Attach the back box of type I camera/base plate
of type II camera to the ceiling and secure them
with supplied screws.
Figure 5 Attach the Back Box/Base Plate
Note:
• The supplied screw package contains self-tapping
screws and expansion bolts.