
User Manual


UM DS-2CE5xH0T-Axxxxx 042318NA 11
Figure 17 Attach the Back Box to the Mount
6. Route the cables through the mount.
7. Repeat
steps 6 to 9 of the
2.1
Ceiling Mounting of
Type III Camera to complete the installation
.
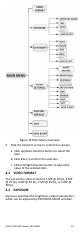
4 Menu Description
Purpose:
Call the menu by clicking the button on the PTZ
Control interface, or call preset No.95.
Steps:
1. Connect the camera with the TVI DVR and the
monitor, shown as figure 3-1.
Figure 18 Connection
2. Power on the analog camera, TVI DVR, and the
monitor to view the image on the monitor.
3. Click PTZ Control to enter the PTZ Control
interface.
4. Call the camera menu by clicking the button,
or call preset No. 95.