
User Manual
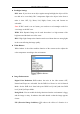
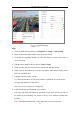
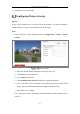
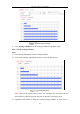
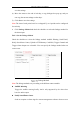
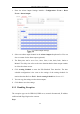
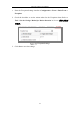
Table Of Contents
- Chapter 1 System Requirement
- Chapter 2 Network Connection
- Chapter 3 Access to the Network Camera
- Chapter 4 Live View
- Chapter 5 Network Camera Configuration
- Chapter 6 Network Settings
- Chapter 7 Video/Audio Settings
- Chapter 8 Image Settings
- Chapter 9 Event Settings
- Chapter 10 Storage Settings
- Chapter 11 Playback
- Chapter 12 Picture
- Appendix

Network Camera User Manual
83
9. Click Save to save the settings.
Configuring Picture Overlay
Purpose:
Picture overlay enables you to overlay a picture on the image. This function enables a
certain enterprise or users to overlay their logo on the image.
Steps:
1. Enter the Picture Overlay Settings interface, Configuration > Image > Picture
Overlay.
Picture Overlay
2. Select the desired channel number from the drop-down list.
3. Click Browse to select a picture.
4. Click Upload to upload it.
5. Check Enable Picture Overlay checkbox to enable the function.
6. Set X Coordinate and Y Coordinate values adjust the picture position on the
image. Adjust Picture Width and Picture Height to the desired size.
7. Click Save to save settings.
Note: The picture must be in RGB24 bmp format and the maximum picture size is
128*128.