Dual-Lens People Counting Camera User Manual Dual-Lens People Counting Camera User Manual UD12330B 0
Dual-Lens People Counting Camera User Manual User Manual COPYRIGHT ©2018 Hangzhou Hikvision Digital Technology Co., Ltd. ALL RIGHTS RESERVED. Any and all information, including, among others, wordings, pictures, graphs are the properties of Hangzhou Hikvision Digital Technology Co., Ltd. or its subsidiaries (hereinafter referred to be “Hikvision”).
Dual-Lens People Counting Camera User Manual FITNESS FOR A PARTICULAR PURPOSE, AND NON-INFRINGEMENT OF THIRD PARTY.
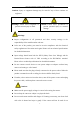
Dual-Lens People Counting Camera User Manual Cautions: Injury or equipment damage may be caused if any of these cautions are neglected. Warnings Follow these safeguards to Cautions Follow these precautions to prevent serious injury or death. prevent potential injury or material damage. Warnings: Proper configuration of all passwords and other security settings is the responsibility of the installer and/or end-user.
Dual-Lens People Counting Camera User Manual extended period, please replace the lens cap to protect the sensor from dirt. Do not aim the camera at the sun or extra bright places. Blooming or smearing may occur otherwise (which is not a malfunction), and affect the endurance of sensor at the same time. The sensor may be burned out by a laser beam, so when any laser equipment is in using, make sure that the surface of sensor will not be exposed to the laser beam.
Dual-Lens People Counting Camera User Manual Table of Contents Chapter 1 System Requirement ........................................................................... 1 Chapter 2 Network Connection ........................................................................... 2 2.1 Setting the Network Camera over the LAN ........................................................ 2 2.1.1 Wiring over the LAN ......................................................................................................
Dual-Lens People Counting Camera User Manual 6.3 Maintenance ................................................................................................. 37 6.3.1 Upgrade & Maintenance ................................................................................................. 37 6.3.2 Log .................................................................................................................................. 38 6.3.3 System Service ................................................
Dual-Lens People Counting Camera User Manual Chapter 13 Picture ..........................................................................................81 Chapter 14 Application ....................................................................................82 14.1 People Counting Statistics .............................................................................. 82 Appendix .............................................................................................................
Dual-Lens People Counting Camera User Manual Chapter 1 System Requirement Operating System: Microsoft Windows XP SP1 and above version CPU: 2.0 GHz or higher RAM: 1G or higher Display: 1024×768 resolution or higher Web Browser: Internet Explorer 8.0 and above version, Mozilla Firefox 30.0 to 51, and Google Chrome 31 to 51.
Dual-Lens People Counting Camera User Manual Chapter 2 Network Connection Note: You shall acknowledge that the use of the product with Internet access might be under network security risks. For avoidance of any network attacks and information leakage, please strengthen your own protection. If the product does not work properly, please contact with your dealer or the nearest service center.
Dual-Lens People Counting Camera User Manual Refer to the Figure 2-2 to set network camera over the LAN via a switch or a router. or Network Cable Network Camera 半球 Computer Figure 2-1 Connecting Directly or or tw e N Ne tw e abl kC 网络交换机 ork C abl e or Network Camera 半球 Computer Figure 2-2 Connecting via a Switch or a Router 2.1.2 Activating the Camera You are required to activate the camera first by setting a strong password for it before you can use the camera.
Dual-Lens People Counting Camera User Manual to search the IP address. Figure 2-3 Activation via Web Browser 3. Create a password and input the password into the password field. STRONG PASSWORD RECOMMENDED–We highly recommend you create a strong password of your own choosing (using a minimum of 8 characters, including at least three of the following categories: upper case letters, lower case letters, numbers, and special characters) in order to increase the security of your product.
Dual-Lens People Counting Camera User Manual Select inactive device. Input and confirm password. Figure 2-4 SADP Interface Note: The SADP software supports activating the camera in batch. Refer to the user manual of SADP software for details. 3. Create a password and input the password in the password field, and confirm the password.
Dual-Lens People Counting Camera User Manual Figure 2-5 Modify the IP Address 6. Input the admin password and click Modify to activate your IP address modification. The batch IP address modification is supported by the SADP. Refer to the user manual of SADP for details. Activation via Client Software The client software is versatile video management software for multiple kinds of devices.
Dual-Lens People Counting Camera User Manual Figure 2-6 Control Panel 2. Click the Device Management icon to enter the Device Management interface, as shown in the figure below.
Dual-Lens People Counting Camera User Manual 3. Check the device status from the device list, and select an inactive device. 4. Click the Activate button to pop up the Activation interface. 5. Create a password and input the password in the password field, and confirm the password.
Dual-Lens People Counting Camera User Manual Figure 2-9 Modifying the Network Parameters 8. Change the device IP address to the same subnet with your computer by either modifying the IP address manually or checking the checkbox of Enable DHCP. 9. Input the password to activate your IP address modification. 2.2 Setting the Network Camera over the WAN Purpose: This section explains how to connect the network camera to the WAN with a static IP or a dynamic IP. 2.2.
Dual-Lens People Counting Camera User Manual 2. Assign a LAN IP address, the subnet mask and the gateway. Refer to Section 2.1.2 for detailed IP address configuration of the network camera. 3. Save the static IP in the router. 4. Set port mapping, e.g., 80, 8000, and 554 ports. The steps for port mapping vary according to the different routers. Please call the router manufacturer for assistance with port mapping. Note: Refer to Appendix 2 for detailed information about port mapping. 5.
Dual-Lens People Counting Camera User Manual 1. Connect the network camera to the router. 2. In the camera, assign a LAN IP address, the subnet mask and the gateway. Refer to Section 2.1.2 for detailed IP address configuration of the network camera. 3. In the router, set the PPPoE user name, password and confirm the password. 4. Set port mapping. E.g. 80, 8000, and 554 ports. The steps for port mapping vary depending on different routers.
Dual-Lens People Counting Camera User Manual Chapter 3 Access to the Network Camera 3.1 Accessing by Web Browsers Steps: 1. Open the web browser. 2. In the browser address bar, input the IP address of the network camera, and press the Enter key to enter the login interface. Note: The default IP address is 192.168.1.64. You are recommended to change the IP address to the same subnet with your computer. 3. Input the user name and password and click Login.
Dual-Lens People Counting Camera User Manual Figure 3-2 Download and Install Plug-in Note: You may have to close the web browser to finish the installation of the plug-in. 6. Reopen the web browser after the installation of the plug-in and repeat steps 2 to 4 to login. Note: For detailed instructions of further configuration, please refer to the user manual of network camera. 3.2 Accessing by Client Software The product CD contains the iVMS-4200 client software.
Dual-Lens People Counting Camera User Manual Figure 3-3 iVMS-4200 Control Panel Figure 3-4 iVMS-4200 Main View 14
Dual-Lens People Counting Camera User Manual Chapter 4 People Counting Purpose: People counting function is used to calculate the number of people entering, exiting, and passing by an area. It is widely applied to the entrances and exits. Before you start: The camera is recommended to be installed right above the entrance/exit, and make sure it is installed properly. Refer to Quick Start Guide of Dual-Lens People Counting Camera for installation advice.
Dual-Lens People Counting Camera User Manual Auto Calibration: camera automatically calculates the lens height. Manual Calibration: lens height should be measured by the users. Note: If the level ground area occupies less than 25% of the whole image, use manual calibration. • Auto Calibration i. Select calibration mode as Auto. ii. Drag the calibration area (the green rectangle in image) to cover a level area of the ground. You can adjust the size of the green rectangle by dragging its angles.
Dual-Lens People Counting Camera User Manual Figure 4-1 Auto Calibration • Manual Calibration Manual calibration is recommended if it is easy to measure the lens height. i. Select calibration mode as Manual. ii. Measure the lens height from the ground. Input the value into the Lens Height field. iii. Click Calibration. The camera displays the red count area and the orange detection line in image. iv. Check the calibration effect.
Dual-Lens People Counting Camera User Manual If the calibration is considered invalid, repeat above steps again. Figure 4-2 Manual Calibration 4. Adjust detection line and the direction. You can drag the straight line and its endpoints to adjust its position and length to better cover the entrance/exit. Click to change the direction of the detection line arrow. The arrow stands for the direction of entering.
Dual-Lens People Counting Camera User Manual Arming Schedule Steps: 1. Click Arming Schedule to edit the arming schedule. 2. Click on the time bar and drag the mouse to select the time period. Figure 4-3 Arming Schedule Note: Click on the selected time period, you can adjust the time period to the desired time by either moving the time bar or input the exact time period. 3. (Optional) Click Delete to delete the current arming schedule, or click Save to save the settings. 4.
Dual-Lens People Counting Camera User Manual Figure 4-4 Linkage Method Notify Surveillance Center Send an exception or alarm signal to remote management software when an event occurs. 4.1.2 Data Uploading Setting Data uploading is about how and when the counting data can be sent to clients and users. You can upload people counting data to surveillance center and client software through SDK and HTTP (if configured). To upload real-time data, check the Real-Time Upload Data checkbox.
Dual-Lens People Counting Camera User Manual Calculated height information can be displayed on persons in the live image. Note: To display height on person, you should first enable Display POS Information at Local settings. Height Filter Enable the function and set a height value. Persons and objects shorter than the set value are not counted as a valid target. Flow Overlay It displays real-time flow information on screen. You can select displayed data type from the drop-down list.
Dual-Lens People Counting Camera User Manual Rule Steps: 1. Enter configuration interface: Configuration > People Counting 2. Enable people counting function. 3. Set up camera calibration. a. Measure the lens height from the lens to the first step of the entry/exit area. Input the value into the Lens Height from Entry/Exit Area field. b. Click Calibration. The camera displays the red count area and the orange detection line in image. c. Click and draw entry/exit area in image.
Dual-Lens People Counting Camera User Manual 1. Click Arming Schedule to edit the arming schedule. 2. Click on the time bar and drag the mouse to select the time period. Figure 4-6 Arming Schedule Note: Click on the selected time period, you can adjust the time period to the desired time by either moving the time bar or input the exact time period. 3. (Optional) Click Delete to delete the current arming schedule, or click Save to save the settings. 4.
Dual-Lens People Counting Camera User Manual Notify Surveillance Center Send an exception or alarm signal to remote management software when an event occurs. 4.2.2 Data Uploading Setting Select a trigger counting mode. None, or trigger by alarm input. None: Camera keeps counting, unaffected by door status. When you select None, people counting data is sent to surveillance center and client software through SDK (default) and HTTP (if configured).
Dual-Lens People Counting Camera User Manual 4.2.3 Advanced Settings Advanced page shows some maintenance settings which are not necessary for proper functioning. Display Rule info. on Stream Check to write rule information of people counting on video stream. Display Height Calculated height information can be displayed on persons in the live image. Note: To display height on person, you should first enable Display POS Information at Local settings.
Dual-Lens People Counting Camera User Manual 4.3 Statistics Output You can search and output the counting statistics on Application tab. Steps: 1. Select the report type. Daily report, weekly report, monthly report, and annual report are selectable.
Dual-Lens People Counting Camera User Manual Chapter 5 Live View 5.1 Live View Page Purpose: The live view page allows you to view the real-time video, capture images, and configure video parameters. Log in the network camera to enter the live view page, or you can click Live View on the menu bar of the main page to enter the live view page.
Dual-Lens People Counting Camera User Manual start/stop live view, capture, record, start/stop digital zoom, etc. For IE (Internet Explorer) users, plug-ins as webcomponents and quick time are selectable. And for Non-IE users, webcomponents, quick time, VLC or MJPEG is selectable if they are supported by the web browser. 5.2 Starting Live View In the live view window, click on the toolbar to start the live view of the camera.
Dual-Lens People Counting Camera User Manual Chapter 6 Network Camera Configuration 6.1 Configuring Local Parameters Purpose: The local configuration refers to the parameters of the live view, record files and captured pictures. The record files and captured pictures are the ones you record and capture using the web browser and thus the saving paths of them are on the PC running the browser. Steps: 1. Enter the Local Configuration interface: Configuration > Local.
Dual-Lens People Counting Camera User Manual UDP: Provides real-time audio and video streams. HTTP: Allows the same quality as of TCP without setting specific ports for streaming under some network environments. MULTICAST: It’s recommended to select MCAST type when using the Multicast function. For detailed information about Multicast, refer to Section 7.1.1 Configuring TCP/IP Settings. Play Performance: Set the play performance to Shortest Delay or Auto.
Dual-Lens People Counting Camera User Manual Save clips to: Set the saving path of the clipped video files in playback mode. Note: You can click Browse to change the directory for saving the clips and pictures, and click Open to open the set folder of clips and picture saving. 3. Click Save to save the settings. 6.2 Configure System Settings Purpose: Follow the instructions below to configure the system settings, include System Settings, Maintenance, Security, and User Management, etc. 6.2.
Dual-Lens People Counting Camera User Manual Figure 6-2 Basic Information 6.2.2 Configuring Time Settings Purpose: You can follow the instructions in this section to configure the time synchronization and DST settings. Steps: 1. Enter the Time Settings interface, Configuration > System> System Settings > Time Settings.
Dual-Lens People Counting Camera User Manual Figure 6-3 Time Settings 2. Select the Time Zone of your location from the drop-down menu. 3. Configure the NTP settings. (1) Click to enable the NTP function. (2) Configure the following settings: Server Address: IP address of NTP server. NTP Port: Port of NTP server. Interval: The time interval between the two synchronizing actions with NTP server. (3) (Optional) You can click the Test button to test the time synchronization function via NTP server.
Dual-Lens People Counting Camera User Manual Center (IP Address: 210.72.145.44). If the camera is set in a customized network, NTP software can be used to establish a NTP server for time synchronization. Configure the manual time synchronization. (1) Check the Manual Time Sync. item to enable the manual time synchronization function. (2) Click the icon to select the date, time from the pop-up calendar. (3) (Optional) You can check Sync.
Dual-Lens People Counting Camera User Manual 2. Configure the Baud Rate, Data Bit, Stop Bit, Parity, Flow Control, and Usage. Figure 6-6 RS232 Settings Note: If you want to connect the camera by the RS232 port, the parameters of the RS232 should be exactly the same with the parameters you configured here. 3. Click Save to save the settings. 6.2.4 Configuring RS485 Settings Purpose: The RS485 serial port is used to control the PTZ of the camera.
Dual-Lens People Counting Camera User Manual Figure 6-7 RS-485 Settings 2. Set the RS485 parameters and click Save to save the settings. By default, the Baud Rate is set as 9600 bps, the Data Bit is 8, the stop bit is 1 and the Parity and Flow Control is None. Note: The Baud Rate, PTZ Protocol and PTZ Address parameters should be exactly the same as the PTZ camera parameters. 6.2.
Dual-Lens People Counting Camera User Manual Figure 6-8 DST Settings 2. Select the start time and the end time. 3. Select the DST Bias. 4. Click Save to activate the settings. 6.2.6 Open Source Software License Information about the open source software that applies to the IP camera can be checked if required. Go to Configuration > System Settings > About. 6.3 Maintenance 6.3.
Dual-Lens People Counting Camera User Manual Export/Import Config. File: Configuration file is used for the batch configuration of the camera, which can simplify the configuration steps when there are a lot of cameras needing configuring. Steps: 1. Click Device Parameters to export the current configuration file, and save it to certain place. 2. Click Browse to select the saved configuration file and then click Import to start importing configuration file.
Dual-Lens People Counting Camera User Manual Figure 6-9 Log Searching Interface 2. Set the log search conditions to specify the search, including the Major Type, Minor Type, Start Time and End Time. 3. Click Search to search log files. The matched log files will be displayed on the log list interface. Figure 6-10 Log Searching 4. To export the log files, click Export to save the log files. 6.3.3 System Service System service settings refer to the hardware service the camera supports.
Dual-Lens People Counting Camera User Manual 6.4 Security Settings Configure the parameters, including Authentication, and Security Service from security interface. 6.4.1 Authentication Purpose: You can specifically secure the stream data of live view. Steps: 1. Enter the Authentication interface: Configuration > System > Security > Authentication. Figure 6-11 RTSP Authentication 2. Select the RTSP Authentication type basic or disable in the drop-down list to enable or disable the RTSP authentication.
Dual-Lens People Counting Camera User Manual Figure 6-12 Security Service 2. Check the checkbox of Enable Illegal Login Lock, and then the IP address will be locked if the admin user performs 7 failed user name/password attempts (5 times for the operator/user). Note: If the IP address is locked, you can try to login the device after 30 minutes. 6.5 User Management 6.5.1 User Management Purpose: The admin user can add, delete or modify user accounts, and grant them different permissions.
Dual-Lens People Counting Camera User Manual The admin user cannot be deleted and you can only change the admin password. Steps: 1. Click Add to add a user. 2. Input the User Name, select Level and input Password. Notes: ● Up to 31 user accounts can be created. ● Users of different levels own different default permissions. Operator and user are selectable.
Dual-Lens People Counting Camera User Manual Figure 6-14 Add a User Modifying a User Steps: 1. Left-click to select the user from the list and click Modify. 2. Modify the User Name, Level and Password. 3.
Dual-Lens People Counting Camera User Manual Figure 6-15 Modify a User Deleting a User Steps: 1. Click to select the user you want to delete and click Delete. 2. Click OK on the pop-up dialogue box to confirm the deletion.
Dual-Lens People Counting Camera User Manual Chapter 7 Network Settings Purpose: Follow the instructions in this chapter to configure the basic settings and advanced settings. 7.1 Configuring Basic Settings Purpose: You can configure the parameters, including TCP/IP, DDNS, Port, and NAT, etc., by following the instructions in this section. 7.1.1 Configuring TCP/IP Settings Purpose: TCP/IP settings must be properly configured before you operate the camera over network.
Dual-Lens People Counting Camera User Manual Figure 7-1 TCP/IP Settings 2. Configure the basic network settings, including the NIC Type, IPv4 or IPv6 Address, IPv4 or IPv6 Subnet Mask, IPv4 or IPv6 Default Gateway, MTU settings and Multicast Address. 3. (Optional) Check the checkbox of Enable Multicast Discovery, and then the online network camera can be automatically detected by client software via private multicast protocol in the LAN. 4. Configure the DNS server.
Dual-Lens People Counting Camera User Manual Multicast function of your router. A reboot is required for the settings to take effect. 7.1.2 Configuring DDNS Settings Purpose: If your camera is set to use PPPoE as its default network connection, you can use the Dynamic DNS (DDNS) for network access. Before you start: Registration on the DDNS server is required before configuring the DDNS settings of the camera. Steps: 1. Enter the DDNS Settings interface: Configuration > Network > Basic Settings > DDNS.
Dual-Lens People Counting Camera User Manual Figure 7-2 DynDNS Settings NO-IP: Steps: (1) Choose the DDNS Type as NO-IP. Figure 7-3 NO-IP DNS Settings (2) Enter the Server Address as www.noip.com (3) Enter the Domain name you registered. (4) Enter the User Name and Password. (5) Click Save and then you can view the camera with the domain name. Note: Reboot the device to make the settings take effect. 7.1.
Dual-Lens People Counting Camera User Manual You can set the port No. of the camera, e.g., HTTP port, RTSP port and HTTPS port. Steps: 1. Enter the Port Settings interface, Configuration > Network > Basic Settings > Port Figure 7-4 Port Settings 2. Set the HTTP port, RTSP port, HTTPS port and server port of the camera. HTTP Port: The default port number is 80, and it can be changed to any port No. which is not occupied. RTSP Port: The default port number is 554 and it can be changed to any port No.
Dual-Lens People Counting Camera User Manual implementation of networks in the home and corporate environments. With the function enabled, you don’t need to configure the port mapping for each port, and the camera is connected to the Wide Area Network via the router. Steps: 1. Enter the NAT settings interface. Configuration > Network > Basic Settings > NAT. 2. Check the checkbox to enable the UPnP™ function. 3. Choose a nickname for the camera, or you can use the default name. 4.
Dual-Lens People Counting Camera User Manual or a timing snapshot task. Steps: 1. Enter the FTP Settings interface: Configuration > Network > Advanced Settings > FTP. Figure 7-6 FTP Settings 2. Input the FTP address and port. 3. Configure the FTP settings; and the user name and password are required for the FTP server login. For your privacy and to better protect your system against security risks, we strongly recommend the use of strong passwords for all functions and network devices.
Dual-Lens People Counting Camera User Manual parent directory and child directory. When the parent directory is selected, you have the option to use the Device Name, Device Number or Device IP for the name of the directory; and when the Child Directory is selected, you can use the Camera Name or Camera No. as the name of the directory. 5. Check the Upload Picture checkbox to enable the function. Upload Picture: To enable uploading the captured picture to the FTP server.
Dual-Lens People Counting Camera User Manual Sender: The name of the email sender. Sender’s Address: The email address of the sender. SMTP Server: IP address or host name (e.g., smtp.263xmail.com) of the SMTP Server. SMTP Port: The SMTP port. The default TCP/IP port for SMTP is 25 (not secured). And the SSL SMTP port is 465. Email Encryption: None, SSL, and TLS are selectable. When you select SSL or TLS and disable STARTTLS, e-mails will be sent after encrypted by SSL or TLS.
Dual-Lens People Counting Camera User Manual responsibility of the installer and/or end-user. The Receiver table: Select the receiver to which the email is sent. Up to 3 receivers can be configured. Receiver: The name of the user to be notified. Receiver’s Address: The email address of user to be notified. Figure 7-7 Email Settings 4. Click Save to save the settings. 7.2.3 Platform Access Purpose: Platform access provides you an option to manage the devices via platform. Steps: 1.
Dual-Lens People Counting Camera User Manual device. 3. Select the Platform Access Mode. Note: Hik-Connect is an application for mobile devices. With the App, you can view live image of the camera, receive alarm notification and so on. If you select Platform Access Mode as Hik-Connect, 1) Click and read "Terms of Service" and "Privacy Policy" in pop-up window. 2) Create a verification code or change the verification code for the camera.
Dual-Lens People Counting Camera User Manual protects against Man-in-the-middle attacks. Perform the following steps to set the port number of https. E.g., If you set the port number as 443 and the IP address is 192.168.1.64, you may access the device by inputting https://192.168.1.64:443 via the web browser. Steps: 1. Enter the HTTPS settings interface. Configuration > Network > Advanced Settings > HTTPS. 2. Check the checkbox of Enable to enable the function. 3.
Dual-Lens People Counting Camera User Manual authority for signature. (4) After receiving the signed valid certificate, import the certificate to the device. 4. There will be the certificate information after your successfully creating and installing the certificate. Figure 7-9 Installed Certificate 5. Click the Save button to save the settings. 7.2.
Dual-Lens People Counting Camera User Manual and Management DSCP. The valid value range of the DSCP is 0 to 63. The bigger the DSCP value is, the higher the priority is. Note: DSCP refers to the Differentiated Service Code Point; and the DSCP value is used in the IP header to indicate the priority of the data. 3. Click Save to save the settings. Note: A reboot is required for the settings to take effect. 7.2.6 Configuring 802.1X Settings Purpose: The IEEE 802.
Dual-Lens People Counting Camera User Manual Figure 7-11 802.1X Settings 2. Check the Enable IEEE 802.1X checkbox to enable the feature. 3. Configure the 802.1X settings, including Protocol, EAPOL version, User Name, Password and Confirm. Note: The EAPOL version must be identical with that of the router or the switch. 4. Enter the user name and password to access the server. 5. Click Save to finish the settings. Note: A reboot is required for the settings to take effect. 7.2.
Dual-Lens People Counting Camera User Manual Figure 7-12 HTTP Listening 2. Enter the desired destination IP or host name, URL and port. 3. You can click Test to test whether the entered IP address or host name are valid. 4. Or you can click Default to reset the destination IP or host name.
Dual-Lens People Counting Camera User Manual Chapter 8 Video/Audio Settings 8.1 Configuring Video Settings Steps: 1. Enter the Video Settings interface, Configuration > Video/Audio > Video Figure 8-1 Video Settings 2. Select the Stream Type of the camera to main stream (normal) or sub-stream. Notes: The main stream is usually for recording and live view with good bandwidth, and the sub-stream can be used for live view when the bandwidth is limited. 3.
Dual-Lens People Counting Camera User Manual Select the bitrate type to constant or variable. Video Quality: When bitrate type is selected as Variable, 6 levels of video quality are selectable. Frame Rate: Set the frame rate. The frame rate is to describe the frequency at which the video stream is updated and it is measured by frames per second (fps). A higher frame rate is advantageous when there is movement in the video stream, as it maintains image quality throughout. Max. Bitrate: Set the max.
Dual-Lens People Counting Camera User Manual The video parameters vary according to different camera models. Refer to the actual display page for camera functions.
Dual-Lens People Counting Camera User Manual Chapter 9 Image Settings Purpose: Follow the instructions in this chapter to configure the image parameters, including display settings, and OSD settings. 9.1 Configuring Display Settings Purpose: Configure the image adjustment, exposure settings, day/night switch, backlight settings, white balance, image enhancement, video adjustment, and other parameters in display settings. Note: The display parameters vary according to the different camera models.
Dual-Lens People Counting Camera User Manual Figure 9-1 Exposure Settings Day/Night Switch Day/Night Switch controls the status of supplement light. Day, Night, Auto, and Scheduled-Switch are selectable for day/night switch. Figure 9-2 Day/Night Switch Day: the camera stays at day mode. Night: the camera stays at night mode. Auto: the camera switches between the day mode and the night mode according to the illumination automatically.
Dual-Lens People Counting Camera User Manual Capture Mode: It’s the selectable video input mode to meet the different demands of field of view and resolution. 9.2 Configuring OSD Settings Purpose: You can customize the camera name, time/date format, display mode, and OSD size displayed on the live view. Steps: 1. Enter the OSD Settings interface: Configuration > Image > OSD Settings. 2. Check the corresponding checkbox to select the display of camera name, date or week if required. 3.
Dual-Lens People Counting Camera User Manual Chapter 10 Event Settings 10.1 Basic Events You can configure the basic events by following the instructions in this section, including video tampering, alarm input, alarm output, and exception, etc. These events can trigger the linkage methods, such as Notify Surveillance Center, Send Email, Trigger Alarm Output, etc.
Dual-Lens People Counting Camera User Manual Figure 10-1 Video Tampering Alarm 2. Check Enable checkbox to enable the video tampering detection. 3. Set the video tampering area. 4. Set arming schedule for video tampering.
Dual-Lens People Counting Camera User Manual Steps: 1. Click Arming Schedule to edit the arming schedule. 2. Click on the time bar and drag the mouse to select the time period. Figure 10-3 Arming Schedule Note: Click on the selected time period, you can adjust the time period to the desired time by either moving the time bar or input the exact time period. 3. (Optional) Click Delete to delete the current arming schedule, or click Save to save the settings. 4.
Dual-Lens People Counting Camera User Manual Figure 10-4 Linkage Method Note: The linkage methods vary according to the different camera models. Audible Warning Trigger the audible warning locally. And it only supported by the device that have the audio output. Notify Surveillance Center Send an exception or alarm signal to remote management software when an event occurs. Send Email Send an email with alarm information to a user or users when an event occurs.
Dual-Lens People Counting Camera User Manual Trigger Channel The video will be recorded when the motion is detected. You have to set the recording schedule to realize this function. Please refer to Section 11.1 for detailed information. Trigger Alarm Output Trigger one or more external alarm outputs when an event occurs. Note: To trigger an alarm output when an event occurs, please refer to Section 10.1.3 Configuring Alarm Output to set the related parameters. 6. Click Save to save the settings.
Dual-Lens People Counting Camera User Manual 3. Click Arming Schedule to set the arming schedule for the alarm input. 4. Click Linkage Method and check the checkbox to select the linkage method taken for the alarm input. 5. You can copy your settings to other alarm inputs. 6. Click Save to save the settings. 10.1.3 Configuring Alarm Output Figure 10-6 Alarm Output Settings Steps: 1. Enter the Alarm Output Settings interface: Configuration> Event > Basic Event > Alarm Output. 2.
Dual-Lens People Counting Camera User Manual 7. Click Arming Schedule to enter the Edit Schedule Time interface. 4. You can copy the settings to other alarm outputs. 5. Click Save to save the settings. 10.1.4 Handling Exception The exception type can be HDD full, HDD error, network disconnected, IP address conflicted and illegal login to the cameras. Steps: 1. Enter the Exception Settings interface: Configuration > Event > Basic Event > Exception. 2.
Dual-Lens People Counting Camera User Manual Chapter 11 Storage Settings Before you start: To configure record settings, please make sure that you have the network storage device or local storage device configured. 11.1 Configuring Record Schedule Purpose: There are two kinds of recording for the cameras: manual recording and scheduled recording. In this section, you can follow the instructions to configure the scheduled recording.
Dual-Lens People Counting Camera User Manual Figure 11-2 Record Parameters Pre-record: The time you set to start recording before the scheduled time or the event. For example, if an alarm triggers recording at 10:00, and the pre-record time is set as 5 seconds, the camera starts to record at 9:59:55. The Pre-record time can be configured as No Pre-record, 5s, 10s, 15s, 20s, 25s, 30s or not limited. Post-record: The time you set to stop recording after the scheduled time or the event.
Dual-Lens People Counting Camera User Manual Record Triggered by Alarm If you select Alarm, the video will be recorded when the alarm is triggered via the external alarm input channels. Besides configuring the recording schedule, you have to set the Alarm Type and check the checkbox of Trigger Channel in the Linkage Method of Alarm Input Settings interface.
Dual-Lens People Counting Camera User Manual 1. Enter the Capture Settings interface: Configuration > Storage > Storage Settings > Capture. Figure 11-3 Capture Configuration 2. Go to Capture Schedule tab to configure the capture schedule by click-and-drag the mouse on the time bar. You can copy the record schedule to other days by clicking the green copy icon on the right of each time bar. 3. Click Advanced to select stream type. Figure 11-4 Advanced Setting of Capture Schedule 4.
Dual-Lens People Counting Camera User Manual (3) Check the Enable Event-triggered Snapshot checkbox to enable event-triggered snapshot. (4) Select the picture format, resolution, quality, capture interval, and capture number. Figure 11-5 Set Capture Parameters 6. Set the time interval between two snapshots. 7. Click Save to save the settings.
Dual-Lens People Counting Camera User Manual Chapter 12 Playback Purpose: This section explains how to view the remotely recorded video files stored in the network disks or SD cards. Steps: 1. Click Playback on the menu bar to enter playback interface. Figure 12-1 Playback Interface 2. Select the date and click Search. Figure 12-2 Search Video 3. Click to play the video files found on this date.
Dual-Lens People Counting Camera User Manual process. Figure 12-3 Playback Toolbar Table 12-1 Description of the buttons Button Operation Button Operation Play Pause / Stop / / Capture a picture Start/Stop clipping video files Audio on and adjust volume/Mute Speed down Download Speed up Playback by frame Enable/Disable digital zoom Note: You can choose the file paths locally for downloaded playback video files and pictures in Local Configuration interface.
Dual-Lens People Counting Camera User Manual Chapter 13 Picture Click Picture to enter the picture searching interface. You can search, view, and download the pictures stored in the local storage or network storage. Notes: Make sure HDD, NAS or memory card are properly configured before you process the picture search. Make sure the capture schedule is configured. Go to Configuration > Storage > Schedule Settings > Capture to set the capture schedule. Figure 13-1 Picture Search Interface Steps: 1.
Dual-Lens People Counting Camera User Manual Chapter 14 Application Click Application to enter the statistics counting interface. You can search, view, and download the counting data stored in the local storage or network storage. Note: Application function varies according to the different camera models. 14.1 People Counting Statistics After you enable the people counting function, you can view and download the people counting data from application tab.
Dual-Lens People Counting Camera User Manual Appendix Appendix 1 SADP Software Introduction Description of SADP SADP (Search Active Devices Protocol) is a kind of user-friendly and installation-free online device search tool. It searches the active online devices within your subnet and displays the information of the devices. You can also modify the basic network information of the devices using this software.
Dual-Lens People Counting Camera User Manual You can also click to refresh the online device list manually. The newly searched devices will be added to the list. You can click you can click or on each column heading to order the information; to expand the device table and hide the network parameter panel on the right side, or click to show the network parameter panel. Modify network parameters Steps: 1.
Dual-Lens People Counting Camera User Manual Figure A.1.
Dual-Lens People Counting Camera User Manual Appendix 2 Port Mapping The following settings are for TP-LINK router (TL-WR641G). The settings vary depending on different models of routers. Steps: 1. Select the WAN Connection Type, as shown below: Figure A.2.1 Select the WAN Connection Type 2. Set the LAN parameters of the router as in the following figure, including IP address and subnet mask settings. Figure A.2.2 Set the LAN parameters 3. Set the port mapping in the virtual severs of Forwarding.
Dual-Lens People Counting Camera User Manual another camera as 81, 8001, 555, 8201 with IP 192.168.1.24. Refer to the steps as below: Steps: 1. As the settings mentioned above, map the port 80, 8000, 554 and 8200 for the network camera at 192.168.1.23 2. Map the port 81, 8001, 555 and 8201 for the network camera at 192.168.1.24. 3. Enable ALL or TCP protocols. 4. Check the Enable checkbox and click Save to save the settings. Figure A.2.
Dual-Lens People Counting Camera User Manual 88