
User Manual
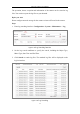
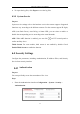
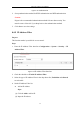
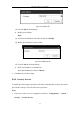
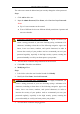
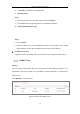
Table Of Contents
- Chapter 1 System Requirement
- Chapter 2 Network Connection
- Chapter 3 Access to the Network Camera
- Chapter 4 Wi-Fi Settings
- Chapter 5 Live View
- Chapter 6 Network Camera Configuration
- Chapter 7 Network Settings
- Chapter 8 Video/Audio Settings
- Chapter 9 Image Settings
- Chapter 10 Event Settings
- Chapter 11 People Counting
- Chapter 12 Storage Settings
- Chapter 13 Playback
- Chapter 14 Picture
- Chapter 15 Application
- Appendix

Network Camera User Manual
51
• For camera that supports Wi-Fi, wireless dial, or wlan function, Restore
action does not restore the related settings of mentioned functions to default.
Information Export
Device Parameters: click to export the current configuration file of the camera.
This operation requires admin password to proceed.
For the exported file, you also have to create an encryption password. The
encryption password is required when you import the file to other cameras.
Diagnose Information: click to download log and system information.
Import Config. File
Configuration file is used for the batch configuration of the cameras.
Steps:
1. Click Browse to select the saved configuration file.
2. Click Import and input the encryption password that you set during
exporting.
Note: You need to reboot the camera after importing configuration file.
Upgrade: Upgrade the device to a certain version.
Steps:
1. Select firmware or firmware directory to locate the upgrade file.
Firmware: Locate the exact path of the upgrade file.
Firmware Directory: Only the directory the upgrade file belongs to is
required.
2. Click Browse to select the local upgrade file and then click Upgrade to start
remote upgrade.
Note: The upgrading process will take 1 to 10 minutes. Please don't disconnect
power of the camera during the process, and the camera reboots automatically
after upgrade.
6.3.2 Log
Purpose: