
User Manual
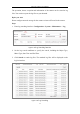
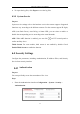
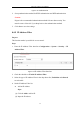
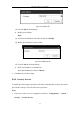
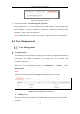
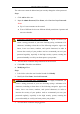
Table Of Contents
- Chapter 1 System Requirement
- Chapter 2 Network Connection
- Chapter 3 Access to the Network Camera
- Chapter 4 Wi-Fi Settings
- Chapter 5 Live View
- Chapter 6 Network Camera Configuration
- Chapter 7 Network Settings
- Chapter 8 Video/Audio Settings
- Chapter 9 Image Settings
- Chapter 10 Event Settings
- Chapter 11 People Counting
- Chapter 12 Storage Settings
- Chapter 13 Playback
- Chapter 14 Picture
- Chapter 15 Application
- Appendix

Network Camera User Manual
50
the Start Time and End Time.
Figure 6-9 Set Schedule
Auto: The LED will be turned on according to the environment illumination.
5. Click Save to save the settings.
6.2.7 Open Source Software License
Information about the open source software that applies to the IP camera can be
checked if required. Go to Configuration > System Settings > About.
6.3 Maintenance
Upgrade & Maintenance
Purpose:
The upgrade & maintenance interface allows you to process the operations, including
reboot, partly restore, restore to default, export/import the configuration files, and
upgrade the device.
Enter the Maintenance interface: Configuration > System > Maintenance >
Upgrade & Maintenance.
Reboot: Restart the device.
Restore: Reset all the parameters, except the IP parameters and user information,
to the default settings.
Default: Restore all the parameters to the factory default.
Notes:
• After restoring the default settings, the IP address is also restored to the
default IP address, please be careful for this action.