
Quick Start Guide
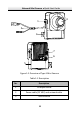
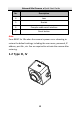
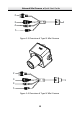
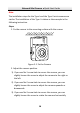
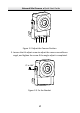
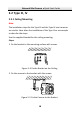
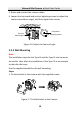
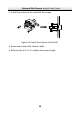
Table Of Contents

Network Mini Camera·Quick Start Guide
19
19
3. Route and connect the camera cables.
4. Loosen the horizontal and vertical adjusting screws to adjust the
camera surveillance angel, and then tighten the screws.
Vertical
Adjusting Screw
Horizontal
Adjusting Screw
Adjust the Camera Angle Figure 2-6
Wall Mounting 2.2.2
Note:
The installation steps for the Type III and the Type IV mini cameras
are similar. Here takes the installation of the Type IV as an example
to describe the steps.
Use the supplied bracket for the wall mounting.
Steps:
1. Fix the bracket to the camera with the supplied screws.
Fix the Bracket to the Camera Figure 2-7