
Quick Start Guide
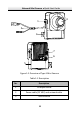
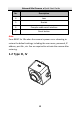
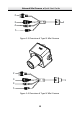
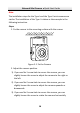
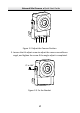
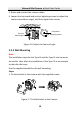
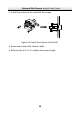
Table Of Contents

Network Mini Camera·Quick Start Guide
16
16
Note:
The installation steps for the Type I and the Type II mini cameras are
similar. The installation of the Type I is taken as the example in the
following instruction.
Steps:
Fix the camera to the mounting surface with the screws. 1.
Figure 2-1 Fix the Camera
Adjust the camera position. 2.
1). If you use No.1 screw hole to secure the camera, you can
slightly loosen the screw to adjust the camera to the right or
the left.
2). If you use No.2 screw hole to secure the camera, you can
slightly loosen the screw to adjust the camera upwards or
downwards.
3). If you use No.3 screw hole to secure the camera, you can
slightly loosen the screw to rotate the camera horizontally.