
User Manual

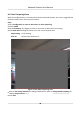


Table Of Contents
- Initiatives on the Use of Video Products
- Legal Information
- Chapter 1 Device Activation and Accessing
- Chapter 2 Network Camera Configuration
- 2.1 Update Firmware
- 2.2 Symbol Conventions
- 2.3 Safety Instruction
- 2.4 System Requirement
- 2.5 Live View
- 2.6 Video and Audio
- 2.7 Video Recording and Picture Capture
- 2.8 Event and Alarm
- 2.9 Network Settings
- 2.10 Arming Schedule and Alarm Linkage
- 2.11 System and Security
- 2.11.1 View Device Information
- 2.11.2 Search and Manage Log
- 2.11.3 Simultaneous Login
- 2.11.4 Import and Export Configuration File
- 2.11.5 Export Diagnose Information
- 2.11.6 Reboot
- 2.11.7 Restore and Default
- 2.11.8 Upgrade
- 2.11.9 Device Auto Maintenance
- 2.11.10 View Open Source Software License
- 2.11.11 Wiegand
- 2.11.12 Metadata
- 2.11.13 Time and Date
- 2.11.14 Set RS-485
- 2.11.15 Set RS-232
- 2.11.16 Power Consumption Mode
- 2.11.17 External Device
- 2.11.18 Security
- 2.11.19 Certificate Management
- 2.11.20 User and Account
- 2.12 VCA Resource
- 2.13 Smart Display
- 2.14 EPTZ
- 2.15 Image Stitching
- Appendix A. FAQ
- Appendix B. Device Command
- Appendix C. Device Communication Matrix

2.
Check Enable Alarm Input Handling.
3.
Select Alarm Input NO. and Alarm Type from the dropdown list. Edit the Alarm Name.
4.
Refer to Set Arming Schedule for seng scheduled me. Refer to Linkage Method Sengs for
seng linkage method.
5.
Click Copy to... to copy the
sengs to other alarm input channels.
6.
Click Save.
Set Video Quality Diagnosis
When the video quality of the device is abnormal and the alarm linkage is set, the alarm will be
triggered automacally.
Steps
1.
Go to
Conguraon → Event → Basic Event → Video Quality Diagnosis .
2.
Select Diagnosis Type.
3.
Set the corresponding parameters.
Alarm
Detecon Interval
The
me interval to detect the excepon.
Sensivity
The higher the value is, the more easily the excepon will be detected, and the higher
possibility of
misinformaon would be.
Alarm Delay Times
The device uploads the alarm when the alarm reaches the set number of mes.
4.
Check Enable, and the selected diagnosis type will be detected.
5.
Set arming schedule. See
Set Arming Schedule .
6.
Set linkage method. See Linkage Method Sengs .
7.
Click Save.
Note
The funcon is only supported by certain models. The actual display varies with models.
Set Vibraon Detecon
It is used to detect whether the device is vibrang. The device reports an alarm and triggers linkage
acons if the funcon is enabled.
Steps
1.
Go to Conguraon → Event → Basic Event → Vibraon Detecon .
2.
Check Enable.
3.
Drag the slider to set the
detecon sensivity. You can also enter number to set the sensivity.
4.
Set the arming schedule. See Set Arming Schedule .
Network Camera User Manual
50