
User Manual
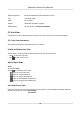
Table Of Contents
- Initiatives on the Use of Video Products
- Legal Information
- Chapter 1 Device Activation and Accessing
- Chapter 2 Network Camera Configuration
- 2.1 Update Firmware
- 2.2 Symbol Conventions
- 2.3 Safety Instruction
- 2.4 System Requirement
- 2.5 Live View
- 2.6 Video and Audio
- 2.7 Video Recording and Picture Capture
- 2.8 Event and Alarm
- 2.9 Network Settings
- 2.10 Arming Schedule and Alarm Linkage
- 2.11 System and Security
- 2.11.1 View Device Information
- 2.11.2 Search and Manage Log
- 2.11.3 Simultaneous Login
- 2.11.4 Import and Export Configuration File
- 2.11.5 Export Diagnose Information
- 2.11.6 Reboot
- 2.11.7 Restore and Default
- 2.11.8 Upgrade
- 2.11.9 Device Auto Maintenance
- 2.11.10 View Open Source Software License
- 2.11.11 Wiegand
- 2.11.12 Metadata
- 2.11.13 Time and Date
- 2.11.14 Set RS-485
- 2.11.15 Set RS-232
- 2.11.16 Power Consumption Mode
- 2.11.17 External Device
- 2.11.18 Security
- 2.11.19 Certificate Management
- 2.11.20 User and Account
- 2.12 VCA Resource
- 2.13 Smart Display
- 2.14 EPTZ
- 2.15 Image Stitching
- Appendix A. FAQ
- Appendix B. Device Command
- Appendix C. Device Communication Matrix

Select the Third-Party Plug-in
When the live view cannot display via certain browsers, you can change the plug-in for live view
according to the browser.
Steps
1.
Click Live View.
2.
Click
to select the plug-in.
-
When you access the device via Internet Explorer, you can select Webcomponents or
QuickTime.
-
When you access the device via the other browsers, you can select Webcomponents,
QuickTime, VLC or MJPEG.
Window Division
●
refers to 1 × 1 window division.
●
refers to 2 × 2 window division.
●
refers to 3 × 3 window division.
●
refers to 4 × 4 window division.
Light
Click to turn on or turn o the illuminator.
Count Pixel
It helps to get the height and width pixel of the selected region in the live view image.
Steps
1.
Click to enable the funcon.
2.
Drag the mouse on the image to select a desired rectangle area.
The width pixel and height pixel are displayed on the
boom of the live view image.
Start Digital Zoom
It helps to see a detailed informaon of any region in the image.
Steps
1.
Click to enable the digital zoom.
2.
In live view image, drag the mouse to select the desired region.
3.
Click in the live view image to back to the original image.
Network Camera User Manual
16