Quick Start Guide
Manuals
Brands
Hikvision Manuals
Surveillance
4MP Vandal-Resistant Outdoor Network Dome Camera with 2.8-12mm Varifocal Lens & Night Vision
21
22
23
24
25
26
27
28
29
30
Table Of Contents
1 Appearance Description
1.1 Type I Camera
1.1.1 Overview
1.1.2 Cable Description
1.2 Type II Camera
1.2.1 Overview
1.2.2 Cable Description
2 Installation
2.1 Preparation
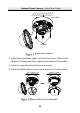
2.1.1 Disassembling
2.1.2 Memory Card Installation
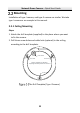
2.2 Mounting
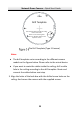
2.2.1 Ceiling Mounting
Conduit Installation on the Side
2.2.2 In-ceiling Mounting
2.2.3 Mounting with Wall Mounting Bracket
2.2.4 Mounting with Pendant Mounting Bracket
2.2.5 Mounting with Junction box
2.3 Image and Focus Adjusting
2.3.1 3-Axis Adjustment
2.3.2 Zoom and Focus Adjustment.
Manually Adjustment:
Motor-driven Lens:
3 Setting the Network Camera over the LAN
3.1 Wiring
3.2 Activating the Camera
3.2.1 Activation via Web Browser
3.2.2 Activation via SADP Software
3.3 Modifying the IP Address
4 Accessing via Web Browser
5 Operating via Hik-Connect App
5.1 Enable Hik-Connect Service on Camera
5.1.1 Enable Hik-Connect Service via SADP Software
5.1.2 Enable Hik-Connect Service via Web Browser
5.2 Hik-Connect Setup
5.3 Adding Camera to Hik-Connect
5.4 Initializing the Memory Card
Network Dome Camera
·
Quick Start Guide
21
21
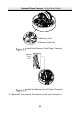
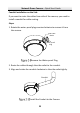
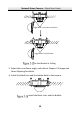
Memory Card
Memory Card Slot
Inst
all the M
emory Card (Type I Camera)
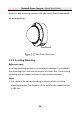
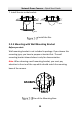
Memory
Card
Slot
Inst
all the M
emory Card (T
ype II Ca
mera)
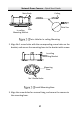
3.
(Optional) T
o unmo
unt the memory card, push to eject it.
1
...
...
19
20
21
22
23
...
...
59