
Quick Start Guide


QSG DS-2CD23xxxx-xx Turret 051420NA 13
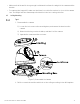
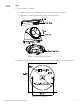
NOTE: Three side outlets on the enclosure are selectable, which makes routing the cables
easier instead of drilling a cable hole on the ceiling. Use a plier to remove the plastic,
and route the cables through the hole.
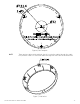
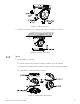
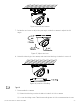
3.
Affix the mounting base to the ceiling with the supplied expansion screws.
Figure 8, Secure the Mounting to the Ceiling
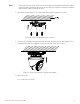
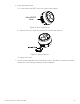
4.
Connect the corresponding power/network cable, and then install the camera to the
mounting base with the supplied screws. Rotate the camera to secure it.
Figure 9, Secure the Camera to the Mounting Base
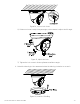
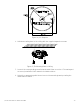
5.
Adjust the Lens.
1). Loosen the lock screw.