
User Manual
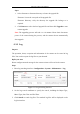
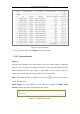
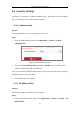
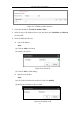
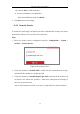
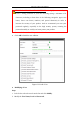
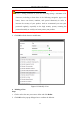
Table Of Contents
- Chapter 1 System Requirement
- Chapter 2 Network Connection
- Chapter 3 Access to the Network Camera
- Chapter 4 Wi-Fi Settings
- Chapter 5 Live View
- Chapter 6 Network Camera Configuration
- Chapter 7 Network Settings
- Chapter 8 Video/Audio Settings
- Chapter 9 Image Settings
- Chapter 10 Event Settings
- 10.1 Basic Events
- 10.2 Smart Events
- 10.2.1 Configuring Audio Exception Detection
- 10.2.2 Configuring Defocus Detection
- 10.2.3 Configuring Scene Change Detection
- 10.2.4 Configuring Face Detection
- 10.2.5 Configuring Intrusion Detection
- 10.2.6 Configuring Line Crossing Detection
- 10.2.7 Configuring Region Entrance Detection
- 10.2.8 Configuring Region Exiting Detection
- 10.2.9 Configuring Unattended Baggage Detection
- 10.2.10 Configuring Object Removal Detection
- 10.3 VCA Configuration
- Chapter 11 Storage Settings
- Chapter 12 Playback
- Chapter 13 Picture
- Chapter 14 Application
- Appendix

Network Camera User Manual
46
(3) Click the OK to finish modifying.
Delete an IP Address or IP Addresses.
Select the IP address(es) and click Delete.
5. Click Save to save the settings.
6.4.3 Security Service
To enable the remote login, and improve the data communication security, the camera
provides the security service for better user experience.
Steps:
1. Enter the security service configuration interface: Configuration > System >
Security > Security Service.
Figure 6-20 Security Service
2. Check the checkbox of Enable SSH to enable the data communication security,
and uncheck the checkbox to disable the SSH.
3. Check the checkbox of Enable Illegal Login Lock, and then the IP address will
be locked if the admin user performs 7 failed user name/password attempts (5
times for the operator/user).
Note: If the IP address is locked, you can try to login the device after 30 minutes.