
User Manual
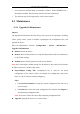
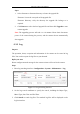
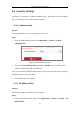
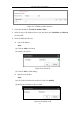
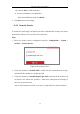
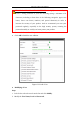
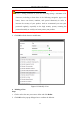
Table Of Contents
- Chapter 1 System Requirement
- Chapter 2 Network Connection
- Chapter 3 Access to the Network Camera
- Chapter 4 Wi-Fi Settings
- Chapter 5 Live View
- Chapter 6 Network Camera Configuration
- Chapter 7 Network Settings
- Chapter 8 Video/Audio Settings
- Chapter 9 Image Settings
- Chapter 10 Event Settings
- 10.1 Basic Events
- 10.2 Smart Events
- 10.2.1 Configuring Audio Exception Detection
- 10.2.2 Configuring Defocus Detection
- 10.2.3 Configuring Scene Change Detection
- 10.2.4 Configuring Face Detection
- 10.2.5 Configuring Intrusion Detection
- 10.2.6 Configuring Line Crossing Detection
- 10.2.7 Configuring Region Entrance Detection
- 10.2.8 Configuring Region Exiting Detection
- 10.2.9 Configuring Unattended Baggage Detection
- 10.2.10 Configuring Object Removal Detection
- 10.3 VCA Configuration
- Chapter 11 Storage Settings
- Chapter 12 Playback
- Chapter 13 Picture
- Chapter 14 Application
- Appendix

Network Camera User Manual
40
the Start Time and End Time.
Figure 6-11 Set Schedule
Auto: The LED will be turned on according to the environment illumination.
5. Click Save to save the settings.
6.2.7 Configuring VCA Resource
Purpose:
VCA resource offers you options to enable certain VCA functions according to actual
need when several VCA functions are available. It helps allocate more resources to
the wanted functions.
Figure 6-12 VCA Resource Configuration
Steps:
1. Enter VCA Resource configuration interface:
Configuration > System > System Settings > VCA Resource
2. Select a desired VCA combination. SMART Event + Face Detection and SMART
Event + Heat Map are selectable.
3. Click Save to save the settings. A reboot is required after setting the VCA
Resource.
Notes:
• VCA Resource function varies according to different camera models.