
User Manual
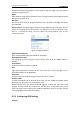
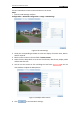
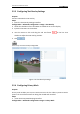
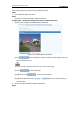

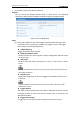
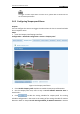
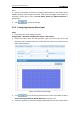
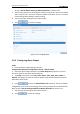
Table Of Contents
- Chapter 1 System Requirement
- Chapter 2 Network Connection
- Chapter 3 Access to the Network Camera
- Chapter 4 Live View
- Chapter 5 Network Camera Configuration
- Chapter 6 Storage Settings
- Chapter 7 Playback
- Chapter 8 Log Searching
- Chapter 9 Others
- Appendix

User Manual of Network Camera
40
image horizontally and vertically. It can be used to view the image in the way you see
it directly using your eyes.
WDR:
Wide dynamic range can be used when there is a high contrast of the bright area and
the dark area of the scene.
BLC Area:
BLC area is the area sense the light intensity; Close, Up, Down, Left, Right and Center
are selectable.
White Balance: The below figure shows the white balance type selectable. You can
choose it according to the real condition. For example, if in the surveillance scene,
there is a fluorescent lamp, you can choose the white balance type as the
Fluorescent Lamp.
Figure 5-22 White Balance
Digital Noise Reduction:
Close, Normal Mode and Expert Mode are selectable.
Noise Reduction Level:
For adjusting the noise reduction level and only valid when the DNR function is
enabled.
Scene Mode:
Choose the scene as indoor or outdoor.
HLC:
High light compression function can be used when there are strong lights in the
scene which affect the image quality.
Grey Scale:
You can choose the range of the grey scale as [0-255] or [16-235].
Corridor mode:
To make a complete use of the 16:9 aspect ratio, you can enable the corridor mode
when you use the camera in a narrow view scene.
When installing, turn the camera to the 90 degrees or rotate the 3-axis lens to 90
degrees, and set the corridor mode as on, you will get a normal view of the scene
with 9:16 aspect ratio to ignore the needless information such as the wall, and get
more meaningful information of the scene.
5.5.2 Configuring OSD Settings
Purpose: