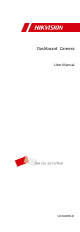
Dashboard Camera User Manual UD13287B-B
User Manual © 2018 Hangzhou Hikvision Digital Technology Co., Ltd. About this Manual This manual applies to Dashboard Camera. This Manual is subject to domestic and international copyright protection. Hangzhou Hikvision Digital Technology Co., Ltd. (“Hikvision”) reserves all rights to this manual. This manual cannot be reproduced, changed, translated, or distributed, partially or wholly, by any means, without the prior written permission of Hikvision.
Regulatory Information FCC Information FCC compliance: This product has been tested and found to comply with the limits for a Class B digital device, pursuant to Part 15 of the FCC Rules. These limits are designed to provide reasonable protection against harmful interference in a residential installation. This product generates, uses, and can radiate radio frequency energy and, if not installed and used in accordance with the instructions, may cause harmful interference to radio communications.
2012/19/EU (WEEE directive): Products marked with this symbol cannot be disposed of as unsorted municipal waste in the European Union. For proper recycling, return this product to your local supplier upon the purchase of equivalent new equipment, or dispose of it at designated collection points. For more information see: www.recyclethis.info. 2006/66/EC (battery directive): This product contains a battery that cannot be disposed of as unsorted municipal waste in the European Union.
When the product is mounted on wall or ceiling, the device shall be firmly fixed. If smoke, odor or noise rise from the device, turn off the power at once and unplug the power cable, and then please contact the service center. If the product does not work properly, contact your dealer or the nearest service center. Never attempt to disassemble the camera by yourself. (We shall not assume any responsibility for problems caused by unauthorized repair or maintenance.
risk, which if not avoided, will result in death or serious injury.
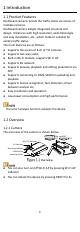
1 Introduction 1.1 Product Features Dashboard camera records the traffic status via access of multiple cameras. Dashboard camera adopts integrated structure and design. It features with high resolution, wide field angle and easy installation, etc., which makes it suitable for variety traffic status.
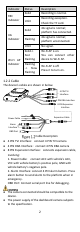
Indicator REC Indicator 4G Indicator Wi-Fi AP Indicator Status Description Solid Recording is normal. Unlit Recording exception. Check the TF card. Solid 4G signal is normal; platform has connected. Flashing 4G signal is normal; platform unconnected. Unlit No signal. Solid-> Fast Flashing Wi-Fi AP is on. You can connect other device to Wi-Fi AP. Flashing -> Slow Flashing Wi-Fi AP is off. Press it to turn on. 1.2.2 Cable The device’s cables are shown in below.
2 Installation Before you start: Please make sure that the device in the package is in good condition and all the assembly parts are included. Make sure that all the related equipment is power-off during the installation. Check the specification of the products for the installation environment. Check whether the power supply is matched with your power output to avoid damage. Be sure that there is enough space to install the camera and accessories.
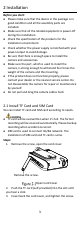
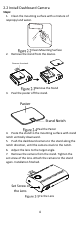
2.2 Install Dashboard Camera Steps: 1. Clean the mounting surface with a mixture of isopropyl and water. Clean Mounting Surface 2. Remove the stand from the device. Remove the stand. Remove the Stand 3. Peal the paster off the stand. Paster Stand Notch Peal the Paster 4. Paste the stand to the mounting surface with stand notch vertically downward. 5. Push the dashboard camera to the stand along the notch direction, until the camera stuck to the notch. 6. Adjust the lens to the target angle. 7.
2.3 Wiring and Start Device Steps: 1. (Optional) Connect TVI camera to the dashboard camera’s TVI interface according to needs. 2. Connect the dashboard camera’s power cable to the vehicle’s battery: a. Connect ACC with vehicle’s ACC; b. Connect VCC with vehicle battery’s positive pole; c. Connect GND with vehicle battery’s negative pole. 3. The dashboard camera starts automatically once the vehicle started. Check the recording indicator.