
User manual


Table Of Contents
- Chapter 1 Overview
- Chapter 2 Network Connection
- Chapter 3 Access to the Network Speed Dome
- Chapter 4 Live View
- Chapter 5 PTZ Configuration
- Chapter 6 Speed Dome Configuration
- 6.1 Configuring Local Parameters
- 6.2 Configuring Time Settings
- 6.3 Configuring Network Settings
- 6.3.1 Configuring TCP/IP Settings
- 6.3.2 Configuring Port Settings
- 6.3.3 Configuring PPPoE Settings
- 6.3.4 Configuring DDNS Settings
- 6.3.5 Configuring SNMP Settings
- 6.3.6 Configuring 802.1X Settings
- 6.3.7 Configuring QoS Settings
- 6.3.8 Configuring FTP Settings
- 6.3.9 Configuring UPnP™ Settings
- 6.3.10 Configuring NAT (Network Address Translation) Settings
- 6.3.11 Configuring Email Settings
- 6.4 Configuring Video and Audio Settings
- 6.5 Configuring Image Settings
- 6.6 Configuring and Handling Alarms
- Chapter 7 Record Settings
- Chapter 8 Playback
- Chapter 9 Log Searching
- Chapter 10 Others
- Appendix
User Manual of Network Speed Dome
© Hikvision
98
client software.
In the speed dome, the 8200~8210 ports change with the 8000 port with a constant
value of 200. E.g. if the 8000 port is changed to 8005, then the 8200~8210 ports should
be changed to 8205~8215.
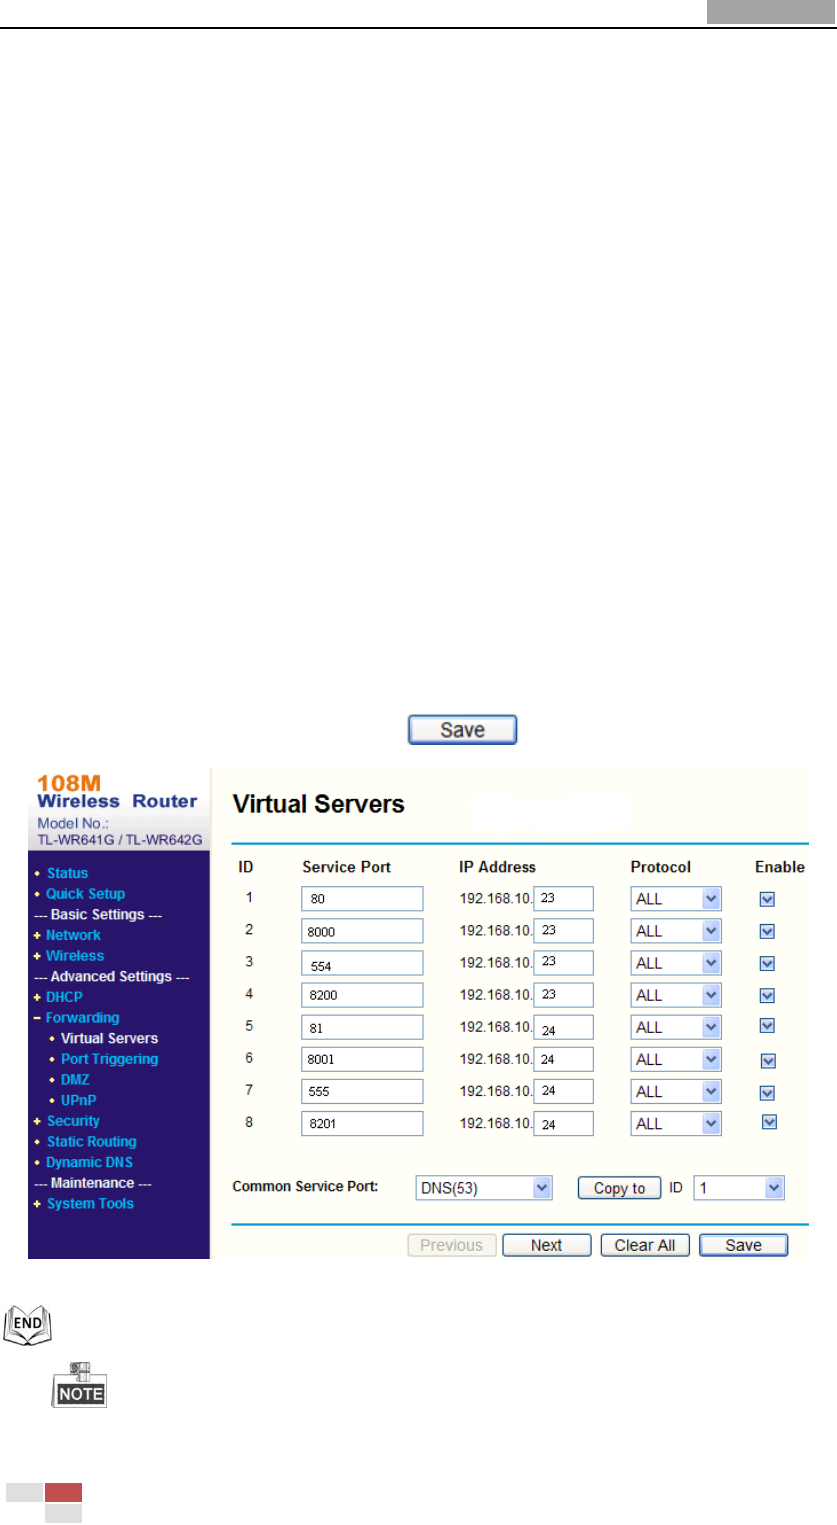
Example:
When the speed domes are connected to the same router, you can forward the ports of a
speed dome as 80, 8000, 8200~8210 and 554 with IP address 192.168.1.23, and the
ports of another speed dome as 81, 8001, 8201~8211 and 555 with IP 192.168.1.24.
Refer to the steps as below:
Steps:
1. As the settings mentioned above, forward the port 80, 8000, 8200~8210 and 554
for the network speed dome at 192.168.1.23
2. Forward the port 81, 8001, 8201~8211 and 555 for the network speed dome at
192.168.1.24.
3. Enable ALL or TCP protocols.
4. Check the Enable checkbox and click .
Figure A.2.3 Port Mapping
The port of the network speed dome cannot conflict with other ports. For example,
some web management port of the router is 80. Change the speed dome port if it is the