
User manual


Table Of Contents
- Chapter 1 Overview
- Chapter 2 Network Connection
- Chapter 3 Access to the Network Speed Dome
- Chapter 4 Live View
- Chapter 5 PTZ Configuration
- Chapter 6 Speed Dome Configuration
- 6.1 Configuring Local Parameters
- 6.2 Configuring Time Settings
- 6.3 Configuring Network Settings
- 6.3.1 Configuring TCP/IP Settings
- 6.3.2 Configuring Port Settings
- 6.3.3 Configuring PPPoE Settings
- 6.3.4 Configuring DDNS Settings
- 6.3.5 Configuring SNMP Settings
- 6.3.6 Configuring 802.1X Settings
- 6.3.7 Configuring QoS Settings
- 6.3.8 Configuring FTP Settings
- 6.3.9 Configuring UPnP™ Settings
- 6.3.10 Configuring NAT (Network Address Translation) Settings
- 6.3.11 Configuring Email Settings
- 6.4 Configuring Video and Audio Settings
- 6.5 Configuring Image Settings
- 6.6 Configuring and Handling Alarms
- Chapter 7 Record Settings
- Chapter 8 Playback
- Chapter 9 Log Searching
- Chapter 10 Others
- Appendix
User Manual of Network Speed Dome
© Hikvision
77
The Post-record time can be configured as 5 s, 10 s, 30 s, 1 min, 2 min, 5 min
or 10 min.
Overwrite: If you enable his function and the HDD is full, the new record files
overwrite the oldest record files automatically.
The Pre-record and Post-record parameters vary depending on the speed dome
model.
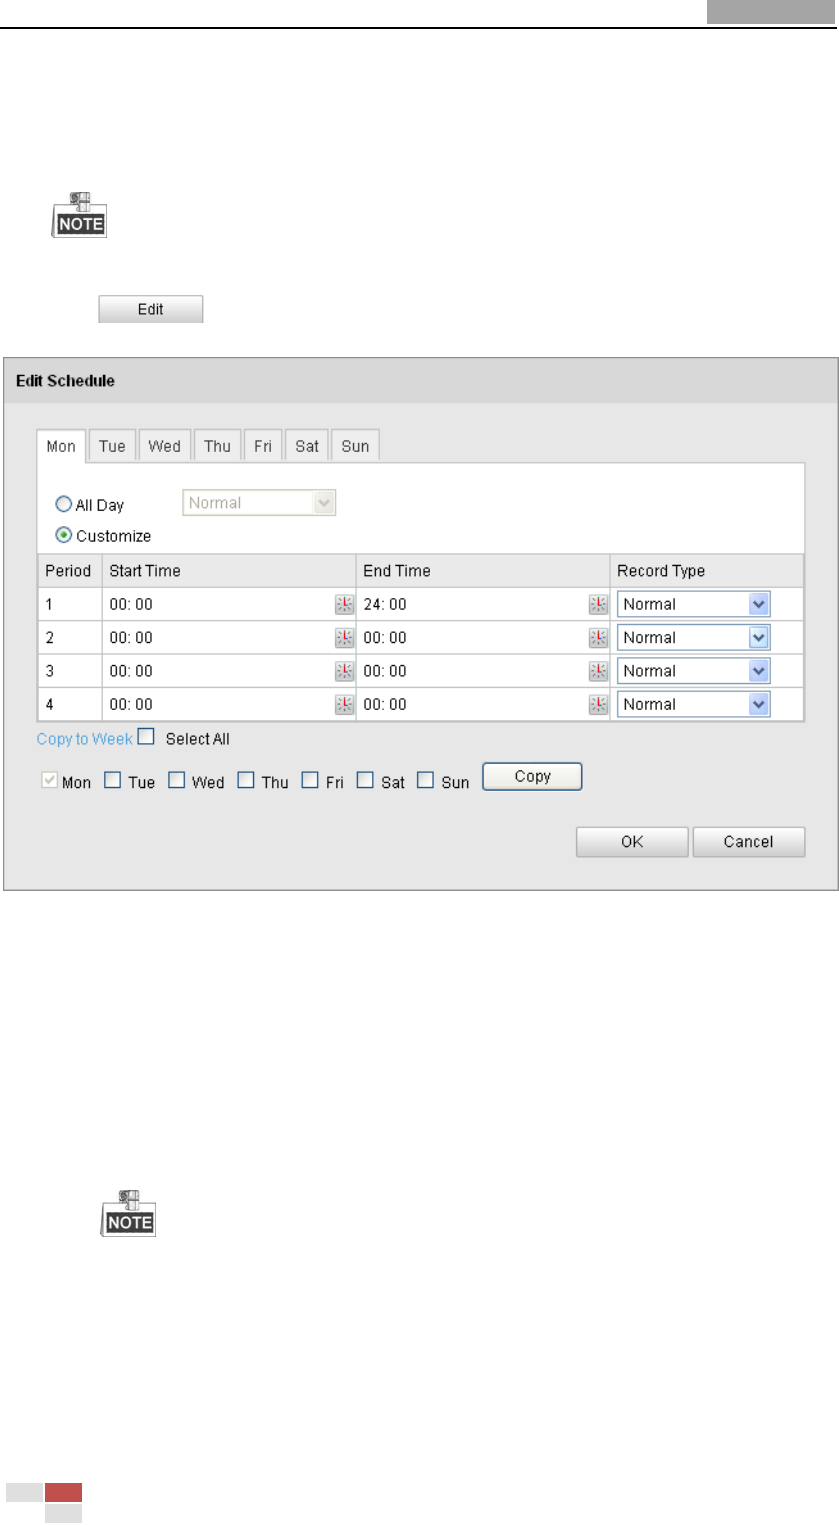
4. Click to edit the record schedule.
Figure 7-8 Record Schedule
5. Choose the day to set the record schedule.
(1) Set all-day record or segment record:
If you want to configure the all-day recording, please check the All Day
checkbox.
If you want to record in different time sections, check the Customize
checkbox. Set the Start Time and End Time.
The time of each segment can’t be overlapped. Up to 4 segments can be
configured.
(2) Select a Record Type. The record type can be Normal, Motion Detection,
Alarm, Motion | Alarm, Motion & Alarm.
Normal
If you select Normal, the video will be recorded automatically according to
the time of the schedule.