
User manual


Table Of Contents
- Chapter 1 Overview
- Chapter 2 Network Connection
- Chapter 3 Access to the Network Speed Dome
- Chapter 4 Live View
- Chapter 5 PTZ Configuration
- Chapter 6 Speed Dome Configuration
- 6.1 Configuring Local Parameters
- 6.2 Configuring Time Settings
- 6.3 Configuring Network Settings
- 6.3.1 Configuring TCP/IP Settings
- 6.3.2 Configuring Port Settings
- 6.3.3 Configuring PPPoE Settings
- 6.3.4 Configuring DDNS Settings
- 6.3.5 Configuring SNMP Settings
- 6.3.6 Configuring 802.1X Settings
- 6.3.7 Configuring QoS Settings
- 6.3.8 Configuring FTP Settings
- 6.3.9 Configuring UPnP™ Settings
- 6.3.10 Configuring NAT (Network Address Translation) Settings
- 6.3.11 Configuring Email Settings
- 6.4 Configuring Video and Audio Settings
- 6.5 Configuring Image Settings
- 6.6 Configuring and Handling Alarms
- Chapter 7 Record Settings
- Chapter 8 Playback
- Chapter 9 Log Searching
- Chapter 10 Others
- Appendix
User Manual of Network Speed Dome
© Hikvision
76
are stored in the SD card (if supported) or in the network disk.
Steps:
1. Enter the Record Schedule Settings interface:
Configuration > Advanced Configuration> Storage > Record Schedule
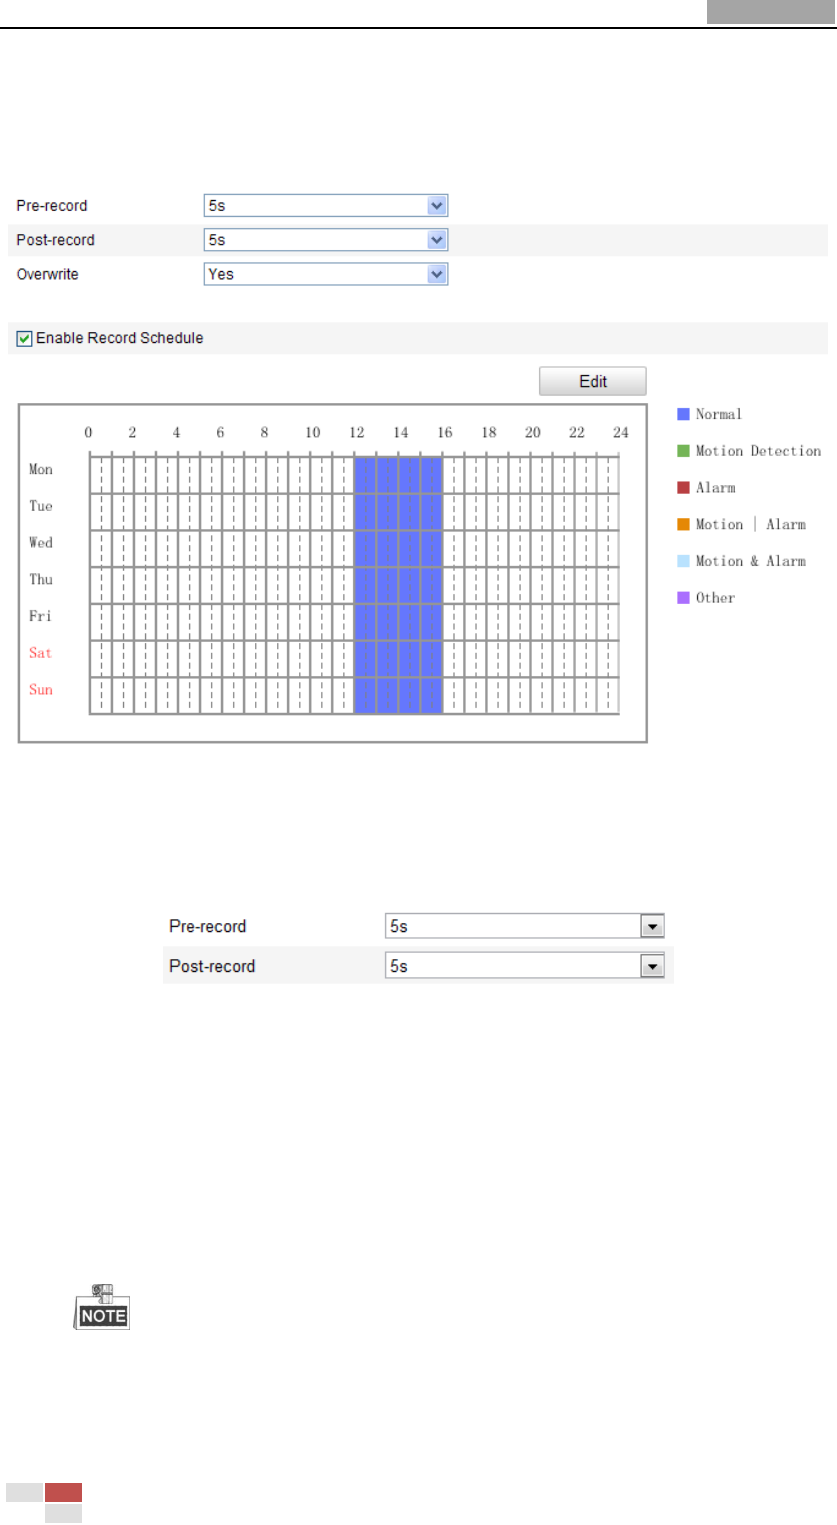
Figure 7-6 Recording Schedule Interface
2. Check the checkbox of Enable Record Schedule to enable scheduled recording.
3. Set the record parameters of the speed dome.
Figure 7-7 Record Parameters
Pre-record: The time you set to start recording before the scheduled time or
the event. For example, if an alarm triggers recording at 10:00, and the
pre-record time is set as 5 seconds, the speed dome starts to record at
9:59:55.
The Pre-record time can be configured as No Pre-record, 5 s, 10 s, 15 s, 20 s,
25 s, 30 s or not limited.
The pre-record time changes according to the video bitrate.
Post-record: The time you set to stop recording after the scheduled time or
the event. For example, if an alarm triggered recording ends at 11:00, and the
post-record time is set as 5 seconds, the speed dome records until 11:00:05.