
User manual


Table Of Contents
- Chapter 1 Overview
- Chapter 2 Network Connection
- Chapter 3 Access to the Network Speed Dome
- Chapter 4 Live View
- Chapter 5 PTZ Configuration
- Chapter 6 Speed Dome Configuration
- 6.1 Configuring Local Parameters
- 6.2 Configuring Time Settings
- 6.3 Configuring Network Settings
- 6.3.1 Configuring TCP/IP Settings
- 6.3.2 Configuring Port Settings
- 6.3.3 Configuring PPPoE Settings
- 6.3.4 Configuring DDNS Settings
- 6.3.5 Configuring SNMP Settings
- 6.3.6 Configuring 802.1X Settings
- 6.3.7 Configuring QoS Settings
- 6.3.8 Configuring FTP Settings
- 6.3.9 Configuring UPnP™ Settings
- 6.3.10 Configuring NAT (Network Address Translation) Settings
- 6.3.11 Configuring Email Settings
- 6.4 Configuring Video and Audio Settings
- 6.5 Configuring Image Settings
- 6.6 Configuring and Handling Alarms
- Chapter 7 Record Settings
- Chapter 8 Playback
- Chapter 9 Log Searching
- Chapter 10 Others
- Appendix
User Manual of Network Speed Dome
© Hikvision
50
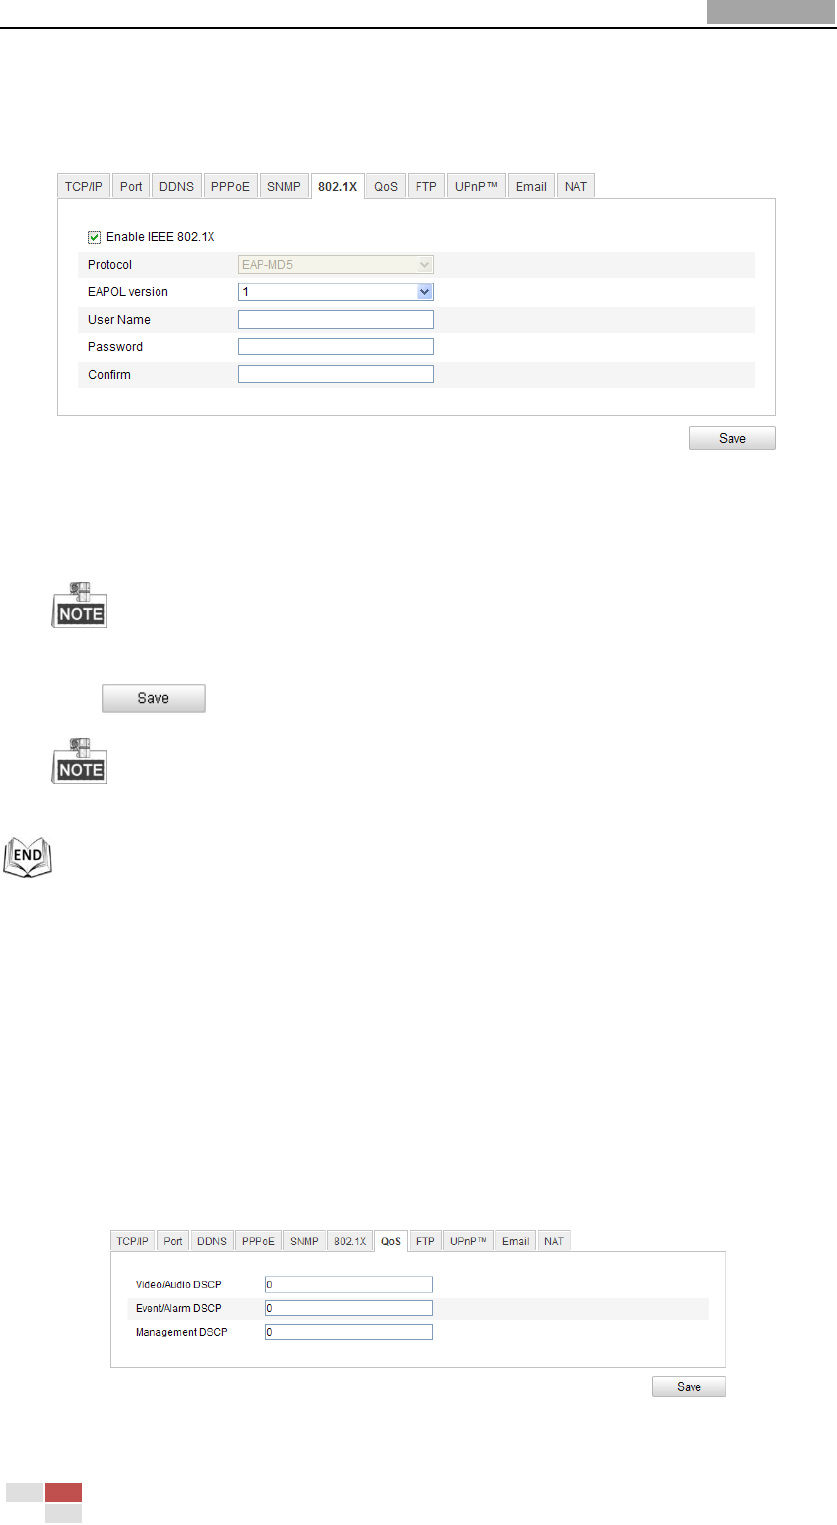
1. Connect the network camera to your PC directly with a network cable.
2. Enter the 802.1X Settings interface:
Configuration > Advanced Configuration > Network > 802.1X
Figure 6-17 802.1X Settings
3. Check the Enable IEEE 802.1X checkbox to enable it.
4. Configure the 802.1X settings, including user name and password.
The EAP-MD5 version must be identical with that of the router or the switch.
5. Enter the user name and password (issued by the CA) to access the server.
6. Click to finish the settings.
The camera reboots when you save the settings.
7. After the configuration, connect the camera to the protected network.
6.3.7 Configuring QoS Settings
Purpose:
QoS (Quality of Service) can help solve the network delay and network congestion by
configuring the priority of data sending.
Steps:
1. Enter the QoS Settings interface:
Configuration >Advanced Configuration > Network > QoS
Figure 6-18 QoS Settings