
User manual


Table Of Contents
- Chapter 1 Overview
- Chapter 2 Network Connection
- Chapter 3 Access to the Network Speed Dome
- Chapter 4 Live View
- Chapter 5 PTZ Configuration
- Chapter 6 Speed Dome Configuration
- 6.1 Configuring Local Parameters
- 6.2 Configuring Time Settings
- 6.3 Configuring Network Settings
- 6.3.1 Configuring TCP/IP Settings
- 6.3.2 Configuring Port Settings
- 6.3.3 Configuring PPPoE Settings
- 6.3.4 Configuring DDNS Settings
- 6.3.5 Configuring SNMP Settings
- 6.3.6 Configuring 802.1X Settings
- 6.3.7 Configuring QoS Settings
- 6.3.8 Configuring FTP Settings
- 6.3.9 Configuring UPnP™ Settings
- 6.3.10 Configuring NAT (Network Address Translation) Settings
- 6.3.11 Configuring Email Settings
- 6.4 Configuring Video and Audio Settings
- 6.5 Configuring Image Settings
- 6.6 Configuring and Handling Alarms
- Chapter 7 Record Settings
- Chapter 8 Playback
- Chapter 9 Log Searching
- Chapter 10 Others
- Appendix
User Manual of Network Speed Dome
© Hikvision
41
Address: 210.72.145.44). If the speed dome is set in a customized network, NTP software
can be used to establish a NTP server for time synchronization.
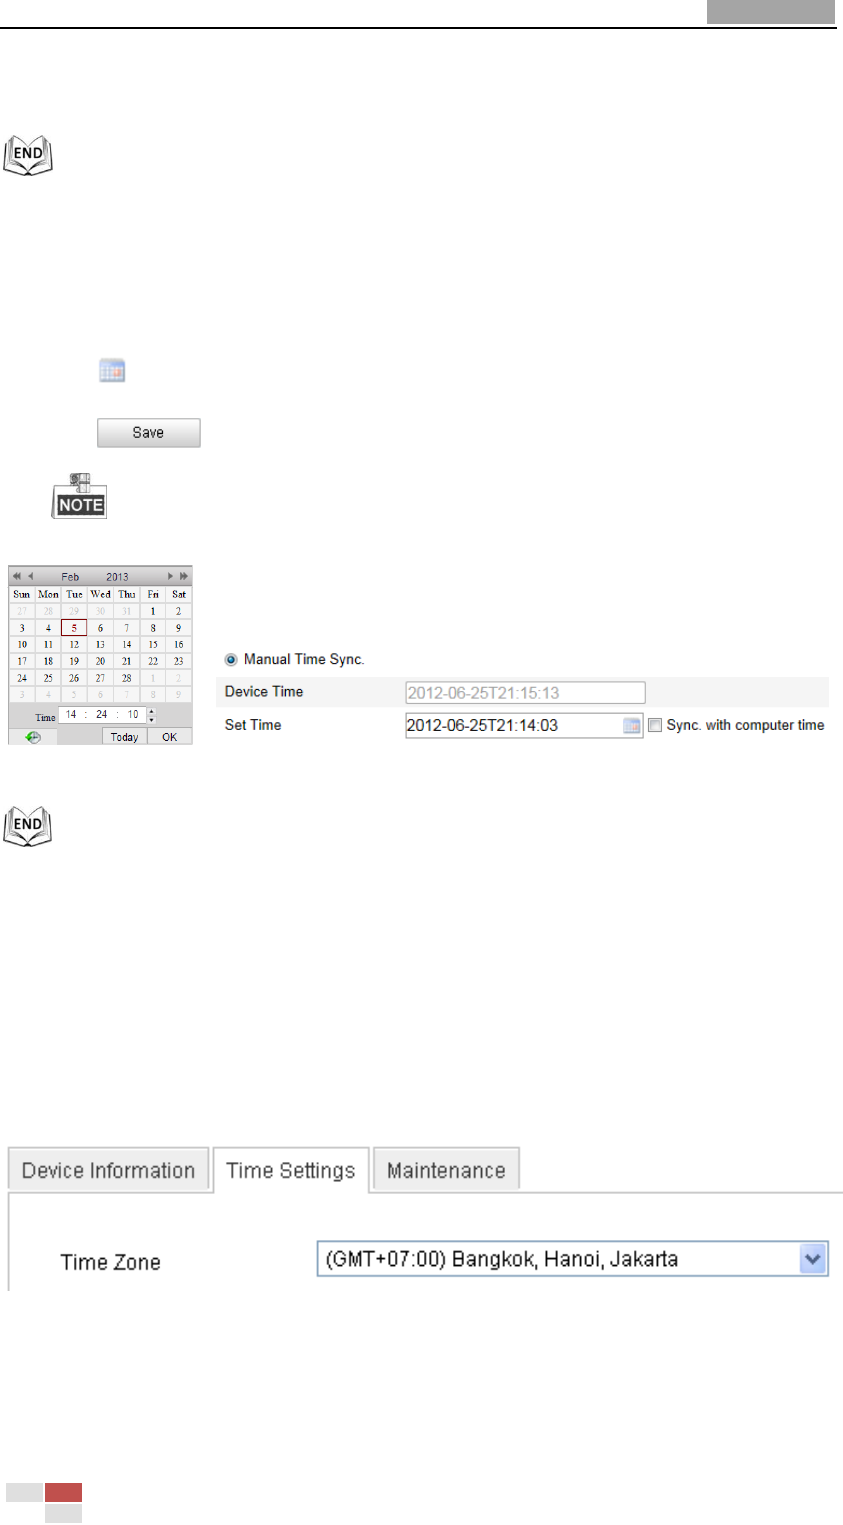
Configuring Time Synchronization Manually
Steps:
(1) Check the Manual Time Sync radio button.
(2) Click to set the system time from the pop-up calendar.
(3) Click to save the settings.
You can also check the Sync with local time checkbox to synchronize the time of the
speed dome with the time of your computer.
Figure 6-4 Time Sync Manually
Select the Time Zone
Purpose:
When the speed dome is taken to another time zone, you can use the Time Zone
function to adjust the time. The time will be adjusted according to the original
time and the time difference between the two time zones.
From the Time Zone drop-down menu as shown in Figure 6-5, select the Time
Zone in which the speed dome locates.
Figure 6-5 Time Zone Settings
Configuring Daylight Saving Time (summer time)
Purpose: