
User manual


Table Of Contents
- Chapter 1 Overview
- Chapter 2 Network Connection
- Chapter 3 Access to the Network Speed Dome
- Chapter 4 Live View
- Chapter 5 PTZ Configuration
- Chapter 6 Speed Dome Configuration
- 6.1 Configuring Local Parameters
- 6.2 Configuring Time Settings
- 6.3 Configuring Network Settings
- 6.3.1 Configuring TCP/IP Settings
- 6.3.2 Configuring Port Settings
- 6.3.3 Configuring PPPoE Settings
- 6.3.4 Configuring DDNS Settings
- 6.3.5 Configuring SNMP Settings
- 6.3.6 Configuring 802.1X Settings
- 6.3.7 Configuring QoS Settings
- 6.3.8 Configuring FTP Settings
- 6.3.9 Configuring UPnP™ Settings
- 6.3.10 Configuring NAT (Network Address Translation) Settings
- 6.3.11 Configuring Email Settings
- 6.4 Configuring Video and Audio Settings
- 6.5 Configuring Image Settings
- 6.6 Configuring and Handling Alarms
- Chapter 7 Record Settings
- Chapter 8 Playback
- Chapter 9 Log Searching
- Chapter 10 Others
- Appendix
User Manual of Network Speed Dome
© Hikvision
34
2. Check the checkbox of Enable Scheduled Task.
3. Set the Park Time. You can set the park time (a period of inactivity) before the
dome starts the scheduled tasks.
4. Set the schedule and task details.
Steps:
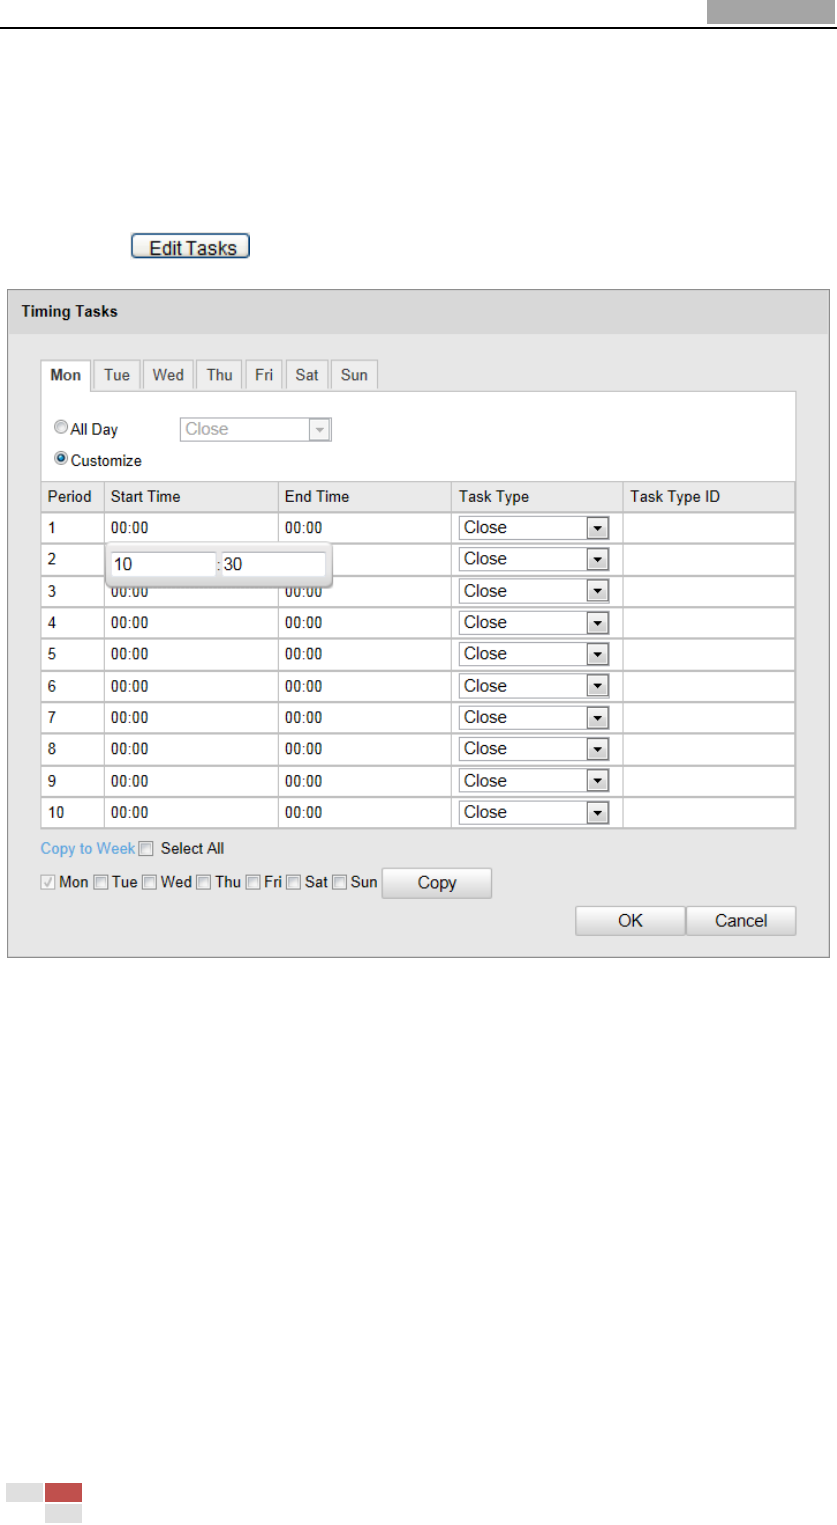
(1) Click to edit the task schedule.
Figure 5-5 Edit the Schedule and Task Type
(2) Choose the day you want to set the task schedule.
(3) Click All Day to set the schedule as all day; or click Customize and input the
Start Time and End Time for each task, and click Enter on your keyboard to
enter the time.
(4) Choose the task type from the drop-down list. You can choose scan, preset,
pattern and etc.