
Installation manual

Installation Manual of Network Camera
39
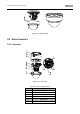
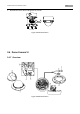
6
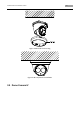
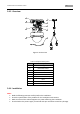
Infrared lamp
7
Lower dome
8
Status indicator
9
RCA analog video output
10
Debug
11
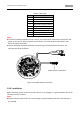
Reset
Note:
After the power-on of the camera, pressing and holding the RESET button for about 10 seconds can
reset all the parameters to the default settings.
3.5.6 Installation
Notes:
Read the following contents carefully before the installation.
Check the specification of the products for the installation environment.
Make sure that all the related equipment is power-off during the installation.
Check whether the power supply is matched with your AC outlet to avoid any damage.
Do not place the camera in extremely hot or damp environment. To avoid heat accumulation,
good ventilation is required for a proper operating environment.
If the product does not function properly, please contact your dealer or the nearest service
center. Do not disassemble the camera for repair or maintenance by yourself.
Ceiling mounting is recommended for this camera.
Note:
The ceiling must be thick enough to withstand more than three times the weight of the camera.
Steps:
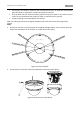
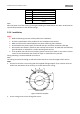
1. Drill the screw holes on the ceiling with the supplied drilling template. If you need to route the
cables from the bottom of the camera, cut a cable hole on the ceiling.
Figure 3-58 Drill Template
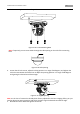
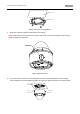
2. Fix the ceiling mount on the ceiling with screws.