
User manual


User Manual of E Series 5-inch Speed Dome
© Hikvision Digital Technology Co., Ltd. All Rights Reserved.
31
1. Move the cursor to enter the TIME TASK submenu:
MAIN MENU > DOME SETTINGS > TIME TASK
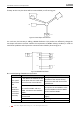
TIME TASK
TASK NUM 1
TASK STATE ON
TASK ACTION NONE
TASK TIME
TASK PREVIEW
TASK CLEAR
BACK EXIT
Figure 3-18 Time Task Configuration Menu
2. Choose the task number.
Steps:
(1) Move the cursor to TASK NUM and click IRIS+ to enter edit mode.
(2) Click the up/down direction buttons to select the number of the task which is to be
configured.
(3) Click IRIS+ again to confirm the settings and exit the edit mode.
Note: Up to 8 time tasks can be configured.
3. Set the task status.
Steps:
(1) Move the cursor to TASK STATE and click IRIS+ to enter edit mode.
(2) Click the up/down direction buttons to set the task status to ON.
(3) Click IRIS+ again to confirm the settings and exit edit mode of this column.
Note: If the task action and task time have not been configured, you cannot set the status as
ON.
4. Configure the task action.
Steps:
(1) Move the cursor to TASK ACTION and click the IRIS+ to enter edit mode.
(2) Click the up and down direction buttons to select the task action from preset 1-8, pattern
1-4, patrol 1-8, pan scan, tilt scan, random scan, frame scan, panoramic scan, day mode,
night mode, patrol-d and none.
(3) Click IRIS+ again to confirm the settings and exit edit mode of this column.
5. Set the task time.
Steps:
(1) Move the cursor to TASK TIME and click IRIS+ to enter edit mode.
(2) Click the left and right direction buttons to position the cursor to WEEK, START (H-M) and
END (H-M).
(3) Click the up and down direction buttons to set the start time and end time to run the time
task.
(4) Click IRIS+ to confirm the settings and exit.