
Quick Start Guide
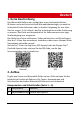
Table Of Contents
- 1. Brief Description
- 3. Install Battery (Page 2 – C)
- 4. Install Rail (Page 3 – D)
- 5. Connect Device (Page 4 – E)
- 3. Akku installieren (Seite 2 – C)
- 4. Schiene installieren (Seite 3 - D)
- 5. Gerät anschließen (Seite 4 – E)
- 3. Installer les piles (page 2 – C)
- 4. Installer le rail (page 3 – D)
- 5. Connecter l’appareil (page 4 – E)
- 3. Instalación de la pila (página 2 – C)
- 4. Instalación con riel (página 3 - D)
- 5. Conexión del dispositivo (Page 4 – E)
- 3. Instalar as pilhas (Página 2 – C)
- 4. Instalar a calha (Página 3 – D)
- 5. Ligar o dispositivo (Página 4 – E)
- 3. Installazione della batteria (Pagina 2 – C)
- 4. Installazione della guida (Pagina 3 – D)
- 5. Collegamento del dispositivo (Pagina 4 – E)
- 3. Instalace baterie (strana 2 – C)
- 4. Instalace kolejnice (strana 3 – D)
- 5. Připojení zařízení (strana 4 – E)
- 3. Inštalácia batérie (strana 2 – C)
- 4. Inštalácia koľajničky (strana 3 – D)
- 5. Pripojenie zariadenia (strana 4 – E)
- 3. Instalowanie baterii (str. 2 – C)
- 4. Instalowanie na szynie montażowej (str. 3 – D)
- 5. Podłączanie urządzenia (str. 4 – E)
- 3. Akkumulátor beszerelése (Oldal: 2 - C)
- 4. Sín felszerelése (Oldal 3 – D)
- 5. A készülék csatlakoztatása (Oldal: 4 – E)
- 3. Instalare baterie (Pagina 2 - C)
- 4. Instalare șină (Pagina 3 - D)
- 5. Conectare dispozitiv (Pagina 4 - E)
- 2. Verschijning
- 3. Batterij plaatsen (pagina 2 – C)
- 5. Rail plaatsen (pagina 3 – D)
- 5. Apparaat verbinden (pagina 4 – E)
- 3. Installér batteri (side 2 – C)
- 4. Montér skinne (side 3 – D)
- 5. Tilslut enhed (side 4 – E)
- 3. Installer batteri (side 2 – C)
- 4. Installer skinne (side 3 – D)
- 5. Tilkoble enheten (side 4 – E)
- 3. Asenna paristo (sivu 2 – C)
- 4. Kiskoasennus (sivu 3 – D)
- 5. Yhdistä laite (sivu 4 – E)
- 3. Montering av batteri (sida 2 – C)
- 4. Montering på skena (sida 3 – D)
- 5. Anslutning av enheten (sida 4 – E)
- 3. Установка батареи (стр. 2 – C)
- 4. Установка направляющей (стр. 3 – D)
- 5. Подключение устройства (стр. 4 – E)
- 3. Pilin Takılması (Sayfa 2 – C)
- 6. Rayın Takılması (Sayfa 3 - D)
- 5. Cihazın Bağlanması (Sayfa 4 – E)
- 2.外観
- 3.バッテリーの取り付け(2 – Cページ)
- 4. レールの取り付け(3 – Dページ)
- 5.デバイスの接続(4 – Eページ)
- 3. 배터리 설치(페이지 2 – C)
- 4. 레일 설치(페이지 3 – D)
- 5. 장비 연결 (페이지 4 – E)
- 3.安裝電池(第 2 頁—C)
- 4. 安裝導軌(第 3 頁—D)
- 5.連線裝置(第 4 頁—E)

11
designated collection point. For more information see:
www.recyclethis.info
Industry Canada ICES-003 Compliance
This device meets the CAN ICES-3 (B)/NMB-3(B) standards requirements.
This device complies with Industry Canada licence-exempt RSS
standard(s). Operation is subject to the following two conditions:
(1) this device may not cause interference, and
(2) this device must accept any interference, including interference that
may cause undesired operation of the device.
Le présent appareil est conforme aux CNR d'Industrie Canada applicables
aux appareils radioexempts de licence. L'exploitation est autorisée aux
deux conditions suivantes :
(1)l'appareil ne doit pas produire de brouillage, et
(2)l'utilisateur de l'appareil doit accepter tout brouillage radioélectrique
subi, même si le brouillage est susceptible d'en compromettre le
fonctionnement.
Under Industry Canada regulations, this radio transmitter may only
operate using an antenna of a type and maximum (or lesser) gain
approved for the transmitter by Industry Canada. To reduce potential
radio interference to other users, the antenna type and its gain should be
so chosen that the equivalent isotropically radiated power (e.i.r.p.) is not
more than that necessary for successful communication.
Safety Instruction
These instructions are intended to ensure that user can use the product
correctly to avoid danger or property loss.
Laws and Regulations
●
Use of the product must be in strict compliance with the local electrical
safety regulations.