
User Manual


6 - Recovering/Verifying Arrays
When an array member (hard disk) of a redundant array fails, the array will be marked
as “broken”.
Broken arrays can be automatically rebuilt using hot-spare disks (see page 20).
However, if there are no available spare disks, you can still rebuild the array by
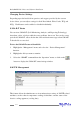
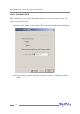
adding a new disk to it. To add a disk to a broken array:
1. Highlight the “Management” menu, and select the “Array Management”
function.
2. Highlight the broken array that needs to be rebuilt.
3. Click the Add Disk button on the toolbar or select “Add Disk” command from the
“Operation” menu.
4. If the disk is successfully added to the array, rebuild process will start
automatically.
Note: In some instances, a failed array will not rebuild automatically.
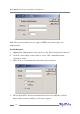
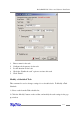
To manually start the rebuild process for a broken/critical array:
1. Highlight the “Management” menu, and select the “Array Management”
function.
2. Highlight the array that needs to be rebuilt.
3. Click the Rebuild button on the toolbar or select the “Rebuild” command from the
“Operation” menu.
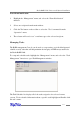
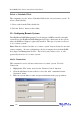
Verifying an Array
For a RAID 1 or RAID 10 array, the verify process compares the data of one mirror
pair with the other (single hard disk in the case of RAID1, and a paired set of disks for
RAID 10).
For RAID 5, the verify process calculates RAID5 parity and compares it to the parity
data on the array. Verification checks each sector on a given disk. Periodic verifica-
tion of an array allows the disk drive firmware to take corrective actions on problem
areas on the disk, minimizing the occurrence of uncorrectable read and write errors.
RocketRAID 2240 Driver and Software Installation
4-11