Universal Controller The Universal Controller The Universal Controller allows you to program and store a complex light show in a few simple steps and play it back with the touch of a button 1
The Universal Controller Provides designers and operators with the ability to control INTELLABEAM, TRACKSPOT, and EMULATOR Fixtures from the same Controller Overview of Features • 500 Recordable Pages • 64 Programmable Presets • Simultaneous control of multiple Fixture types • 16 Unique Addresses • Master/Slave capabilities • Edit and Copy functions 2
Agenda • Front Panel • Programming • Advanced Programming Features • Additional Features • User Keys • Menu Items • Rear Panel Universal Controller Front Panel Overview 3
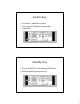
Enable Key • Activates Controller's power • Activates all Fixtures connected to Controller Standby Key • Closes GATES of all connected Fixtures • Default mode upon power up 4
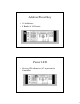
Address/Preset Key • 16 Addresses • 4 Banks of 16 Presets Power LED • Always ON whenever AC is present in Controller 5
Adjust 1 (Up/Down) Keys • READY STATE – Controls MASTER DIM Level • MENU STATE – Select MENU Items • PROGRAMMING – Select Construct Parameters Position Up/Down Left/Right Arrow Keys • READY STATE – Select either the AUDIO ADVANCE or DELAY RATE • MENU STATE – Select MENU Items • PROGRAMMING – Use as a DIGITAL JOYSTICK to position the BEAM 6
Adjust 2 (Up/Down) Keys • READY STATE – Change PAGES • MENU STATE – Select MENU Items LCD Window • READY STATE – Adjust the MASTER DIM Level • MENU STATE – Select MENU Items • PROGRAMMING – Displays Programming Prompts and Constructs 7
Erase Key • Use to Perform Several ERASE Functions – – – – PAGE ERASE FIXTURE ERASE PRESET ERASE UNITIALIZED PAGES Record Key • ADDRESS MODE – records current pages for selected Addresses • PRESET MODE – Assign a program to a PRESET 8
Select Key • Initiate Programming Operations Memory Card Slot • PCMCIA Card 9
User Keys • Audio Advance features • User Programmable Macros Commonly Used Terms • Fixture • Construct • Parameter 10
FIXTURE • Lighting device attached to the controller • INTELLABEAM, TRACKSPOT, and EMULATOR are examples of Fixtures CONSTRUCTS Features of the Fixtures: – Trackspot examples include COLOR, GOBO, DIM, MSPEED, POSITION, GATE, XFADE, & DELAY – Intellabeams have an additional construct: IRIS – Emulator constructs include ROTATION, SCAN, PROGRAM, & SCALE 11
Constructs of Each Fixture PARAMETERS • Values you assign to CONSTRUCTS 12
Programming Overview • • • • • Recording a Page Recording a Loop Defining Fixture Types Position Memories Copy Features PAGE • Building blocks of SCENES • One static look specifying Constructs for one or more Fixtures • Universal Controller has 1 large memory of 500 Pages 13
Recording a Page • • • • 1. Select a Page using the Adjust 2 Up/Down Keys 2. Select the ADDRESSES to be edited 3. Press the MENU Key to access Constructs 4. Use Position Left/Right Keys to select Constructs • 5. Use the Adjust 1 Up/Down Keys to edit Parameters • 6.
Edit Constructs of Multiple Fixtures • To edit a Construct of multiple Fixtures on one Page without affecting all other recorded Constructs for those Fixtures, select one Address first, change any Construct one value and back to its original value, then select the range of Fixtures you want to edit – All fixtures will retain their previously recorded values while responding only to the constructs edited as a group Hands On Exercise Editing Constructs • Edit both Trackspots on Page 1 to have Color 6 without
LOOP • SEQUENCE or SERIES of programmed pages that runs continuously in a loop when played back Building a Loop • Record all Pages to be part of the loop • Loops require an Unitialized Page before the first recorded Page and after the last recorded Page of the loop • Unitialized Pages act as boundary or marker Pages • To record an Unitialized Page, press SELECT, ERASE, ERASE 16
Hands On Exercise Building a Loop • Program Pages 5-8 – Trackpots in Red with Tunnel Gobo, Mspeed 92 • Program Unitialized Pages on Pages 4 & 9 Playback a Loop • From Ready Window, press the Position Right key to start Loop • Press Position Up/Down Keys to adjust Delay time (RATE) for Loop • To stop playback of Loop, press Position Right key again 17
Hands On Exercise Playing a Loop • Playback the Loop recorded on Pages 5-8 Presets • Instant Reference to a Page or Pages recorded in Address Mode • Recalled with a single keypress • Universal Controller has 64 Presets (4 BANKS of 16) • To access Presets, toggle to Preset Mode – Toggle the ADDRESS/PRESET key until the PRESET mode LED is on 18
Recording Presets • • • • • • Select any Page or Loop Toggle to Preset Mode Choose Preset Bank using Adjust 2 keys Press SELECT Select PRESET Key Press RECORD NOTE: Loops must be running in order to be recorded correctly onto Presets Hands On Exercises Presets • 1. Record the Loop on Pages 5-8 to Preset 1 • 2.
Advanced Programming Features • Position Memory • Copy Features • Address Lockout Position Memory Preset Focus Positions • Stored on Pages 469-500 • Record Pages with position information • Reference these pages as positions 1-32 from all other Pages • All other Pages that reference these positions will automatically reflect any change to the position information on the reference Pages 20
Hands On Exercise Position Memory Focuses • 1. Record Positions on Pages 469-472 • 2. Build looks on Pages 15-18 using those 4 Positions • 3.
Page Copy • From READY mode, press SELECT • Press Adjust 2 Key until destination Page number is displayed • Press Record Hands On Exercise Page Copy • Use Page Copy to copy Page 13 to Page 14 and change the Gobos on Page 14 • Record Page 14 to Preset 7 22
Block Copy Copies a Range of Recorded Pages to a different Range of Pages • • • • • • • • • From Ready Mode, select first page of series to be copied Press SELECT Press Position UP arrow key Press Adjust 2 Key to select end page of series Press Position UP arrow key Press Adjust 2 key to select Destination Page Press Position UP key Press Adjust 1 Key to select COPY DIRECTION Press RECORD Hands On Exercises Block Copy • 1. Use Block Copy to copy Pages 10-13 to Pages 20-23 • 2.
Position Copy Copies all Constructs of one Address to same Address on a different Page – – – – – 1. Press and HOLD SELECT 2. Select ADDRESS 3. Release Select and Address keys 4. Select Destination Page using Adjust 2 keys 5.
Parameter Copy Copies Position and other Constructs from one Address to different Address on same Page • From READY window, Press SELECT • Press Position Down key • Select source Address • Select destination Addresses • Mark Constructs to be copied using the Adjust 1 key • Press RECORD Address Copy Copies all Constructs from selected Addresses to a different Page • • • • • • From READY window, press SELECT Select Address of one fixture type to be copied Press either Adjust 2 Key Select any other Addresses
Additional Programming Features • Defining Fixture Types • Address Lockout • Page Lock • Pos Mem Edit • Deselecting an Address • Erasing a Page • Erasing a Fixture from a Page • Erasing a Preset Defining Fixture Types • • • • • • • • In READY mode, press MENU key Press Position Right Key three times Press Adjust 2 Key to enter SETUP menu Press Position Right Arrow Key Once to FIXTURE Press either Adjust 2 key Press Address Key to be configured Press Adjust 1 Key to select fixture type Press Record when t
Hands On Exercises Defining Fixture Types • Assign Addresses 1&2 as Intellabeam • Assign Addresses 3&4 as Emulators Address Lockout • Temporary removal of Addresses from all recorded Pages: FIXTURE EXCLUSION • To LOCKOUT an Address, press and hold desired Address Key for 5 seconds • To UNLOCK an Address, press the Address key again for 5 seconds • ALL Addresses are reset automatically upon powering up Controller 27
Page Lock Locks selected Pages • Select first PAGE of Range of PAGES to be locked • Press and HOLD SELECT • Press and HOLD BOTH ADJUST 1 Keys • Release Select and Adjust 1 keys • Press Adjust 1 UP key to Clear/Set value • Press Adjust 2 Keys to select end page • Press RECORD Hands On Exercises Page Lock • Lock Pages 495-500 • Unlock Pages 495-500 28
Posmem Edit Editing Position Memories from any Page – 1. Press SELECT – 2. Press POSITION RIGHT key – 3. Select Address that references the PM to be edited – 4. Position the Mirror – 5.
Deselecting Addresses on a Page • • • • • • Select any Address Edit its Constructs Press Address Key again to DESELECT Press a different Address Key to select it DESELECT and Select other Addresses Press RECORD when all editing has been completed Erasing a Page Resetting a Page to its default Parameters • To Erase a Page: – – – – Select the Page Press Select Press Erase Press Record • An Erased Page is also known as a Blackout Page 30
Hands On Exercises Erasing a Page • Erase Pages 1-5 Erase a Fixture from a Page • • • • • Select desired Page Press SELECT Select Fixture Address Press ERASE Press RECORD 31
Hands On Exercises Erasing a Fixture from a Page • Erase the first Trackspot from Page 10 Erase a Preset • • • • • Toggle to Preset Mode Press SELECT Select PRESET # Press ERASE Press RECORD 32
Hands On Exercises Erasing a Preset • Erase Presets 2 & 3 User Keys Features – Audio Effects – Macros NOTE: Default settings are Audio Advance and Construct Modulate Effects 33
User Keys Audio Advance FX • User 1 – Step on Beat • User 3 – Pause on Beat • User 5 – Size Modulate* * Emulator only Construct Modulate FX • User 2 – Color Modulate • User 4 – Gobo Modulate • User 6 – Dim Modulate Macro • Series of keystrokes stored onto a single button • MACROS are stored on the USER KEYS of the Universal Controller – Playback of button activates the MACRO stored within 34
Editing a User Key Building a Macro – 1. Press and HOLD USER key in until "EDIT USER KEY" is displayed – 2. Press Position Right Key 2 times to "RECORD" – 3. Press Position Down Key to start recording – 4. Perform keystrokes to be stored as MACRO – 5.
Universal Controller Menu Items Home • Homing a Fixture: – – – – Resets each Fixture to default settings Strikes the lamp Turns on the cooling fan Resets all wheels, gate, and flags to HOME (DEFAULT) positions • HOME is accessed through the HOME Menu 36
Home • Press Menu • Press either Adjust 2 key • Select Address key to be homed Backup • Saving the Controller’s Memory to Disk • PCMCIA CARD – Removable device that allows you to backup or store the controller's internal memory • Each card holds two shows 37
Backup • • • • • • • • • Insert Memory card into Card Slot Press the Menu Key Press Position Right Arrow Key to BACKUP Press any Adjust Key to enter BACKUP submenu – The LCD Window displays: MEMORY->CARD CARD->MEMORY Use the Position Up/Down Arrow Keys to choose between options Press any Adjust Key to enter the Upper/Lower Card submenu – The Window displays: UPPER CARD MEM LOWER CARD MEM Use Position Up/Down Menu keys to choose between options Press any Adjust Key to next display: – Press RECORD to COPY
Allmem • Automatically sequence through (playback) all initialized Pages (up to 500) • Press Menu Key • Press Position Right Arrow key 2 times • Press Position Down Key once to ALLMEM • Press any Adjust Key to enter the ALLMEM display – LCD Window displays: PLAY ALL PAGES NO – Press Adjust 1 Up/Down Arrow Key to select Yes or No • Press RECORD to finish operation • While ALLMEM is active, a small “a” will be displayed in the LCD Window Setup • • • • Set Controller's Master/Slave status Set MIDI Device ID
Erase Controller Memory • To Erase Memory of Controller: – – – – Press MENU Press Position Left 2 times Press either Adjust 2 key Press either Adjust 1 key to display "ERASE MEMORY" – Press RECORD Erase USER Keys • To Reset USER keys to factory effects: – – – – Press Menu Press Position Left 2 times Press either Adjust 2 key Press either Adjust 1 key to display "ERASE USER KEYS" – Press RECORD 40
Universal Controller Rear Panel Overview Audio Threshold Adjust • • • • • Controls the sensitivity of the Audio Effects 0-10 volts Mono Audio Input 1/4 inch Audio Input Jack Signal is necessary to trigger Audio Effects stored on the USER keys 41
MIDI Out Port • Communications Protocol – Musical Instrument Digital Interface • Switchable between OUT and THRU • THRU is Default – Use this Port for MASTER/SLAVE Configurations • MIDI In Port – Cue Numbers are one for one with the Controller's Preset numbers – The Universal Controller only accepts whole numbers Remote Enable • Connect Signal to PINS 1+2 of MIDI IN Port • Allows Control of STANDBY mode from a Remote Location 42
Technical Information • Updating the Controller’s O/S – The Universal Controller’s Operating Systems Software is updated by replacing the EPROM • Solid State Programmable Read-Only memory device that contains instructions used by the microprocessor • All EPROMS are programmed externally The Universal Controller The Universal Controller can be ideal for a number of applications including Theatre, Stage, Studio, Concert Touring, and Nightclubs 43
High End Systems Further Information Sources • www.highend.