© 2012 HID Global Corporation. All rights reserved. Printing and Encoding Solutions FARGO® HDP8500 Industrial Card Printer/Encoder User Guide © 2012 HID Global Corporation. All rights reserved. 1 HDP8500 Industrial Card Printer/Encoder User Guide L001617 rev 1.
© 2012 HID Global Corporation. All rights reserved.
© 2012 HID Global Corporation. All rights reserved.
© 2012 HID Global Corporation. All rights reserved.
© 2012 HID Global Corporation. All rights reserved.
© 2012 HID Global Corporation. All rights reserved.
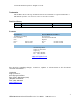
© 2012 HID Global Corporation. All rights reserved. Trademarks HID GLOBAL, HID, the HID logo, iCLASS and SIO are the trademarks or registered trademarks of HID Global Corporation, or its licensors, in the U.S. and other countries. Revision History Date Description Document Version 05//2012 HDP8500 Industrial Card Printer/Encoder User Guide 1.
© 2012 HID Global Corporation. All rights reserved. Section 1: Specifications The purpose of this section is to provide you with specific information on the Regulatory Compliances, Agency Listings, Technical Specifications and Functional Specifications for the HDP8500 Card Printer User Guide.
© 2012 HID Global Corporation. All rights reserved. United States This device complies with Part 15 of the FCC rules. Operation is subject to the following two conditions: (1) This device may not cause harmful interference. (2) This device must accept any interference received, including interference that may cause undesired operation. Note: This equipment has been tested and found to comply with the limits for a Class A digital device, pursuant to part 15 of the FCC Rules.
© 2012 HID Global Corporation. All rights reserved. Environmental Protection (China-RoHS) Environmental Protection Use Period is based on the product being used in an office environment. 10 HDP8500 Industrial Card Printer/Encoder User Guide L001617 rev 1.
© 2012 HID Global Corporation. All rights reserved. Traditional Chinese RF Emissions and Safety Statements 11 HDP8500 Industrial Card Printer/Encoder User Guide L001617 rev 1.
© 2012 HID Global Corporation. All rights reserved.
© 2012 HID Global Corporation. All rights reserved. 程前,始终应断开电源。 小心: 此设备为静电敏感设备。如果暴露在静电电流下,可能会 损坏设备。 可能引发静电安全问题的信息由警告符号(如左图所示) 来表示。 为了防止设备或介质受损,在执行前面带有此符号的操 作之前,请先阅读下面的安全消息。 为了防止设备或介质受损,请在处理电路板和打印头部 件中或附近的电缆时,遵守所有规定的静电放电 (ESD) 过程。 为了防止设备或介质受损,请始终佩带适当的个人接地 设备(例如,已接地避免出现潜在损坏的高质量腕 带)。 为了防止设备或介质受损,除非另有规定,否则在执行 任何维修过程前,始终应将色带和证卡与打印机分离。 为了防止设备或介质受损,在操作打印机前,请取下手 指和手上的珠宝饰物,并将手上的油渍和污渍彻底清洗 干净。 13 HDP8500 Industrial Card Printer/Encoder User Guide L001617 rev 1.
© 2012 HID Global Corporation. All rights reserved. Japan この装置は総務省の型式指定を受けています。" (総務省指定番号は第 AC-xxxxx号です) 本製品は電波を使用した RFID 機器の読み取り・書き込み装置です。 そのため使用する用途・場所によっては、医療機器に影響を与える恐れが あります Korean 14 HDP8500 Industrial Card Printer/Encoder User Guide L001617 rev 1.
© 2012 HID Global Corporation. All rights reserved. Technical Specifications Print Method HDP Dye-Sublimation/ Resin Thermal Transfer Print Resolution 300 dpi (11.8 dots per mm) Print Colors Up to 16.
© 2012 HID Global Corporation. All rights reserved.
© 2012 HID Global Corporation. All rights reserved. Reject Area Capacity Card Materials and Types 15 cards capacity, lockable (.030” and .762mm) ABS Laminated PVC PET PETG Proximity Smart Cards Mag Stripe cards Optical memory cards Polycarbonate Card Thickness System will be compatible with card thicknesses from 2050 mil Print only: .020” (20 mil) to .050” (50 mil) / .762mm to 1.27mm Print/Lamination: .030” (30 mil) to .050” (50 mil) / .762mm to 1.27mm Card Sizes Supported CR-80 (3.452”L x 2.
© 2012 HID Global Corporation. All rights reserved.
© 2012 HID Global Corporation. All rights reserved. Functional Specifications Component Description Card Cartridge Load blank cards into this Cartridge. Card Output Hopper Stores 200 cards. Card Lamination Module Works in conjunction with the Printer to apply a variety of different overlaminates to printed cards, providing increased card durability and security.
© 2012 HID Global Corporation. All rights reserved. Card Flattener Fully adjustable temp dwell (OPTIONAL) The card flattening routine occurs after the card is transferred but before lamination. The card flattener has an adjustable temp and dwell. You can select from different offset values from the default temp. You can select from different offset values from the default dwell. The card flattener has a 0 to 15 second adjustable delay before the flattening routine will run.
© 2012 HID Global Corporation. All rights reserved. Section 2: Graphical Display Home Screen Click this icon to get to the System Information Screen System Information Screen Option. This is the Notification Icon which shows status and error messages Notification Icons These are the icons displayed in the notification area. 21 HDP8500 Industrial Card Printer/Encoder User Guide L001617 rev 1.
© 2012 HID Global Corporation. All rights reserved. 22 HDP8500 Industrial Card Printer/Encoder User Guide L001617 rev 1.
© 2012 HID Global Corporation. All rights reserved. Home Screen ( continued) Laminator configuration (if displayed is installed) Laser Engraver (if displayed is installed) HID Printer Encoder (if displayed is installed) Icon shows status is PROBLEM Press the Station icon to open the Station Details screen, which provides more detail about the station status. Icon shows status is BUSY Press the Station icon to open the Station Details screen, which provides more detail about the station status.
© 2012 HID Global Corporation. All rights reserved. Home Screen ( continued) Printer lock Hopper Select Ribbon Film Laminate levels shown Card Count Setup Menu 24 HDP8500 Industrial Card Printer/Encoder User Guide L001617 rev 1.
© 2012 HID Global Corporation. All rights reserved. Home Screen ( continued) Home Screen Back one level HELP The side buttons allow vertical scrolling when the current screen accommodates multiple lines. 25 HDP8500 Industrial Card Printer/Encoder User Guide L001617 rev 1.
© 2012 HID Global Corporation. All rights reserved. System Information Screen Option Note: Select the desired option to view information Serial Number Model Name Printer Firmware Laminator Firmware Display Firmware MAC Address IP Address Ribbon Type Film Type Lam 1 Type Lam 2 Type Mag Encoder Smart Encoder Prox Encoder Mifare Encoder iCLASS Encoder Laminator Flipper Card Count Pass Count Transfer Count 26 HDP8500 Industrial Card Printer/Encoder User Guide L001617 rev 1.
© 2012 HID Global Corporation. All rights reserved. Process Status While the printer is working, the Notification icon shows a moving gear . Each Station icon shows a progress bar with its current progress in the job A global pause button is shown. 27 HDP8500 Industrial Card Printer/Encoder User Guide L001617 rev 1.
© 2012 HID Global Corporation. All rights reserved.
© 2012 HID Global Corporation. All rights reserved. Film Sensor Mag Sensor Lamination Sensor Lock and Sleep settings See Display E below for details Sleep Time Stand-by Time Stand-by Temp Display Sleep Time Change password Main Menu (continued) Hopper Selection Display A Hopper selection screen allows the user to change the hopper where cards are fed from. Green indicates the selected hopper, also shows cancel and save buttons. 29 HDP8500 Industrial Card Printer/Encoder User Guide L001617 rev 1.
© 2012 HID Global Corporation. All rights reserved. Main Menu (continued) Display B Tools –Diagnostic Self Test Options Alignment Test YMC Color Bar Test Magnetic Test YMCK Test Standard Resin Test Printer Settings card Color Photo Test 30 HDP8500 Industrial Card Printer/Encoder User Guide L001617 rev 1.
© 2012 HID Global Corporation. All rights reserved. Main Menu (continued) Display C Tools –Diagnostic Mechanical Test Options When selected the printer will perform the test to verify mechanical options are working correctly Lower Printhead Raise Printhead Home Flipper Table Run ribbon take-up motor Run ribbon supply motor Run Printhead lift motor Cycle transfer head lift motor Run film supply motor Run film take-up motor 31 HDP8500 Industrial Card Printer/Encoder User Guide L001617 rev 1.
© 2012 HID Global Corporation. All rights reserved. Main Menu (continued) Display D Sensor Calibration Options NOTE: Calibrating sensors may be done through the Driver Printing Preferences Toolbox OR through the LCD DISPLAY. Both options use the same printer setup information. Ribbon Sensor Calibration Film Sensor Calibration Magnetic TOF ( Top of Form) Lamination Sensor Calibration 32 HDP8500 Industrial Card Printer/Encoder User Guide L001617 rev 1.
© 2012 HID Global Corporation. All rights reserved. Main Menu (continued) Display E Sleep and Lock Settings Select to desired option and use the + and – button to adjust the number. Cancel revert save buttons Sleep Time Standby Time Standby Temp Display Sleep Time Change Password Case Open 33 HDP8500 Industrial Card Printer/Encoder User Guide L001617 rev 1.
© 2012 HID Global Corporation. All rights reserved. When the cover is opened, this screen is presented. The arrows ( ) allow card shuttle from 1 to 2 The arrows() ) move the rollers back and forth. This is used if a card jam occurs. Station Error When an error occurs a details screen appears, containing details about the specific error that occurred. The keys to the right are: Job Cancel 34 HDP8500 Industrial Card Printer/Encoder User Guide L001617 rev 1.
© 2012 HID Global Corporation. All rights reserved. Retry Help Boolean Setting While adjusting settings in the setting menu, the Boolean setting can be set by pressing the desired value. Green indicates the selected setting. Settings Keypad 35 HDP8500 Industrial Card Printer/Encoder User Guide L001617 rev 1.
© 2012 HID Global Corporation. All rights reserved. While setting a value in the settings menu that requires numeric input, a keypad will be presented. Current value is displayed in blue font. Cancel and save buttons Pin Keypad Blue instructions says: "Enter Current PIN" Button says: "Next >" Blue instructions says: "Enter New PIN" Button says: "Next >" Blue instructions says: "Confirm New PIN" Button says: "Enter" 36 HDP8500 Industrial Card Printer/Encoder User Guide L001617 rev 1.
© 2012 HID Global Corporation. All rights reserved. Security Keypad When the printer is to be locked or unlocked the Security Keypad is presented. Enter the PIN and press Enter. Text Button Select While setting a value in the settings menu that requires a selection, this screen will be presented. Current value is highlighted in green. Cancel and save buttons 37 HDP8500 Industrial Card Printer/Encoder User Guide L001617 rev 1.
© 2012 HID Global Corporation. All rights reserved. Notification List Navigate to the Notification list by pressing on the Notification Icon. This will show the notification detail and allow navigation to further details. Menu Detail List Navigate to a printer settings menu, a list of all settings will be displayed. Scroll up and down using the side buttons, make selections by pressing the specific setting‟s button. 38 HDP8500 Industrial Card Printer/Encoder User Guide L001617 rev 1.
© 2012 HID Global Corporation. All rights reserved. Consumable Status Consumables status screen shows current levels for : Laminate supply Film supply Ribbon supply Integer Selection While setting a value in the settings menu that requires an integer input, this screen will be presented. Current value is displayed and can be incremented or decremented by the + or – keys respectively. 39 HDP8500 Industrial Card Printer/Encoder User Guide L001617 rev 1.
© 2012 HID Global Corporation. All rights reserved. Cancel revert save buttons Confirmation Some settings require a confirmation. to Decline or to Accept. Card Counter Card counter screen allows the user to view the total number of cards printed as well as the Current count for a particular batch. 40 HDP8500 Industrial Card Printer/Encoder User Guide L001617 rev 1.
© 2012 HID Global Corporation. All rights reserved. The current count can be reset to zero by pressing the reset key. Help Screen Help screen (in the future) will provide detailed information for recovering from common errors. 41 HDP8500 Industrial Card Printer/Encoder User Guide L001617 rev 1.
© 2012 HID Global Corporation. All rights reserved. Section 3: Setup and Installation Procedures Inspection – HDP8500 While unpacking your Printer, inspect the carton to ensure that no damage has occurred during shipping. Make sure that all supplied accessories are included with your unit. Unpacking the Printer.
© 2012 HID Global Corporation. All rights reserved. Loading the HDP Transfer Film Note: Fargo Card Printers require highly specialized supplies to function properly. To maximize Printer life, reliability, printed card quality and durability, you must use only Fargo Certified Supplies. For this reason, your Fargo warranty is void, where not prohibited by law, if you use nonFargo Certified Supplies. Step Procedure 1 Unlock and open the Printer cover . 2 Remove the HDP Film Cartridge.
© 2012 HID Global Corporation. All rights reserved. 3 Load the HDP Film into the Film Cartridge and click into place. The green take-up spool goes on the left side, the full roll goes on the right side. 4 Tighten the HDP Film. 5 Insert the HDP Film cartridge back into the printer and click into place. 44 HDP8500 Industrial Card Printer/Encoder User Guide L001617 rev 1.
© 2012 HID Global Corporation. All rights reserved. Loading the Ribbon Step Procedure 1 Unlock and open the Printer cover . 2 Remove the HDP Ribbon Cartridge. 3 Load the HDP Ribbon into the Cartridge and click into place. The blue take-up spool goes on the left side, the full roll goes on the right side. 45 HDP8500 Industrial Card Printer/Encoder User Guide L001617 rev 1.
© 2012 HID Global Corporation. All rights reserved. 4 Tighten the Ribbon . 5 Insert the HDP Ribbon cartridge back into the printer and click into place. 6 Insert the HDP Ribbon cartridge back into the printer and click into place. 46 HDP8500 Industrial Card Printer/Encoder User Guide L001617 rev 1.
© 2012 HID Global Corporation. All rights reserved. Loading the Card Cleaning Roller The HDP8500 contains 2 card cleaning assemblies in the Printer and 1 cleaning assembly in the Lamination Module. Use the same procedure for both. Step Procedure 1 Unlock and open the Printer cover . 2 Remove the Card Cleaning Roller from the Print Ribbon packaging and insert the Cleaning Roller into the gray handle. 3 Remove the protective sleeve from the Card Cleaning Roller.
© 2012 HID Global Corporation. All rights reserved. 4 Insert the Card Cleaning Roller assembly into the card cleaning slot. 5 Follow the same procedure for the second cleaning assembly. 6 Follow the same procedures for the Lamination Module assembly. 48 HDP8500 Industrial Card Printer/Encoder User Guide L001617 rev 1.
© 2012 HID Global Corporation. All rights reserved. Loading the Overlaminate (Note: This procedure only applies to the HDP8500-LC.) The loading process for both the Thermal Transfer Overlaminate and the PolyGuard™ Overlaminate material is the same. Refer to the following steps to load either type of overlaminate into the Printer. Step Procedure 1 Unlock and open the Printer cover . 2 Remove the HDP Lamination Cartridge from the Printer.
© 2012 HID Global Corporation. All rights reserved. 5 Insert the HDP cartridge back into the printer and click into place. 50 HDP8500 Industrial Card Printer/Encoder User Guide L001617 rev 1.
© 2012 HID Global Corporation. All rights reserved. Loading the Blank Cards Step 1 Procedure Unlock and open the Card Input Cartridge. Leave the cartridge in the Printer, There is no need to completely remove the cartridge to load cards. 2 Load the cards into the cartridge. Important: The front of the card must face DOWN. The back of the card or the magnetic stripe on the card must face UP. The Smart Chip is loaded on the bottom. 3 Place the Card Weight on top of each stack of cards.
© 2012 HID Global Corporation. All rights reserved. 4 Close and lock the Card Input Cartridge. 5 To completely remove the Card Input Hopper unlock the Printer Top Cover and release the BLUE lever to unlock the individual hopper. 52 HDP8500 Industrial Card Printer/Encoder User Guide L001617 rev 1.
© 2012 HID Global Corporation. All rights reserved. Installing the Card Output Hopper Step 1 Procedure Unlock and place the card output hopper onto the output side ( left) of the printer and push down until it clicks into place. Connecting Power to HDP8500 Printer and/or Lamination Module Important! Do not plug in the USB cable until prompted to do so during the installation of the HDP8500 Printer Driver. Refer to the Driver installation procedure below.
© 2012 HID Global Corporation. All rights reserved. Printer Driver Installation Procedures (For MAC OS X and Linux Driver and User Guide see www.hidglobal.com Step 1 Procedure Close down all programs. Insert the Software Installation CD into your computer‟s CD drive. After a few seconds, the CD‟s installer program will automatically open. Follow the CD‟s on-screen Procedures to complete installation.
© 2012 HID Global Corporation. All rights reserved. Section 4: Printer Driver Operations See this section for printer adjustments. Using the Card tab 55 HDP8500 Industrial Card Printer/Encoder User Guide L001617 rev 1.
© 2012 HID Global Corporation. All rights reserved. Selecting the Card Size Important! Never run cards with a contaminated, dull or uneven surface through the Printer. Printing onto such cards will ultimately lead to poor print quality. Always store the card stock in its original packaging or in a clean, dust-free container. Do not print onto cards that have been dropped or soiled. Step 1 Procedure Select the appropriate card option: These Card Printers accept standard CR80 sized cards (3.452L x 2.
© 2012 HID Global Corporation. All rights reserved. Selecting the Card Type Select the appropriate card type according to the composition of the card stock. Step Card Type Procedure You have these selections (to choose from): Fargo UltraCard Premium III (Default Card Type) = 180˚ and 2 sec Fargo Ultracard = 175˚and 2.0 sec HID Tech Card Composite = 190˚ and 2 sec HID Tech Card PVC =180˚and 2.0 sec Indala FlexISO – Standard (FPISO) = 185˚and 2.
© 2012 HID Global Corporation. All rights reserved. In addition, cards must have a completely smooth, level surface in order for the Printer to achieve consistent color Coverage. Some types of Proximity cards, for example, have an uneven surface which will inhibit consistent color transfer. Likewise, some smart card chips are raised slightly above the cards surface, which also results in poor color transfer.
© 2012 HID Global Corporation. All rights reserved. Display A Printing on Alternate Card Stocks In order to optimize the HDP Card Printer‟s capabilities for cards with hard-to-print surfaces, we recommend evaluating the card stock selection before installation of the Printer. The variability in cards based on: Different surface textures and different sources of raw materials: This may require different HDP Film transfer parameters.
© 2012 HID Global Corporation. All rights reserved. Conducting the Tape Adhesion Test It is important to conduct tape adhesion tests because Fargo cannot be certain which transfer temperature and Dwell Time will work best (when printing cards other than UltraCard III). (Note: The optimal transfer settings may vary from card type to card type.) Important! Inadequate time and temperature could produce cards that are more vulnerable to accelerated wear and dye migration.
© 2012 HID Global Corporation. All rights reserved. Once the temperature has been increased 4 times (20 degrees), reset temperature to default and increase the Dwell Time by .5 second. Repeat this process until adequate adhesion is achieved. Ensure that the cards (in use) have a surface roughness (Ra) of 60 micro inches or less. This information should be available from the card manufacturer. 61 HDP8500 Industrial Card Printer/Encoder User Guide L001617 rev 1.
© 2012 HID Global Corporation. All rights reserved. Using the Card Hopper Selection Use this option to select the Card Input Hopper. There are 2 options for setting the Hopper. Step 1 Procedure From the Printer Driver select the desired hopper from which to feed the card. 2 From the Printer Ready screen select the HOPPER icon 3 Cycle between Hopper 1 and Hopper 2 by selecting 1 or 2 from the Printers Display Control Panel.
© 2012 HID Global Corporation. All rights reserved. Setting the Orientation Select either the Portrait or Landscape radio buttons for Orientation. Step 1 Procedure Select Portrait to cause the card to print in a vertical orientation. OR Select Landscape to cause the card to print in a horizontal orientation. 63 HDP8500 Industrial Card Printer/Encoder User Guide L001617 rev 1.
© 2012 HID Global Corporation. All rights reserved. Specifying the number of Copies Specifies the number of copies to be printed. The upper limit is 10000 and the lower limit is 1. Selecting the Diagnostics button This will launch the Diagnostic tool (if installed). The Workbench Utility Program is included on the driver CD. Also see the Workbench Utility Program User Guide located on the driver CD.. 64 HDP8500 Industrial Card Printer/Encoder User Guide L001617 rev 1.
© 2012 HID Global Corporation. All rights reserved. Printing a Test Print Image Step 1 Procedure Install a HDP8500 compatible ribbon in the Printer for the Test Print. The ribbon installed determines the Test Print PRN file sent to the printer. 2 Open the Driver settings. a. From your computer‟s startup menu, select Settings > Printers and Faxes. b. Double click on the HDP8500 Card Printer under the Printer‟s window. c. Select Printing Preferences under the Printer drop-down menu.
© 2012 HID Global Corporation. All rights reserved. Selecting the About button Select the About button to open a dialog box containing the copyright information as well as the Driver‟s version number and date code. Selecting the Toolbox button Select the Toolbox button. See the Section 5: Accessing the Toolbox HELP section for more information and procedures. 66 HDP8500 Industrial Card Printer/Encoder User Guide L001617 rev 1.
© 2012 HID Global Corporation. All rights reserved. Using the Device Options tab This section describes the use of the Device Options tab. 67 HDP8500 Industrial Card Printer/Encoder User Guide L001617 rev 1.
© 2012 HID Global Corporation. All rights reserved. Detecting Supplies at Print Time Function Step 1 Procedure Use the Supplies checkbox for auto detection of the consumables, which are the Ribbon and, Film. See below. In the Firmware, the values (representing the installed Ribbon, installed Transfer Film) are updated on initialization (including each time the cover is closed).
© 2012 HID Global Corporation. All rights reserved. Adjusting the Ribbon Type Use the Ribbon Type dropdown menu to match Ribbon type. Step 1 Procedure Adjust to match the Ribbon Type selection with the Ribbon type that is loaded in the Printer.
© 2012 HID Global Corporation. All rights reserved. Adjusting the Film Type Step 1 Procedure Allows you to select the film type option that is appropriate for the type of HDP film currently loaded in the Printer. Select the Clear option to automatically adjust the appropriate transfer time and temperature to pre-determined defaults. (Note: Select this option to automatically adjust the transfer temperature and the dwell times to defaults when non-custom card type is chosen on Card tab.
© 2012 HID Global Corporation. All rights reserved. Using the Dual Sided - Print Both Sides option Use this option to automatically print on both the front and backside of a card. Step 1 2 Procedure Select this option in conjunction with any application program that supports a multiple-page document, duplex printing. (Note: The program must be able to send down two or more separate pages to be printed within the same document.) Page 1 will be transferred to the front side of the card.
© 2012 HID Global Corporation. All rights reserved. (Note #2: This option is not available if using a YMCKH Ribbon.) Using the Print Both Sides - Print Back Image on Front of Card option This option becomes active when Print Both Sides is checked. The Default is active and unchecked. Step 1 Procedure Select this option: If you need to print the first page of a two-page document on the backside of the card. OR If you need to print the resin black on the chip-side of the Smartcard.
© 2012 HID Global Corporation. All rights reserved. cards in the usual fashion.) When this option is selected, the Print Both Sides option is automatically disabled.) When attempting to print a two-page document (if Print Back Side Only is selected), the first page of the document will print on the backside of the card. The second page of the document will then be printed on the back of a second card.
© 2012 HID Global Corporation. All rights reserved. Using the Options Group The functions under the Options Group are described in this section. Using the Rotate Front 180 Degrees or Rotate Back 180 Degrees options Use this option to change the position of the printed image in relation to the set location of a card's Magnetic Stripe or smart chip. Step 1 Procedure Select the Rotate Front 180 Degrees option to rotate the image on the front of the card by 180 degrees when printed.
© 2012 HID Global Corporation. All rights reserved. 75 HDP8500 Industrial Card Printer/Encoder User Guide L001617 rev 1.
© 2012 HID Global Corporation. All rights reserved. Using the Disable Printing option Use this option to disable the printing capabilities of the Printer while still allowing the Printer to encode cards. (Note: This option is useful to encode or re-encode preprinted cards without wasting additional time or printing supplies.
© 2012 HID Global Corporation. All rights reserved. Using the Dual Pass and Invert F-Panel Image options See Configuring Fluorescent Data (F-Panel for YMCFK Ribbon) using the Workbench procedure in the Fargo Workbench Printer Utility section. Dual Pass option: This refers to the fact that the fluorescing dye can be applied to a separate panel of HDP Film. (Note: First, the YMC ink is applied to a panel of HDP Film; then, the F and possibly K are applied to a separate panel.
© 2012 HID Global Corporation. All rights reserved. The end result is the ribbon has almost no resin left on it while the film has the scrambled image. Only ribbons with the K panel have this option available in the driver. Using the Encrypt Job Data • AES256 encryption - protects the data passed from the computer to the printer . Using the Use Substitute Panel Data Only ribbons with the F or I panel have this option available in the driver.
© 2012 HID Global Corporation. All rights reserved. the third page is printed on the back of the card with the YMC ribbon panel, the fourth page is printed on the back of the card with the F ribbon panel. 79 HDP8500 Industrial Card Printer/Encoder User Guide L001617 rev 1.
© 2012 HID Global Corporation. All rights reserved. Using the Image Color tab Use this tab to adjust color properties. Step 1 Procedure Select the Image Color tab to control the Sharpness, Contrast and Gamma of the printed image, as well as the individual color balance of Yellow, Magenta and Cyan. See both displays in this section. Proceed to related procedures (provided below). Display A – Image Color tab 80 HDP8500 Industrial Card Printer/Encoder User Guide L001617 rev 1.
© 2012 HID Global Corporation. All rights reserved. Using the Image Quality – Color Matching dropdown Step 1 Procedure Select None if color correcting the image for printing has already been done or if using third party color matching software. OR Select System Color Management to allow the Printer Driver to make color corrections similar to the Algebraic option but through a more complex color matching algorithm.
© 2012 HID Global Corporation. All rights reserved. Step 3 Procedure Control the amount of heat the Printer uses when printing with the resin black Panel by adjusting the Resin Heat slide. Move the slide to the left to cause less heat to be used in the printing process, causing resin images to be lighter or less saturated. OR Move the slide to the right to cause more heat to be used, causing resin images to be darker or more saturated.
© 2012 HID Global Corporation. All rights reserved. Step 4 Procedure As needed, return all options to their factory settings by clicking on the Default button. Adjusting for the Resin Dither Select the appropriate dither method according to the type of image to be printed. (Note: This option only affects those objects printed on the backside of a card with the resin black Panel of a YMCK YMCKK and YMCKI Print Ribbon.
© 2012 HID Global Corporation. All rights reserved. Using the Advanced Image Color window Step Procedure 1 Click on the Advanced Settings button to bring up the Advanced Image Color window. See below. 2 For the Image Quality slider bar controls, see below. Click OK to accept any variance from the default (for this specific slider bar) and return to the Image Color tab window. Click Cancel to negate any variance on the slide and return to the Image Color tab window.
© 2012 HID Global Corporation. All rights reserved. Step Procedure 3 For the Balance slider bar controls, see below. Click OK to accept any variance from the default (for this specific slider bar) and return to the Image Color tab window. Click Cancel to negate any variance on the slide and return to the Image Color tab window. Click on the Default button to clear changes back to the default settings for this window only.
© 2012 HID Global Corporation. All rights reserved. Step Procedure 4 Click on the Default button to clear changes back to the default settings for this window only and NOT for the Advanced Image Color dialog box 86 HDP8500 Industrial Card Printer/Encoder User Guide L001617 rev 1.
© 2012 HID Global Corporation. All rights reserved. Using the Image Transfer tab Use this tab to adjust the Image Position, Transfer Dwell Time and Transfer Temperature. (Note: The HDP8500 Printing Preferences window has the same Image Color tab functionality as the HDP8500-LC Printing Preferences window.) 87 HDP8500 Industrial Card Printer/Encoder User Guide L001617 rev 1.
© 2012 HID Global Corporation. All rights reserved. Adjusting the Image Position controls Use the Image Position controls to position the image on a card (to be adjusted). Step 1 Procedure Adjust the Image Position values by clicking on the Vertical and Horizontal adjustment arrows. These values ensure that the Cards always remain in the same position as they travel through the Printer (regardless of image orientation).
© 2012 HID Global Corporation. All rights reserved. The display (below) represents how the printed image will move in relation to the fixed card position as positive and negative image placement values are entered. Step 2 Procedure Follow these instructions: Use the Vertical adjustment to move the image toward the front of the Printer if a positive number is entered and toward the rear of the Printer if a negative number is entered.
© 2012 HID Global Corporation. All rights reserved. Adjusting the Transfer Dwell Time and Temperature Use the Image Transfer option to control of the Transfer Dwell Time and Transfer Temperature. These settings control the speed and temperature at which printed images are transferred from the HDP Film to the card. These settings may vary depending on the card type. The Printer Driver automatically optimizes these settings according to the selection made in the Card Type option.
© 2012 HID Global Corporation. All rights reserved. Print a card. a. If the HDP Film is not transferring properly, adjust these settings accordingly. OR b. If the Film is transferring properly, perform a final durability test called the Tape Test. For instructions on how to do a tape test, see Conducting the Tape Adhesion Test procedure. Using the Flattener Settings Step 1 Procedure Click the Card Flattener Enable box. Use the slider to adjust the Temperature, Dwell Time, and Delay OFFSETS.
© 2012 HID Global Corporation. All rights reserved. Using the Default button Step 1 Procedure Use the Default button to reset the Transfer Dwell Time and Transfer Temperature to defaults for current Card Type choice. 92 HDP8500 Industrial Card Printer/Encoder User Guide L001617 rev 1.
© 2012 HID Global Corporation. All rights reserved. Using the Magnetic Encoding tab Use these options only if the Printer has an optional Stripe Encoding Module installed. (Note: If no Encoder is detected, the tab is active but all functions are grayed out.) Step 1 Procedure Select the Magnetic Encoding tab to display options for controlling the Magnetic Stripe encoding process. (Note: The following describes these options and the Printer's magnetic encoding process.
© 2012 HID Global Corporation. All rights reserved. Using the Encoding Mode dropdown list Use the Encoding Mode option to specify which magnetic encoding standard to use. Category Description Magnetic Encoding options (changing and modifying) Change the encoding mode and coercivity setting or modify the ISO standards for tracks 1, 2 and 3, by correctly modifying these Magnetic Encoding options.
© 2012 HID Global Corporation. All rights reserved. Reverse Bit Order and Add Leading Zero options for each individual magnetic encoding track. JIS II Encoding selection (active and inactive functions) If you select JIS II Encoding, specific standards are used. (Note: This selection disables all the Magnetic Track Options tabs. It also disables the Coercivity dropdown function and Shift Data Left checkbox option.) The default Coercivity is 600 Oe.
© 2012 HID Global Corporation. All rights reserved. Selecting the Coercivity/Magnetic Track Use the ISO option for encoding capability for either high- or low-coercivity cards on tracks 1, 2 and 3 and is the industry's standard mode of magnetic encoding. Step 1 Procedure Select the Coercivity option (Oersted) to use the Magnetic Stripe type that matches the card type.
© 2012 HID Global Corporation. All rights reserved. Reviewing the Shift Data Left Function Use the Shift Data Left option, which applies to all tracks when selected. (Note: When this option is unchecked, it is the default.) Step 1 Procedure Select this option to shift the recorded magnetic data to the left-hand side of the card's Magnetic Stripe. (Note: This is useful in situations that require cards to be readable with insert type readers.
© 2012 HID Global Corporation. All rights reserved. Using the ASCII Offset dropdown list Use this option to customize the Character ASCII Offset used to encode the magnetic data on the currently selected track. (Note: This character-offset value is subtracted from the ASCII value of each Magnetic Stripe data character prior to encoding on the track.) Step 1 Procedure Select NULL to change the ASCII Offset to NULL. OR Select SPACE to change the ASCII Offset to SPACE. (Note: This is the default for Track 1.
© 2012 HID Global Corporation. All rights reserved. Step 1 Procedure Select 75 BPI to change the bits per inch to 75 BPI. (Note: This is the default for Track 2.) OR Select 210 BPI to change the bits per inch to 210 BPI. (Note: This is the default for Tracks 1 and 3.) Using the LRC Generation dropdown list Use this option to customize the LRC Generation Mode (used to encode the magnetic data on the currently selected track). Step 1 Procedure Select No LRC to change the LRC Generation to none.
© 2012 HID Global Corporation. All rights reserved. Using the Character Parity Mode dropdown list Use this option to customize the Encoding Mode (used to encode the magnetic data on the currently selected track). Step 1 Procedure Select No Parity to change the Character Parity to none. OR Select Even Parity to change the Character Parity to Even Parity. OR Select Odd Parity to change the Character Parity to Odd Parity. (Note: This is the default for all tracks.
© 2012 HID Global Corporation. All rights reserved. Reviewing the ISO Track Locations The magnetic Encoding Module encodes onto tracks in accordance with an ISO 7811-2 Magnetic Stripe. For track locations, review the display below. 0.223" 0.353" 0.493" TRACK1 0.110" 0.130" TRACK2 0.110" TRACK3 0.110" 0.140" 101 HDP8500 Industrial Card Printer/Encoder User Guide L001617 rev 1.
© 2012 HID Global Corporation. All rights reserved. Sending the Track Information Magnetic track data is sent in the form of text strings from the application software to the Printer Driver. In order for the Printer Driver to differentiate between Magnetic Track data and the rest of the printable objects, specific characters must be added to the magnetic data to be encoded. These specify the data that is to be encoded, the tracks to encode and mark the start and stop of the data string.
© 2012 HID Global Corporation. All rights reserved. Reviewing the Sample String Track 1: ~1%JULIEANDERSON^1234567890? Track 2: ~2;1234567890987654321? Track 3: ~3;1234567890987654321? Track Start Sentinel End Sentinel Field Separator Track 1 % ? ^ Track 2 ; ? = Track 3 ; ? = Valid Characters ASCII 32-95 (See the table below.) ASCII 48-63 (See the table below.) ASCII 48-63 (See the table below.
© 2012 HID Global Corporation. All rights reserved. Reviewing the ASCII Code and Character Table ASCII Code Character ASCII Code Character ASCII Code Character 32 space 56 8 80 P 33 ! 57 9 81 Q 58 : 82 R 34 35 # 59 ; 83 S 36 $ 60 < 84 T 37 % 61 = 85 U 38 and 62 > 86 V 39 ' 63 ? 87 W 40 ( 64 @ 88 X 41 ) 65 A 89 Y 42 * 66 B 90 Z 43 + 67 C 91 [ 44 ' 68 D 92 \ 45 - 69 E 93 ] 46 .
© 2012 HID Global Corporation. All rights reserved. Using the Default button Step 1 Procedure Use the Default button to reset defaults for the current Track tab only. See below. 105 HDP8500 Industrial Card Printer/Encoder User Guide L001617 rev 1.
© 2012 HID Global Corporation. All rights reserved. Using the Lamination tab Use this option to control specific Printer functions. These options allow you to control the Printer's Lamination process. (Note: When no Laminator is detected, the Lamination tab is active but all functions are grayed out.) Important! FARGO Card Printers require highly specialized overlaminates to function properly.
© 2012 HID Global Corporation. All rights reserved. Selecting the Lamination Position Step 1 Procedure Use the Lamination Position control to adjust the horizontal position of the PolyGuard Overlaminate. (Note: This control functions in the same manner as the Image Position controls, except only the horizontal position of the overlaminate requires adjustment.) To adjust the Lamination position, click on the Horizontal adjustment arrows.
© 2012 HID Global Corporation. All rights reserved. Selecting the Lamination Type Step 1 Procedure Select one of the Lamination Type options, according to which type of Lamination media is currently installed. Two types of overlaminates are supported by the Driver: Film Lamination and PolyGuard Lamination. Custom versions of each type are also available. Select the Clear Film Lamination option if the Thermal Transfer Film Overlaminate type is installed in the Lamination Module. Select the 0.
© 2012 HID Global Corporation. All rights reserved. Using the K Panel Resin tab Use this tab to adjust the Card Size, the Direction the Card Travels through the Printer, the Print All Black with K Panel (options) and the Defined Areas. Use this tab to control where the resin black (K) Panel of a full-color Ribbon is printed. (Note: When Disable Printing under the Device Options tab is selected, this tab will be active while all functions will be grayed out.
© 2012 HID Global Corporation. All rights reserved. Using the Click and Drag capability Click and drag the corners and the sides of an area to change size and location of area. The Horizontal, Vertical size and X, Y coordinates update accordingly. Click and drag the area to change the location. The X, Y coordinates update accordingly. Selecting “inches or mm” radio button Select from the inches or mm radio button to change the measurement type. (Note: This is similar to the choice on the Card tab.
© 2012 HID Global Corporation. All rights reserved. Selecting the Full Card Step 1 Procedure Select the Full Card option to print the resin black (K) Panel for all black found within all areas of the image, as shown below. The Card image becomes fully black. The resin prints anywhere for black. The Add and Delete buttons become inactive and are grayed out. The Defined Area object size and location scroll controls become inactive and are grayed out.
© 2012 HID Global Corporation. All rights reserved. Selecting the Print YMC under the K and Print K Only options Step 1 Procedure Use the Defined Area function. a. Define another area by clicking on the Defined Area. (Note: Another .2 x .2 (5mm x 5mm) area will appear in the lower left-hand corner. This is the location in which all newly defined areas will first appear. Up to 5 areas can be defined.) b. Delete an area by selecting the area and clicking on the Delete button.
© 2012 HID Global Corporation. All rights reserved. Using the Printer Supplies tab Use the options on this tab to view information about the Ribbon, HDP Film, Laminate (Cartridge 1) and Laminate (Cartridge 2) installed in the Printer. (Note: The gauges are horizontal.) 113 HDP8500 Industrial Card Printer/Encoder User Guide L001617 rev 1.
© 2012 HID Global Corporation. All rights reserved. Reviewing Information on the Supplies tab Here are the guidelines for automatic positioning on the Supplies tab. Step 1 Procedure Use this tab to determine the following information (see below): Ribbon Level: Type, Reorder Number and Gauge Indicator. HDP Film Level: Type, Reorder Number and Gauge Indicator. Lamination - Cartridge 1 Level: Type, Reorder Number and Gauge Indicator. (Note: This is visible only when the Laminate – Cartridge 1 is detected.
© 2012 HID Global Corporation. All rights reserved. Section 5: Accessing the Toolbox Select Toolbox to access the Driver Toolbox window and its tabs, as shown throughout this section. OK button: Closes the dialog box and saves the Driver configuration changes since the Driver dialog box has been opened. Cancel button: Closes the dialog box and cancels the Toolbox changes since the Driver dialog box has been opened. Help button: Launches Help specific to the active tab.
© 2012 HID Global Corporation. All rights reserved. Selecting the Configuration tab Step 1 Procedure Select the Configuration tab. Under Printer Features, select features by clicking on a check box or by clicking on the Auto Select button. See instructions provided under that heading. Under Event Monitoring, select events to be monitored. (Note: The Driver will notify or prompt the User when the selected events occur.) Under Set Language for Printer LCD Display, select a language.
© 2012 HID Global Corporation. All rights reserved. Using the Optional Printer Features Group Box The Default setting is checked. If checked, upon Configuration tab activation, the Driver retrieves the installed Printer features information from the Firmware and automatically checks the appropriate check boxes for Dual Sided, Lamination and Magnetic Encoder. If checked, the Dual Sided, Laminator, and Magnetic Encoder checkboxes are read only.
© 2012 HID Global Corporation. All rights reserved. The default setting is checked. If checked, the Ribbon Low message box is displayed with every print job when Printer reports low Ribbon to the Driver. Do not show this message again: The check box allows the User to suppress message per Driver instance. Default = unchecked. The Clean Printer, Error Status, and Password Prompt message will be displayed if these boxes are checked. Reviewing the Ribbon Low message The default setting is checked.
© 2012 HID Global Corporation. All rights reserved. Do not show this message again. The check box allows the User to suppress message per Driver instance. Default = unchecked. Selecting the LCD Display Language The LCD Display Language can be chosen or changed from the Driver Toolbox Configuration tab or directly from the LCD Display. The last language chosen from any of these methods is the active language for the LCD. English is the default.
© 2012 HID Global Corporation. All rights reserved. Using the Driver to set the language Select the Toolbox option Select the Configuration Tab Select the Printer LCD Display language Click OK 120 HDP8500 Industrial Card Printer/Encoder User Guide L001617 rev 1.
© 2012 HID Global Corporation. All rights reserved. Selecting the Calibrate Laminator tab The Calibrate Laminator tab is active when the Laminator is automatically detected or when the Laminator is manually checked (as a Printer Feature on the Configuration tab). Calibrate button: Sends calibrate Laminator command to Printer. Follow the instruction on the page for setting up the Printer. Lamination Module must be warm before sending Calibration option.
© 2012 HID Global Corporation. All rights reserved. Selecting the Calibrate Film tab Calibrate button: Sends calibrate film command to Printer. Follow the instruction on the page for setting up the Printer. Step Procedure Option1 Select the Calibrate Film tab. a. Leave the Film Cartridge installed. b. Close the Printer Cover. c. Click on the Calibrate button. f. Click on the OK button to close the screen. d. If successful the printer‟s LCD will reset to ready.
© 2012 HID Global Corporation. All rights reserved. Selecting the Calibrate Ribbon tab Calibrate button: Sends the Calibrate Ribbon Command to Printer. Follow the instructions below to set up the Printer. Step Procedure Option 1 Select the Calibrate Ribbon tab. e. Leave the Ribbon Cartridge installed a. Close the Printer Cover. b. Click on the Calibrate button. c. Click on the OK button to close the screen. d. If successful the printer‟s LCD will reset to ready.
© 2012 HID Global Corporation. All rights reserved. Selecting the Clean Printer tab The button for the Clean Printer tab is described below. Clean Button: Launches cleaning routine. Follow the instruction on the page for setting up the Printer. Help button: Launches help that is specific to this tab. Use the CR80 size cleaning card. Part Number: 085974 Step Procedure Option 1 Using the Printer Driver option Set up the Printer and click the Clean Printer tab. a.
© 2012 HID Global Corporation. All rights reserved. f. When the Cleaning routine is complete, the Cleaning Card will exit the Printer. g. Reinstall the Card, Film and Laminate Cartridges. The Cleaning routine will begin after all current print jobs have completed. Option 2 Using the LCD Display option Set up the printer as in option 1.
© 2012 HID Global Corporation. All rights reserved. Selecting the Advanced Settings tab Use the Advanced Settings tab for adjusting the internal Printer settings, which are customized for every Printer at the factory and saved directly within the Printer's memory. (Note: You can select the Restore Defaults to restore the internal default settings.) These change values for Firmware settings. See below.
© 2012 HID Global Corporation. All rights reserved. Setting the Printhead Resistance This is factory set. If the main board or the Printhead is replaced then adjust this number. Locate the Printhead Setting Number on the bottom of the Printhead. The number reads R=XXXX. Using the Print LOF (Left of Form) Option Follow this instruction. Step Procedure 1 Print the Alignment Card Self-test.
© 2012 HID Global Corporation. All rights reserved. Using the Image Darkness Option Use this option to set the overall darkness of the printed image by increasing or decreasing the amount of heat used by the Printhead when printing. Step 1 Procedure Lighten the printed image by clicking the down arrow value and decrease the amount of Printhead heat. to enter a negative OR Darken the image by clicking the up arrow increase the amount of Printhead heat.
© 2012 HID Global Corporation. All rights reserved. Using the Print TOF (Top of Form) Option Follow these instructions: Step Procedure 1 Print the alignment card self-test (The front edge should look like figure below). 2 Adjust the Print TOF until the green border is eliminated and the entire Transfer Alignment Block is shown in the center of the card. Note – due to variation in roller alignment, the green border may appear at a slight angle on the top of the card.
© 2012 HID Global Corporation. All rights reserved. Using the Mag Top of Form Option Use this option only if the Printer has a built-in Magnetic Stripe Encoder. If so, use this option to shift the starting point of where the Printer will begin encoding the magnetic track data on a card's Magnetic Stripe. When adjusting this value, keep in mind that a card and its Magnetic Stripe will always remain in the same relative position as the card travels through the Printer.
© 2012 HID Global Corporation. All rights reserved. Using the Transfer TOF (Top of Form) Option Follow this instruction. Step Procedure 1 Print the Alignment Card Self-test. 2 Adjust the Transfer TOF until the TOF Zero Line is located on the edge of the card as shown below. 131 HDP8500 Industrial Card Printer/Encoder User Guide L001617 rev 1.
© 2012 HID Global Corporation. All rights reserved. Using the Transfer EOF (End of Form) Option Follow this instruction. Step Procedure 1 Print the Alignment Card Self-test. 2 Setting the EOF positive (i.e. to a + number) will cause the image length to SHORTEN Setting the EOF negative (i.e. to a – number) will cause the image length to GROW. Using the Transfer Temp Offset Option This option adds an offset to the temp the printer is reading from the transfer roller.
© 2012 HID Global Corporation. All rights reserved. Controls Both the Printer itself and the Printer‟s software Driver control the built-in Transfer Roller. Temperature Adjustment To change the temperature of the Transfer Roller, adjust its temperature through the Image Transfer Tab within the Printer Driver setup window. Once adjusted, the new temperature settings will be sent down with the next print job along with the rest of the Printer Driver information.
© 2012 HID Global Corporation. All rights reserved. Using the Film Print Take-up Tension Option IMPORTANT: The Film Drive sets the baseline for the Film Tension and should not be adjusted by the reseller or the end User. Adjustments moderately change the image length.) Using the Resin Heat Adjust Option Use this adjustment for Black resin text and barcodes appear faded or too light/dark.
© 2012 HID Global Corporation. All rights reserved. Using the Blush Point Option The blush point is compensation during printing: There is no dye transfer. There is no a light gray line on a portion of the card. It should be white. Using the LCD Contrast Option Use this setting to adjust the brightness of the LCD panel. Using the Film Supply Transfer Tension Option Adjustments significantly change image length. Only small adjustments recommended because of sensitivity.
© 2012 HID Global Corporation. All rights reserved. Using the Film Print Supply Tension Option IMPORTANT: The Film Drive sets the baseline for the Film Tension and should not be adjusted by the reseller or the end User. Adjustments moderately change the image length.) Using the Cleaning rate Option The message to clean the printer uses a defaulted number of passes of 3000 and to change this click up or down one number per one card.
© 2012 HID Global Corporation. All rights reserved. Using the EAT Disable Option This is and ON or OFF switch. 0 is off and 1 is on. This will tell the printer to keep track of the environmental temperature and compensate for it. “Environmentally Adaptive Transfer” automatically adjusts the transfer temp based on the ambient air conditions within the printer. Will increase or decrease the transfer roller temp by as much as 20C in extreme conditions.
© 2012 HID Global Corporation. All rights reserved. Using the Mag Hi-Co Voltage Offset Option This option changes the voltage going the magnetic head. This is factory set and should not be changed unless directed by a technician. Using the Mag Lo-Co Voltage Offset Option This option changes the voltage going the magnetic head. This is factory set and should not be changed unless directed by a technician. Using the Mag Flipper Angle Offset Option This option changes the angle of the Flipper Table.
© 2012 HID Global Corporation. All rights reserved.
© 2012 HID Global Corporation. All rights reserved. Warming Time Delay The setting adjusts how much additional time (in minutes) the printer will wait after the transfer roller reaches temperature before beginning transfer. It has a range of 0 to 20. Power On Ribbon Film Skip This setting enables power up ribbon/film savings. When enabled the ribbon and film will not skip to a new set of panels after a power up.
© 2012 HID Global Corporation. All rights reserved. Ribbon Factory Take-up This setting corrects for motor speed variation of the ribbon take-up motor. It has a range of -20 to +20. The larger the value the faster the motor will go. This is a factory setting, the user should never adjust this. Ribbon Factory Supply This setting corrects for motor speed variation of the ribbon supply motor. It has a range of -20 to +20. The larger the value the faster the motor will go.
© 2012 HID Global Corporation. All rights reserved. Section 6: Fluorescent Panel Usage YMCFK Ribbon for HDP8500 is an economical way to add a fully customizable, incremental level of security to your photo identification cards. This process allows the user to configure the data that is printed with the fluorescent panel of an YMCFK Ribbon. (Note: Any software program may be used to print the special florescent panel of the Ribbon to a card once the driver and Workbench are set up correctly.
© 2012 HID Global Corporation. All rights reserved. Step 3 Procedure a. Click on the Secure ID box on the left. b. Click and drag a box onto the Template. c. Move and size as needed. Step 4 Procedure On the Template, right click on the Secure ID box for the options. 143 HDP8500 Industrial Card Printer/Encoder User Guide L001617 rev 1.
© 2012 HID Global Corporation. All rights reserved. Step 5 Procedure a. Click on the Logo box on the left. b. Click and drag a box onto the Template. c. Move and size (as needed) by grabbing the corner of the box. 144 HDP8500 Industrial Card Printer/Encoder User Guide L001617 rev 1.
© 2012 HID Global Corporation. All rights reserved. Step Procedure 6 On the Template right click on the Logo box for the options shown below. 7 Select Logo File. Find the source of the Logo to place on the card. (Note: Fit to Frame will size the image to fit the box. Once this is set up, this logo will print from the software program. This is set up in the background.) Step 8 Procedure a. Click on the Text box on the left. b. Click and drag a box onto the Template. c. Move and size as needed.
© 2012 HID Global Corporation. All rights reserved. Step 9 Procedure On the Template, right click on the Text box for the options shown below. 146 HDP8500 Industrial Card Printer/Encoder User Guide L001617 rev 1.
© 2012 HID Global Corporation. All rights reserved. Step Procedure 10 Follow the same instruction as above for the back side of the card. 11 a. Save this template using the Save tab. b. Close the Workbench. (Note: Any Software program file printed with the YMCFK ribbon installed into the printer will print this design with the F panel of the ribbon. It will print the same file each time unless you recreate a new template.) Step Procedure 12 Set the ribbon for YMCFK in the Printing Preferences.
© 2012 HID Global Corporation. All rights reserved. Configuring Fluorescent Data (F-Panel for YMCFK Ribbon) using the Application This process creates a fluorescent image on your card using a simple text string command in your badge application. Step Procedure 1 Creating Fluorescent Text: Create a new text box in your badge application. 2 Type the TEXT that you want to appear as fluorescent and put a ~T before the start of the text with no space after the ~T.
© 2012 HID Global Corporation. All rights reserved. Step Procedure 8 Set the ribbon for YMCFK in the Printing Preferences. (Note: The Auto Detect button may also be used.) 9 Check Dual Pass if you would like to print the F panel on a separate panel of HDP film from the YMC image.
© 2012 HID Global Corporation. All rights reserved. Section 7: Inhibit Panel Usage You can use the Inhibit Panel (I designation under YMCKI) to define areas on the surface of the card, in order to prevent the transfer of film to the card surface. Examples of where the I Panel has potential use are to ensure that signature panels, security holograms or pre-printed graphics are not covered or obscured by print images or transfer film. When Active: This feature is active when using YMCKI Ribbons.
© 2012 HID Global Corporation. All rights reserved. Step Procedure 1 Create the Inhibit Panel Layout within the Workbench Printer Utility. 2 Save the file. Failure to save will not allow the Inhibit Panel to work 3 You are now ready to print from your application. Any image file will print with the inhibit panel until that image file is deleted. 151 HDP8500 Industrial Card Printer/Encoder User Guide L001617 rev 1.
© 2012 HID Global Corporation. All rights reserved. Using Inhibit Panel with an Application Some applications can utilize the inhibit panel by using text objects containing a “~i” within the print job itself. The “~i” is followed by the file path and file name of a bitmap file, which is merged when the print job is rendered. Rendering is the process which changes the application output to instructions that the printer understands.
© 2012 HID Global Corporation. All rights reserved. Rendering Print Jobs Rendering of the print job occurs on the given local workstation if the Printer Driver is installed for use on that particular workstation. Shared Instance: However, if the Printer Driver is a shared instance (e.g., shared from another workstation), the print job is rendered (converted to something that the printer understands) on the workstation where the Printer Driver is shared from while under Microsoft Windows.
© 2012 HID Global Corporation. All rights reserved. Landscape Orientation (see below) Portrait Orientation (see below) Step 2 Procedure Place objects on the image, which correspond to the exact areas that are being inhibited. 154 HDP8500 Industrial Card Printer/Encoder User Guide L001617 rev 1.
© 2012 HID Global Corporation. All rights reserved. Step 3 Step 4 Procedure Fill the inhibit areas with black color. Procedure Save the file as a BMP from within Microsoft Paint. 155 HDP8500 Industrial Card Printer/Encoder User Guide L001617 rev 1.
© 2012 HID Global Corporation. All rights reserved. Step 5 Procedure Add the „~i‟ command to the application file. (Note: In this case, Microsoft WordPad was used. With WordPad the „~‟ must be left justified.) 156 HDP8500 Industrial Card Printer/Encoder User Guide L001617 rev 1.
© 2012 HID Global Corporation. All rights reserved. Step 6 Procedure Create the rest of the card using the application. 157 HDP8500 Industrial Card Printer/Encoder User Guide L001617 rev 1.
© 2012 HID Global Corporation. All rights reserved. Step Procedure 7 Print the card from within the application. (Note: In this case, use File -> Print.) If the ~i text object is printed on the card. 8 This completes the procedure.. Using the Test Print The printer has a test print file, which can be sent to the printer to verify the Inhibit Panel functionality. This test image uses a pre-formatted inhibit area and will not test a user-defined inhibit bitmap.
© 2012 HID Global Corporation. All rights reserved. Troubleshooting the Inhibit Panel If you are having trouble getting the Inhibit Panel to produce the expected results, verify the following information. You have used a lower case “~i”, not an upper case “~I”. Some applications have an autocorrect feature that will change the case on the small „i‟. The bitmap file (being used) is at the location on the workstation (see notes above regarding shared printer instances) as specified by the text object.
© 2012 HID Global Corporation. All rights reserved. Section 8: General Troubleshooting The purpose of this section is to provide the User with specific procedures relating to the LCD Messages, Communication Errors, Card Feeding Errors, Encoding Errors, Printing Process Errors, Transfer Process Errors and Diagnosing the Image Problems for the HDP8500. Important! Fargo Card Printers require highly specialized print Ribbons to function properly.
© 2012 HID Global Corporation. All rights reserved. How to use the LCD Error Message Table (example provided) The PC Error Message in Column 1 (LCD Error Message) provides the Lower Left Corner Number. This number identifies the PC Error Message screenshot with its respective LCD Error Message. Note the correlation between Column 1 (below) and the PC Error Message window (below).
© 2012 HID Global Corporation. All rights reserved. Troubleshooting with the LCD Error Message Table LCD Error Message Cause Solution Calibrate Failed Film or Ribbon calibration has failed. Verify the film is installed correctly. No ribbon should be installed for Ribbon Calibration. If this problem persists, call for technical assistance. Film Sensors need to be calibrated. Select Cancel and then perform the Film calibration procedure. Ribbon Sensor needs to be calibrated.
© 2012 HID Global Corporation. All rights reserved. No. 69) Check Film (PC Error Message No. 244) Check Laminate 1 (PC Error Message Nos. 231) Check Laminate 2 (PC Error Message No. 232) Check Film Error (PC Error Message Nos. 26, 158, and 176, 290) Check Ribbon (PC Error Message No. 97, 98, 99) Load cards into Hopper. The film is not able to move correctly. The film has become jammed or the wrong number of film marks was seen during printing. Check for jams/breaks.
© 2012 HID Global Corporation. All rights reserved. Film Out The HDP film has run out. (PC Error Message No. 157) There is no material loaded in the Laminator. Film: Wrong Material The HDP Film is not installed properly or has been damaged. (PC Error Message No. 173) Install a new roll of film and press Resume to continue or Cancel to reset. Verify the correct film is installed in the film Cartridge. Ribbon is installed in Film Cartridge. Flipper Jam (PC Error Message Nos.
© 2012 HID Global Corporation. All rights reserved. Nos.88 and 89) Printhead voltage. technical assistance. Headlift Error This is a problem with the Printhead Lift or Transfer Roller Headlift. Remove ribbon and film cartridges. Check for any obstructions in the printhead area or mechanism. Remove any obstructions. Cycle printhead up and down from the display. If printhead cycles normally, reinstall cartridges. The Transfer Heater Roller is too hot. Heater or RTD is malfunctioning.
© 2012 HID Global Corporation. All rights reserved. (PC Error Message No. 245) Laminator. restart the Printer. Lam Card Jam A jam occurred somewhere between the Printer and the Laminator. Open covers and clear the obstruction/jam. (PC Error Message No. 53, 212, 214, and 215, 216) Lam Com Error (PC Error Message No. 246) Lam Card JamNot Ejected Card can't be ejected from laminator. The Lamination material is stuck to the card. There was a communication failure between the Printer and Laminator.
© 2012 HID Global Corporation. All rights reserved. was installed in cartridge one. The wrong Q Encrypt material was installed in cartridge one. Bad RFID Tag in lam cartridge one. Laminate 2 Bad (PC Error Message No. 234 and 236, 228, 226, 265, 262, 250, 224) The Lamination material in Cartridge 2 is not valid for this Laminator. Install valid material. The wrong Securemark lam material was installed in cartridge. The wrong OEM material was installed in cartridge two.
© 2012 HID Global Corporation. All rights reserved. Lm1 Headlift Err (PC Error Message No. 217) Lm2 Headlift Err (PC Error Message No. 218) Lam 1 Tag Error PC Error Message No. 219, 221) Lam 2 Tag Error PC Error Message No. 220, 220) Lamination Calibrate Temperature error No 266 The Laminator failed to move or sense the lower (Lam module 1) head. Check head connections and call for service/repair. The Laminator failed to move or sense the upper (Lam Module 2) head.
© 2012 HID Global Corporation. All rights reserved. (PC Error Message No. 201, 211) sided Printer. capabilities via the LCD Menu. No flipper module is installed in the printer. If Flipper capabilities are present, ensure that the Print Both Sides option in the Driver is set correctly. The laminate is in the wrong position for the side they want to laminate, and they don't have a flipper. Press the Resume button on the Printer‟s Front Cover to continue printing.
© 2012 HID Global Corporation. All rights reserved. Remove Kiosk Jam (PC Error Message No. 296) Remove Lam Material (PC Error Message No. 210) Remove Lam1 Material (PC Error Message No. 204) Remove Lam2 Material (PC Error Message No. 205) Reject Bin Full The printer is in kiosk mode and a card is stuck under the kiosk sensor. Clear the jam and press Cancel. Single Sided Lam job specified but the material is loaded in both Modules. Remove either Lamination Cartridge.
© 2012 HID Global Corporation. All rights reserved. printing. To cancel the print, press the Cancel Print button from the Driver's display dialog. System Fault (PC Error Message No. 286) Unspecified system error is detected by the Printer Firmware. Reset the Printer and try again. If this problem persists, call for technical assistance. The mag encoder module suffered a fatal error. Reboot the printer. Start Film Release Error An error has occurred during the transfer release phase.
© 2012 HID Global Corporation. All rights reserved. Wrong Ribbon (PC Error Message No. 93, 122, and 172) The print Ribbon is not installed properly or has been damaged. Verify the correct Ribbon is installed in the Ribbon Cartridge. An invalid OEM ribbon was installed in the printer. Undefined or fatal Error Codes (PC Error Message No.267, 268, 269, 271, 272, 273, 274, 275, 276, 277, 282, 283, 284, 285,287) Reboot Printer.
© 2012 HID Global Corporation. All rights reserved. Troubleshooting the Printer Error Message Table Printer Error Message Cause Solution General Error A general Printer error has occurred. Press Cancel on the printer or click on Cancel Print. Card Not Found The Printer is unable to find the card. Please check Printer for a card or other obstruction, remove the card and cancel the print by pressing the Cancel Print button from the Driver‟s display dialog or the Cancel button, located on the Printer.
© 2012 HID Global Corporation. All rights reserved. Printer's LCD display. Card Jam A Card has become jammed in the Printer. f. Open the Printer's Front Cover and remove the Print Ribbon and Film Cartridges. g. Clear any cards in the printer by using the Forward and/or Back Buttons located on the printer‟s LCD display. h. Re-insert the Ribbon and close the Printer‟s Front Cover. Card Jam (Encoder) A Card has become jammed in the Printer's Encoding station. i.
© 2012 HID Global Corporation. All rights reserved. c. Close the Printer‟s Front Cover. d. Press the Resume button located on the Printer's LCD display to continue printing. e. To cancel the print, press the Cancel Print button from the Driver's display dialog or the Cancel button on the Printer's LCD display. Card Jam (Laminator) A Card has become jammed in the Printer's Lamination Module. a. Open the Printer's Module‟s Front Cover and remove the Overlaminates. b.
© 2012 HID Global Corporation. All rights reserved. card. b. Clear any cards in the Flipper Module by using the Forward and/or Back buttons located on the Printer‟s Front Cover. c. Ensure that the Flipper Table can rotate freely. Close the Printer's Flipper Module Cover. d. Press the Resume button on the Printer‟s Front Cover to continue printing. e. To cancel the print, press the Cancel Print button from the Driver's display dialog. No Flipper The Printer does not have flipping capabilities. a.
© 2012 HID Global Corporation. All rights reserved. No Ribbon Installed No Print Ribbon is installed in the Printer. Install the correct Ribbon and press Resume on the LCD display. Ribbon Out The Print Ribbon installed in the printer is empty. Install a new Ribbon and press Resume on the LCD display. Ribbon Break/Jam A Ribbon break/jam has been detected inside the Printer. The printer has determined that the installed ribbon has either jammed or broken. a.
© 2012 HID Global Corporation. All rights reserved. Ribbon together and wind any excess onto the Take-up Spool. Re-install the Print Ribbon, close the Printer‟s Cover and press the Resume button on the Printer to continue printing. c. To cancel the print, press the Cancel Print button on the Driver‟s display dialog or the Cancel button on the printer. Ribbon Sensor Error The Printer cannot find the next panel on the Print Ribbon.
© 2012 HID Global Corporation. All rights reserved. No Prox Card Encoder No Proximity Card Encoder is installed in the printer. To cancel, click on Cancel Print. Headlift Error The Headlift Sensor is not detecting movement from the Headlift Cam. Reboot the Printer by cycling power. Invalid Password The Password entered is not a valid password. To cancel, press the Cancel Print button. Press OK to enter another password. To cancel, press the Cancel Print button.
© 2012 HID Global Corporation. All rights reserved. No Laminator Film Installed Wrong Laminator Film Installed No laminator Film is installed in the laminator unit. An incorrect laminator film has been installed, or a driver setting is incorrect. Ensure that the appropriate Laminator Film is installed. To cancel the print, press the Cancel Print button or the Cancel button located on the Printer.
© 2012 HID Global Corporation. All rights reserved. Sensor Error Film. properly and press Resume. To cancel, press the Cancel Print button or the Cancel button located on the Printer. Remove Laminator Film To continue, remove the laminator's film. Open the Laminator's Front Cover. Remove the film and close the Laminator's Front Cover. Print Film Out The Print Film installed in the printer is empty. Install new Film and press the Resume button to continue printing.
© 2012 HID Global Corporation. All rights reserved. Hopper Empty No cards in the Input Hopper. Add cards to the Input hopper 182 HDP8500 Industrial Card Printer/Encoder User Guide L001617 rev 1.
© 2012 HID Global Corporation. All rights reserved. Communications Errors Resolving the Communication Errors Symptom(s): Incorrect output, communications error on PC or Printer, stalling, no response from Printer, no job printed, “paper out” error. Step 1 Procedure Confirm that the system meets the minimum requirements, as shown here: IBM-PC or compatible.
© 2012 HID Global Corporation. All rights reserved. 1) Go to the File menu and select Page Setup. 2) Click on the Printer button and select the HDP8500 Card Printer. 3) Click OK and reset all four margins to zero. (Note: The WordPad will automatically replace the values with its minimum margins.) 4) Open the program and type: “This is a Test.” then, go to File on the menu bar and select Print. 5 Determine whether there is adequate hard Drive space.
© 2012 HID Global Corporation. All rights reserved. Printing a Test Image using the Workbench Diagnostic Step Procedure 1 Open the Diagnostic Tool from the Driver. Choose Run Tests to select a preset test image. Select Self Tests (Note: These images help to determine if the Printer is functioning properly.) 2 Scroll to the desired Self Test image from the Choose Test window options and press the Run Test button. 185 HDP8500 Industrial Card Printer/Encoder User Guide L001617 rev 1.
© 2012 HID Global Corporation. All rights reserved. Reviewing the Alignment Self Test Card Step 1 Procedure Use this card to determine Image Placement and confirm that the Printer is working properly. (Note: The image consists of sixteen (16) gray scale boxes and alignment arrows. The gray boxes are composed from a composite of YMC color panels.) Adjust the TOF and EOF settings to change image placement.
© 2012 HID Global Corporation. All rights reserved. Reviewing the YMCK Self Test Step 1 Procedure Use this card to confirm that image colors are properly reproduced. Image consists of sixteen graduated steps of RGB and YMCK. (Note: This print will provide maximum image size, giving complete card Coverage on a CR-80 sized card.) Reviewing the Color Bars Self Test Step 1 Procedure Use this card to confirm that image colors are properly reproduced. Image consists of sixteen graduated steps of RGB and YMCK.
© 2012 HID Global Corporation. All rights reserved. Reviewing the Device Settings Self Test Step 1 Procedure Use this card to view the Printer settings and counts for Card Count (CC), Card Cleaning Count (TC) and others. The Card Count is the total number of cards the Printer has produced. Reviewing the Resin Self Test Step 1 Procedure Use this card to determine that the Resin Panel is printing properly. 188 HDP8500 Industrial Card Printer/Encoder User Guide L001617 rev 1.
© 2012 HID Global Corporation. All rights reserved. Using the Test Print Each ribbon type has its own test print PRN associated with it. Therefore, with the test print there is no user configuration used to create the print job data. Example below: The ribbon is set to YMCKI and the printer has a specific test print file, which can be sent to the printer to verify the Inhibit Panel functionality. This test image uses a preformatted inhibit area and will not test a user-defined inhibit bitmap.
© 2012 HID Global Corporation. All rights reserved. Section 9: Packing the Card Printer The purpose of this section is to provide the User with a specific packing procedure for the HDP8500. (Note: Do not install the Lamination Module to the Printer before shipping. The Lamination Module must be packaged in its own box and shipped separately, then installed at the site. Attaching both modules together before shipping may cause damage.) Follow this instruction to pack the Card Printer for transport.
© 2012 HID Global Corporation. All rights reserved. Section 10: Firmware Updates The purpose of this section is to provide the User with information on the internal software or Firmware, which controls all aspects of the Printer's operation. New Firmware versions may be released containing enhancements, such as improved reliability, added features or better print quality. New Firmware updates can be downloaded from the Internet.
© 2012 HID Global Corporation. All rights reserved. 5 Select the New Firmware File by clicking Browse and selecting the Firmware file from the appropriate folder. 6 Begin the upgrade by clicking OK. 192 HDP8500 Industrial Card Printer/Encoder User Guide L001617 rev 1.
© 2012 HID Global Corporation. All rights reserved. Section 11: HID Global Technical Support The purpose of this section to provide the User with an efficient, step-by-step procedure to be used when contacting Fargo Technical Support as needed for the HDP8500. Contacting Technical Support Step 1 Procedure Read the suggested Sections of the Technical Service and Maintenance Manual in order to troubleshoot the Card Printer.