
User's Manual
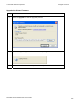
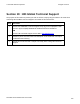

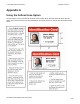
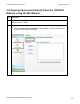
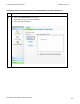

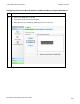
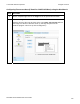
Table Of Contents
- DTC4500 User Guide
- Section 1: Specifications
- Section 2: Setup and Installation Procedures
- Section 3: Print Driver Installation
- Section 4: Printer Preferences Tab Functions
- |contextid=30 Using the Card tab
- Using the Toolbox Options
- |contextid=150 Using the Configuration Tab
- |contextid=151 Selecting the Calibrate Laminator tab
- Using the Event Monitoring Group Box
- |contextid=152 Selecting the Calibrate Ribbon tab
- |contextid=154 Selecting the Clean Printer tab
- |contextid=155 Selecting the Advanced Settings tab
- |contextid=40Using the Device Options tab
- |contextid=50Using the Image Color tab
- |contextid=51Using the Image Calibrate tab
- |contextid=70Using the Magnetic Encoding Tab
- |contextid=80Using the Lamination tab
- |contextid=90 Using the Overlay / Print Area tab
- |contextid=100Using the K Panel Resin tab
- |contextid=120Using the Printer Info tab
- Section 5: Selecting the Fluorescent Panel Ribbon Type
- Section 6: System Overview- Troubleshooting
- Section 7: Troubleshooting
- Section 8: Cleaning
- Section 9: Firmware Upgrades
- Section 10: HID Global Technical Support
- Appendix A

© 2010 HID Global Corporation All rights reserved
Configuring Fluorescent Data (F-Panel for YMCFKO Ribbon) using the Workbench
Step Procedure
6 On the Template right click on the Logo box for the options shown below.
7 Select the Logo File.
Find the source of the Logo to place on the card. (Note: Fit to Frame will size
the image to fit the box. Once this is set up, this logo will print from the
software program. This is set up in the background.)
DTC4500 Card Printer/Encoder User Guide
110